Set up Registration Type
Who does this: hospital administrator Where: Patients › Masters › Registration Type Set up before: Patient Type
A registration type is the kind of registration a patient is created under, such as General, Staff, Telephone or New Born. Front-desk staff pick it when they register a patient. Each type controls which sections the registration form shows, and whether a registration, renewal or card re-print fee is charged.
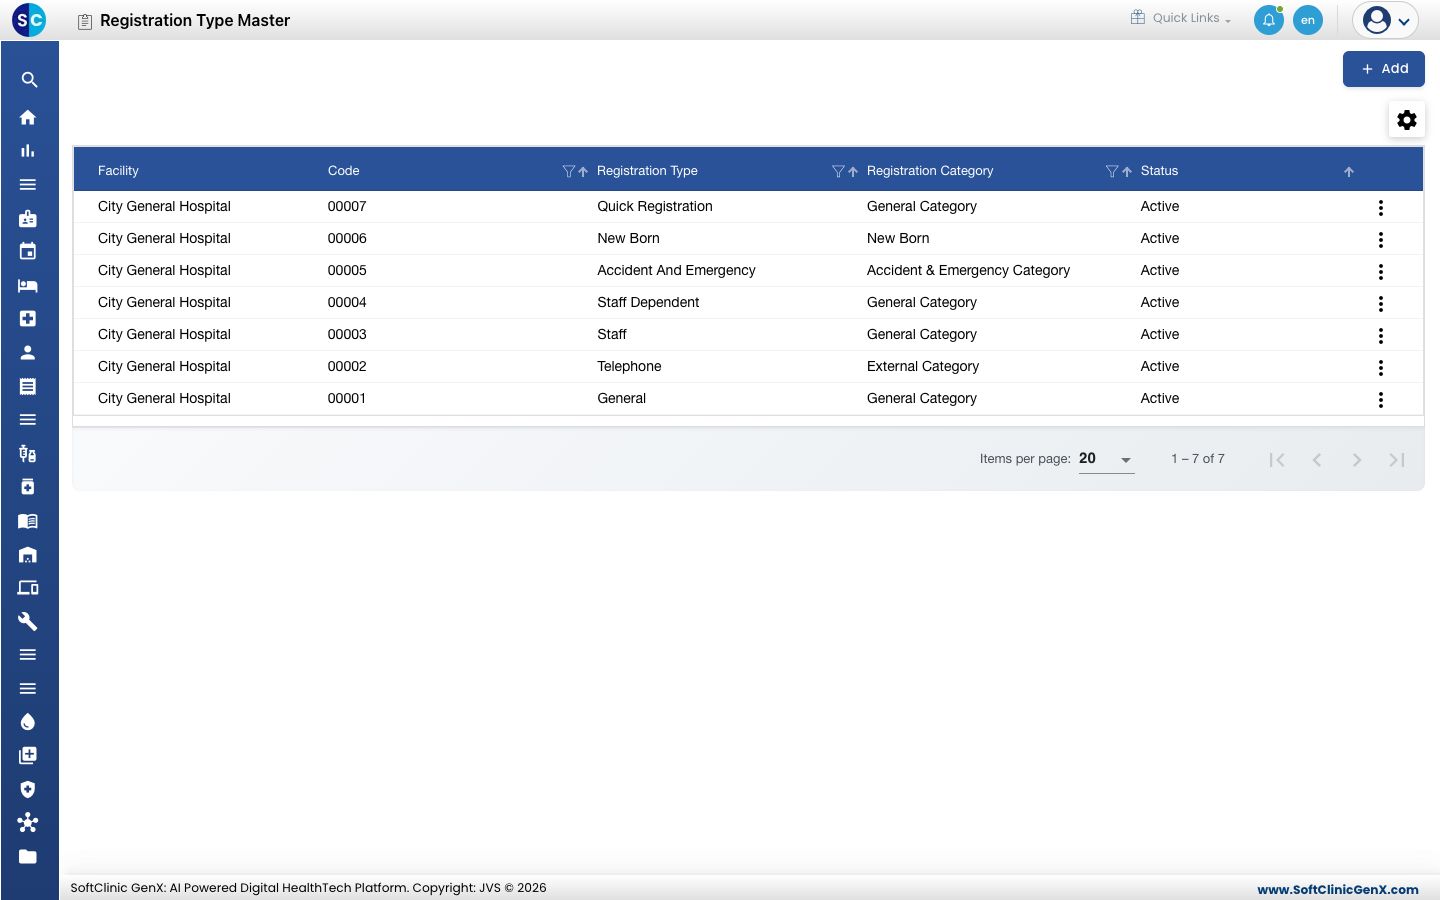
Add a registration type
-
Go to Patients › Masters › Registration Type.
-
Click Add. The Registration Type Master panel opens on the Registration Type tab.
-
Fill in the fields:
Field What to enter Required Registration Type Code Filled in automatically when you save. — Status Leave on Active so staff can pick it. — Facility The facility this registration type belongs to. Yes Registration Type The name staff will see, for example Corporate. Letters, numbers and spaces only.Yes Registration Category General Category, External Category, Accident & Emergency Category or New Born. Yes Charge Registration Fee Tick to charge a registration fee when a patient is registered under this type. No Charge Registration Renewal Fee Tick to charge a fee when the registration is renewed. No Charge Card Re-print Fee Tick to charge a fee when the patient card is printed again. No Is Queue Management Applicable Tick if patients of this type go through queue management. No 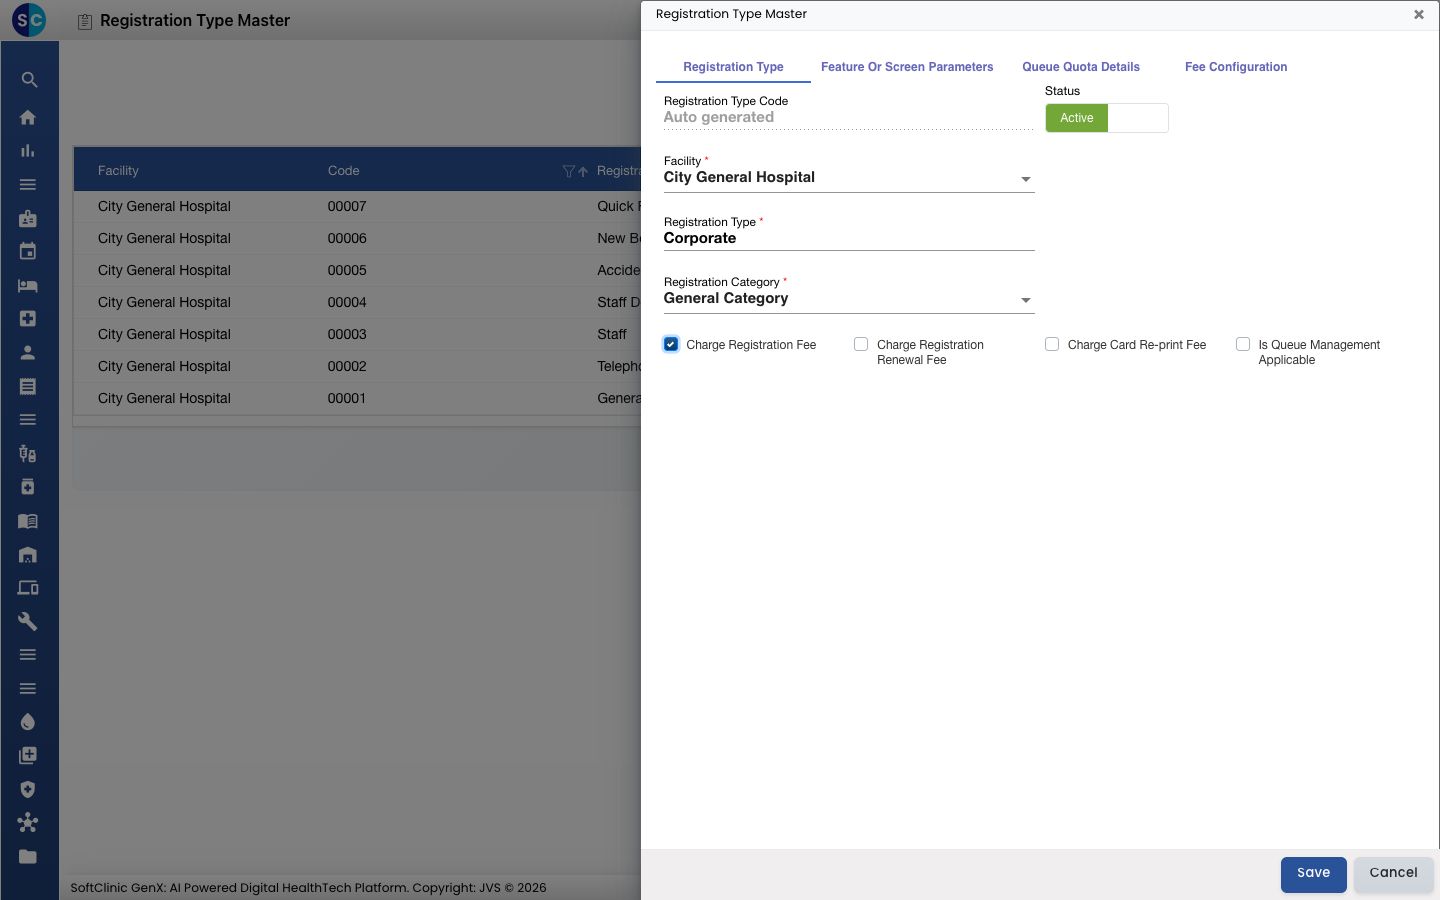
-
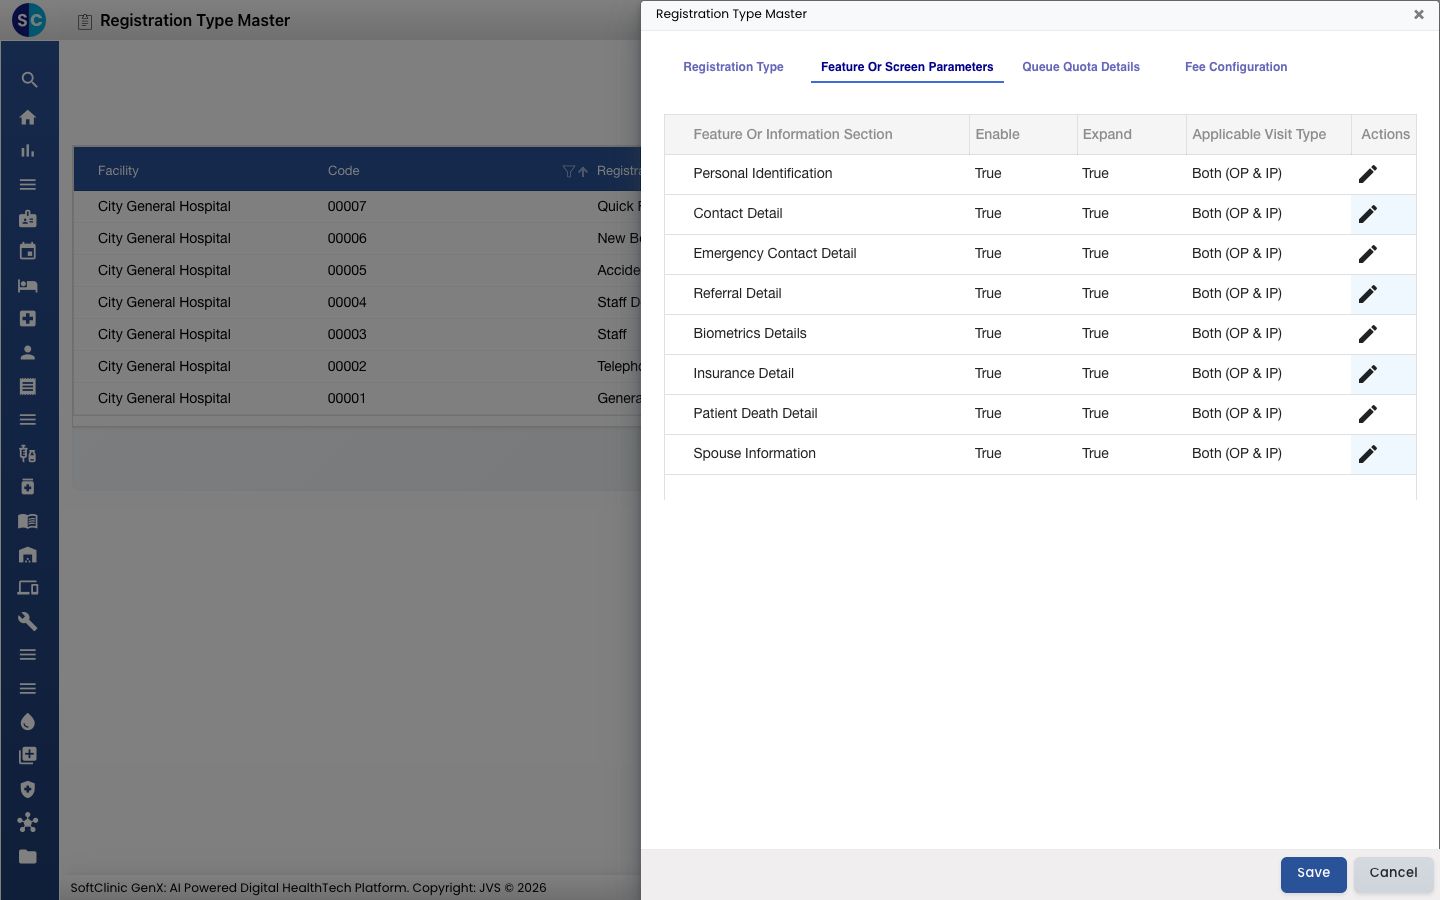
Open Feature Or Screen Parameters to choose which sections of the registration form appear for this type. Each section shows whether it is enabled, whether it opens expanded, and whether it applies to OP, IP or both. Click the pencil icon on a row to change it.
-
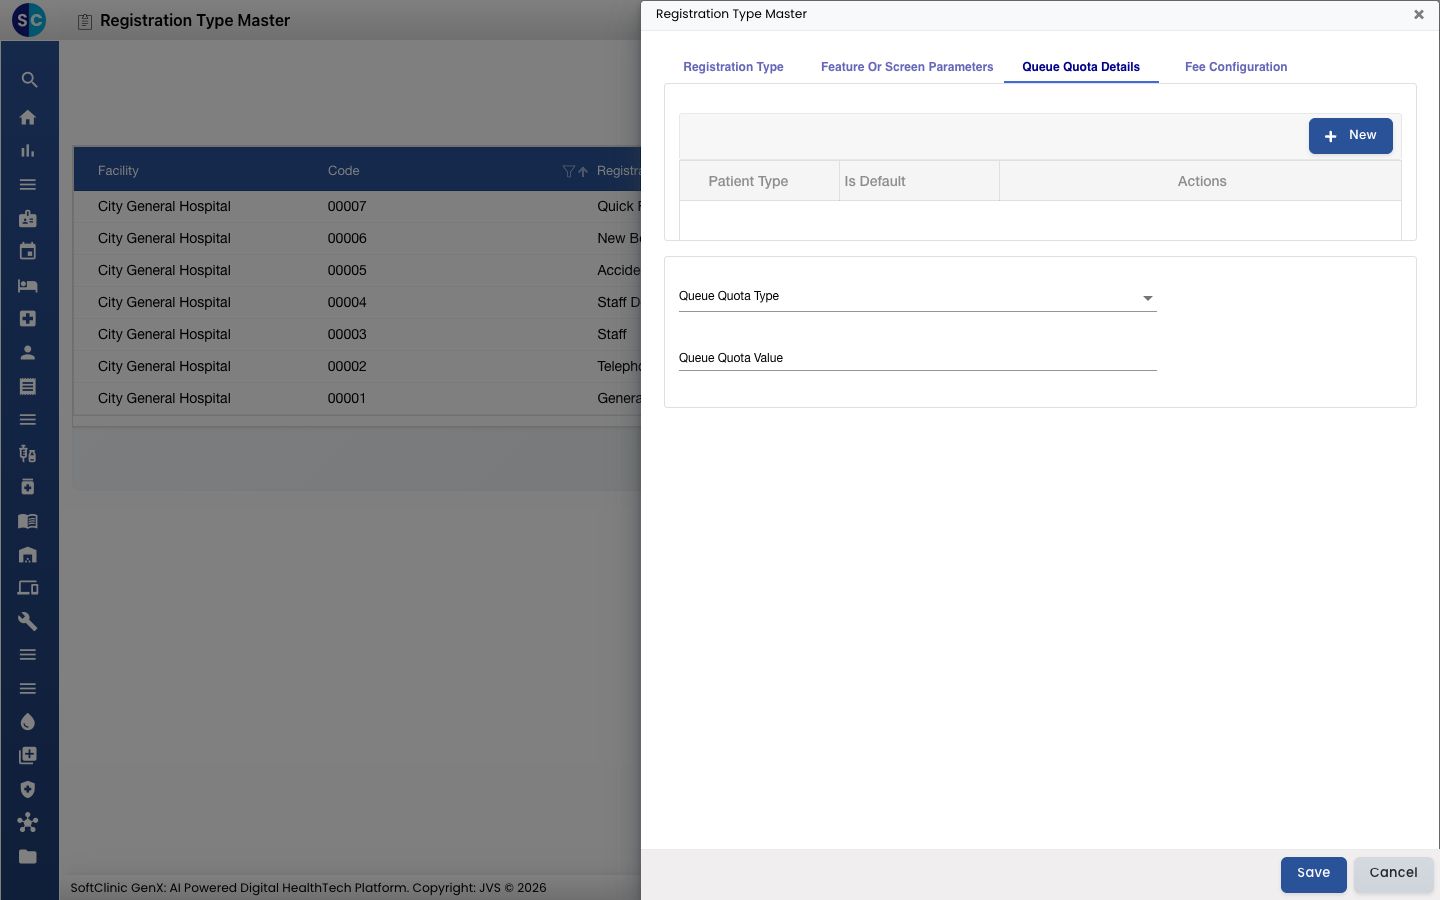
Optional: open Queue Quota Details to limit how many queue slots this type can use. Click New to add a Patient Type (tick Is Default for the one to pre-select), then choose the Queue Quota Type and enter the Queue Quota Value.
-
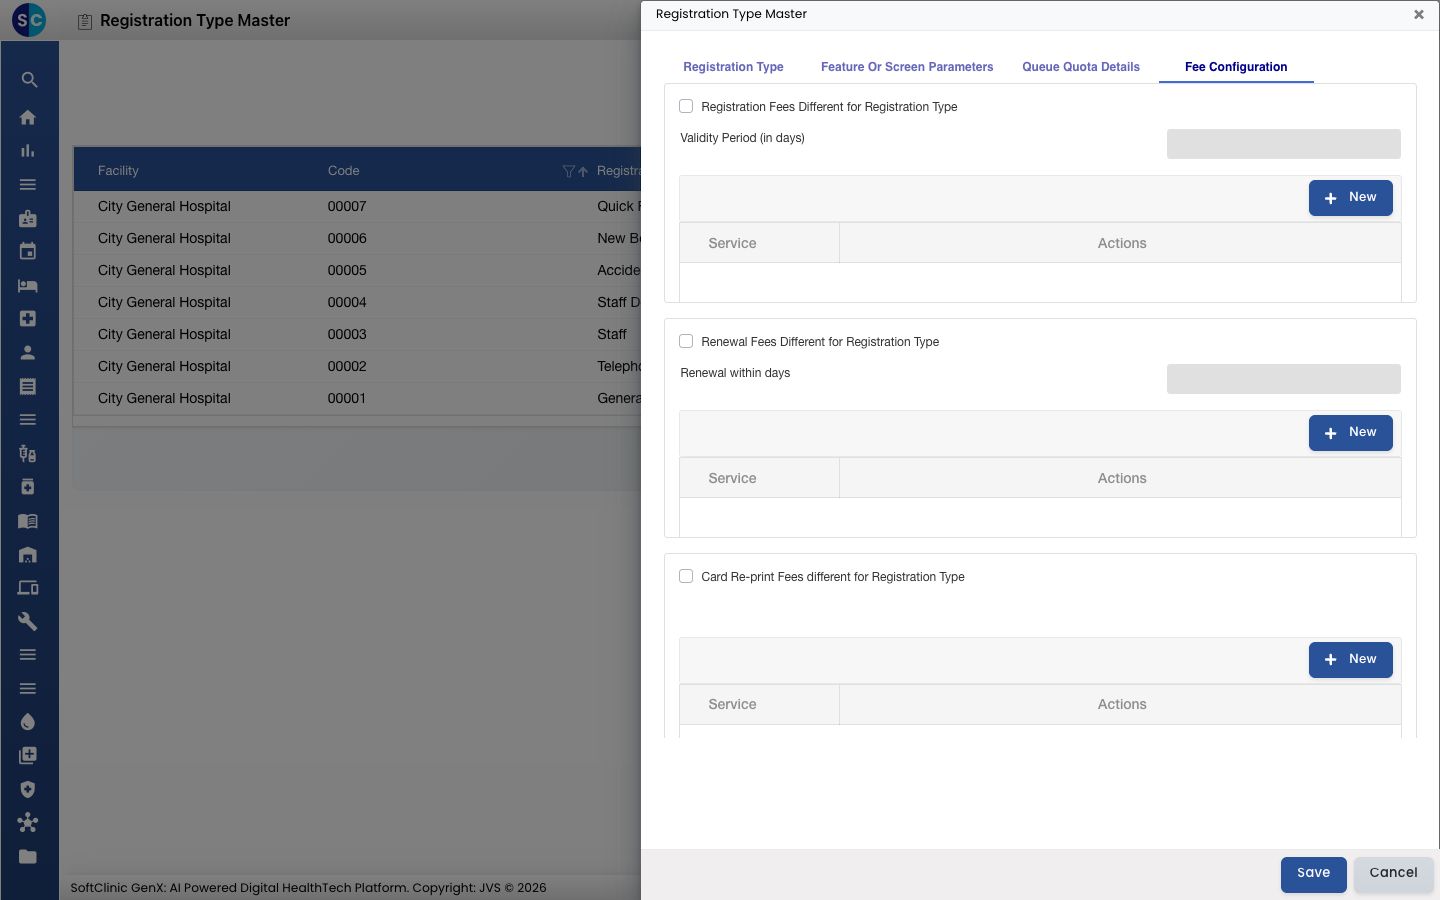
Optional: open Fee Configuration when this type's fees differ from the standard ones.
- Tick Registration Fees Different for Registration Type, enter the Validity Period (in days), and click New to pick the fee service.
- Tick Renewal Fees Different for Registration Type, enter Renewal within days, and click New to pick the service.
- Tick Card Re-print Fees different for Registration Type and click New to pick the service.
-
Click Save. The panel closes and the new type appears in the list with its code.
Change or deactivate a registration type
- In the list, click the ⋮ button at the end of the row and choose Edit.
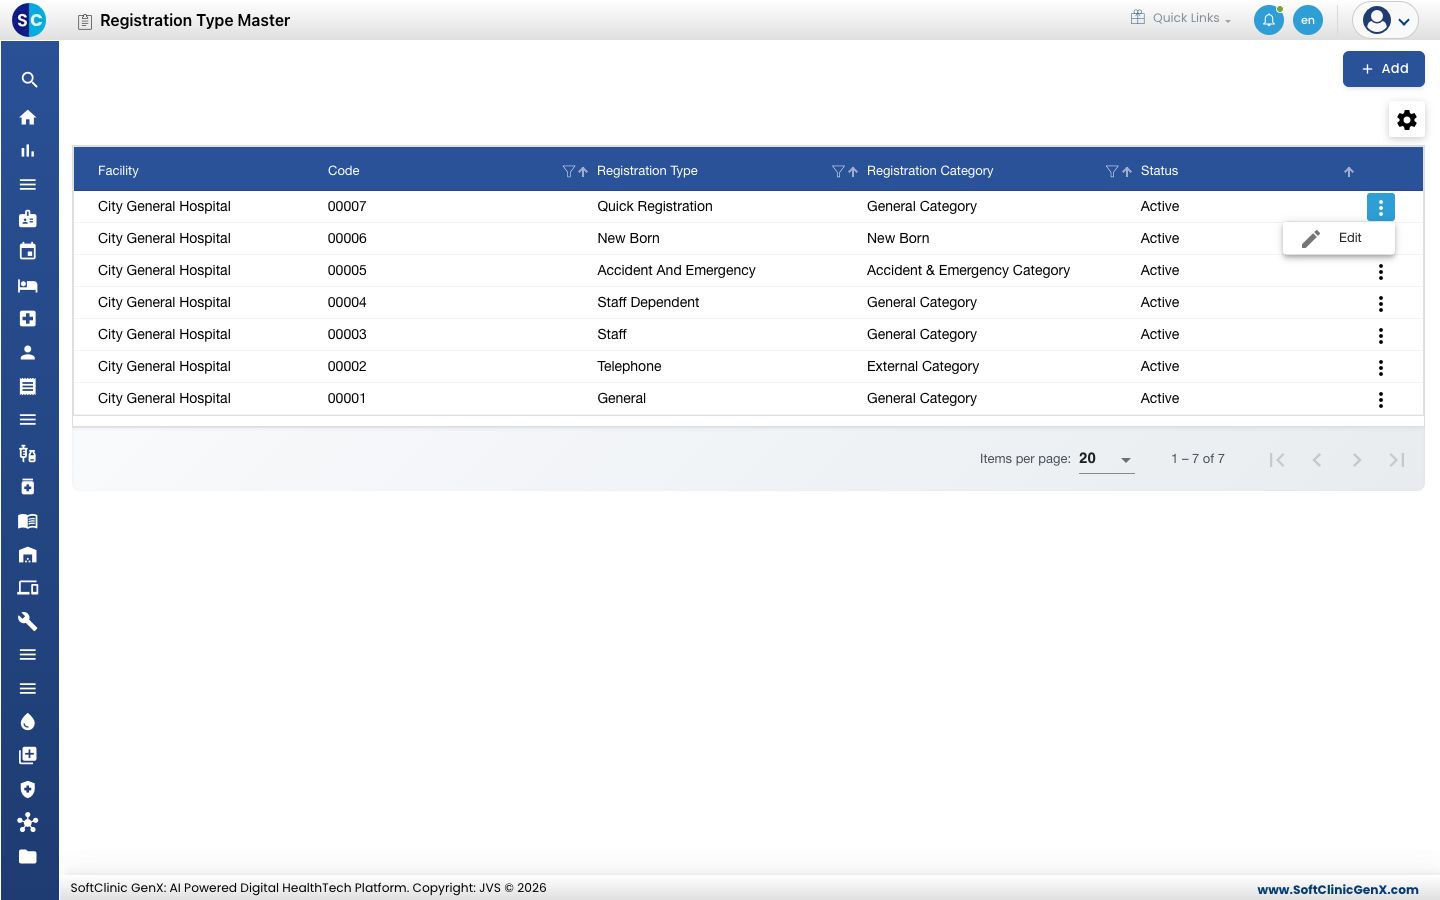
- Change the fields you need on any tab. To stop staff from picking the type, switch Status to Inactive.
- Click Save.
Registration types cannot be deleted. Make a type Inactive instead — patients already registered under it keep it.
Good to know
- Each registration type name must be unique within your hospital.
- The fee services you pick on Fee Configuration must already exist as services in billing.
- The validity and renewal day fields stay greyed out until their checkbox is ticked.
Related
- Previous: Set up Patient Type
- Set up Prefix
- Patients FAQs