Set up Appointment Category
Who does this: hospital administrator Where: Appointments › Masters › Appointment Category
An appointment category is the kind of appointment being booked, such as Normal, Walk-in, Emergency or Antinatal Consultation. You pick a category every time you book an appointment. A category can be limited to one gender or an age range, and it can add an extra charge to the patient's bill.
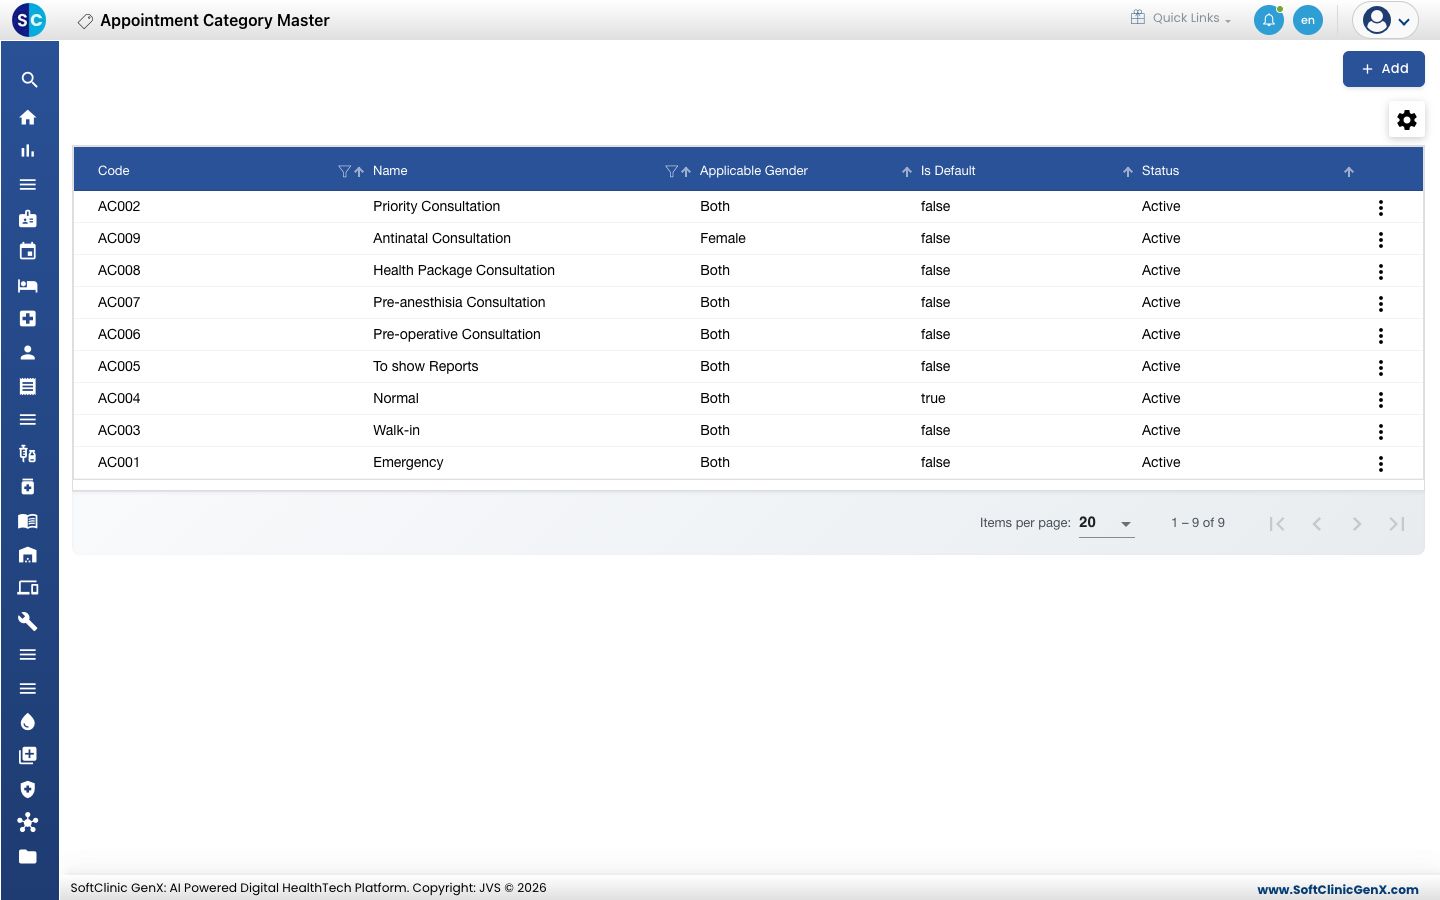
Add an appointment category
-
Go to Appointments › Masters › Appointment Category.
-
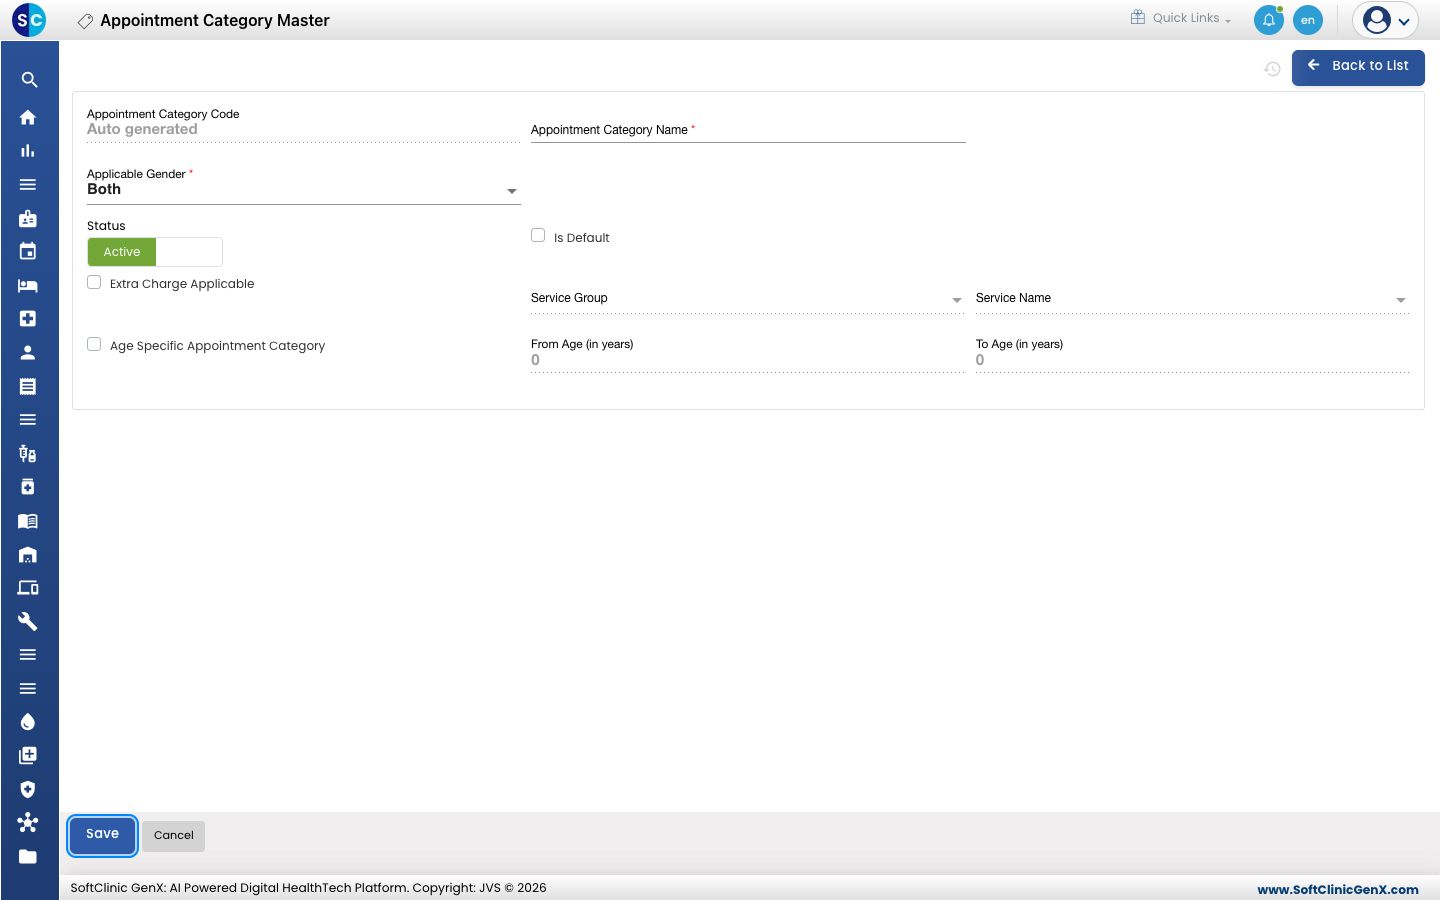
Click Add. The appointment category form opens.
-
Fill in the fields:
Field What to enter Required Appointment Category Code Filled in automatically when you save. — Appointment Category Name The name staff will pick when booking, for example Priority Consultation. Up to 50 characters. Yes Applicable Gender Both, or the one gender the category is for, such as Female for an antenatal visit. Yes Status Leave on Active. — Is Default Tick for the category that should be filled in automatically on every new booking, usually Normal. No Extra Charge Applicable Tick if this kind of appointment carries a charge. No Age Specific Appointment Category Tick if the category is only for an age range. No -
If you ticked Extra Charge Applicable or Age Specific Appointment Category, fill in the extra fields that become active:
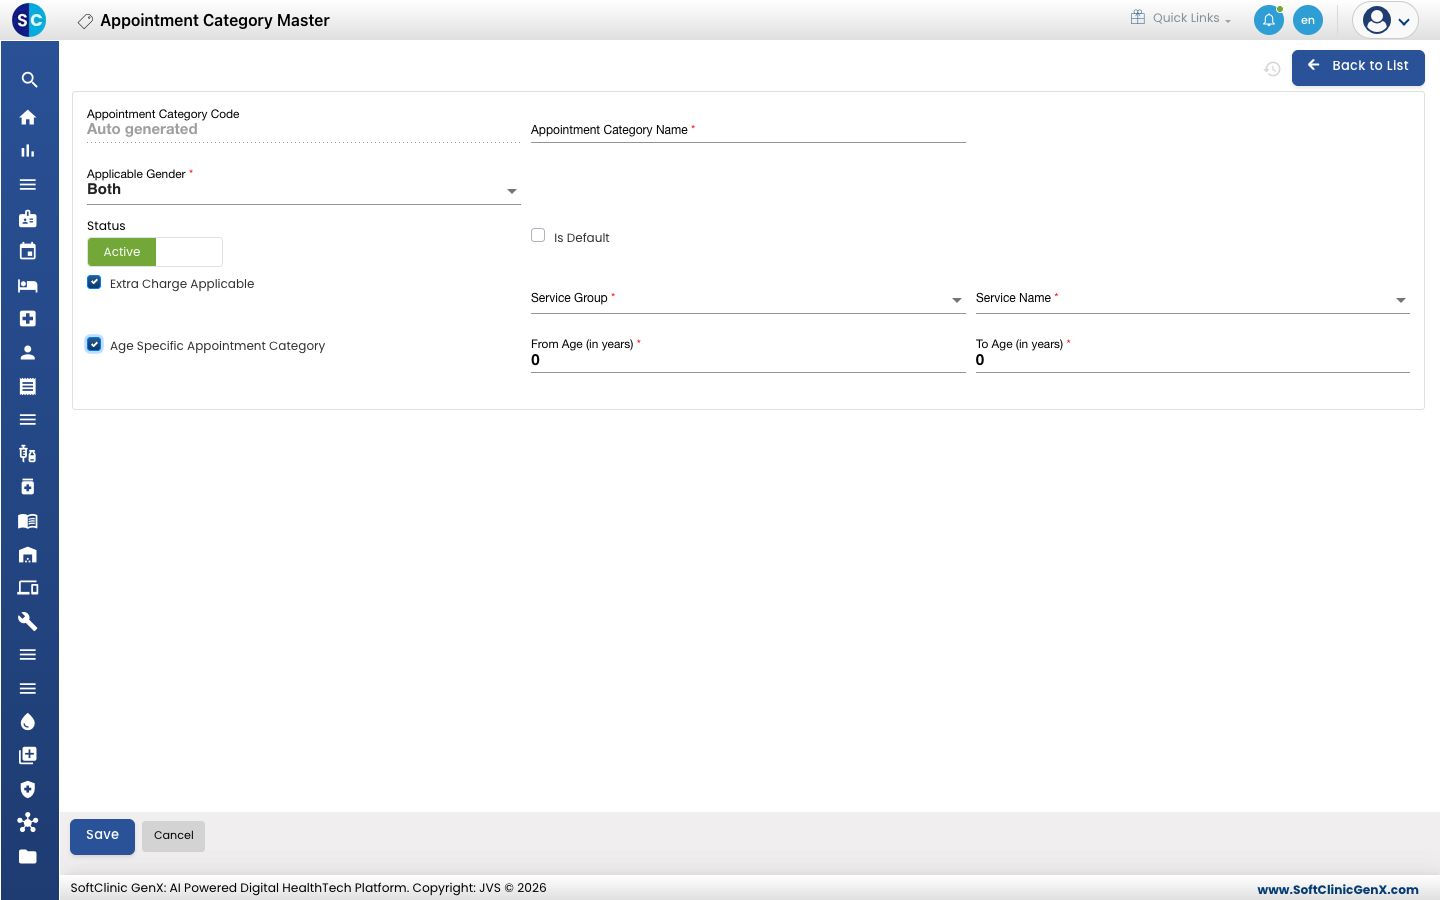
Field What to enter Required Service Group The service group of the charge. Yes, when Extra Charge Applicable is ticked Service Name The service that is charged. Yes, when Extra Charge Applicable is ticked From Age (in years) The youngest age the category is for. Yes, when Age Specific is ticked To Age (in years) The oldest age the category is for. Must not be less than From Age. Yes, when Age Specific is ticked -
Click Save. You return to the list and the new category appears in it.
Change or deactivate an appointment category
- In the list, click the ⋮ button at the end of the row and choose Edit.
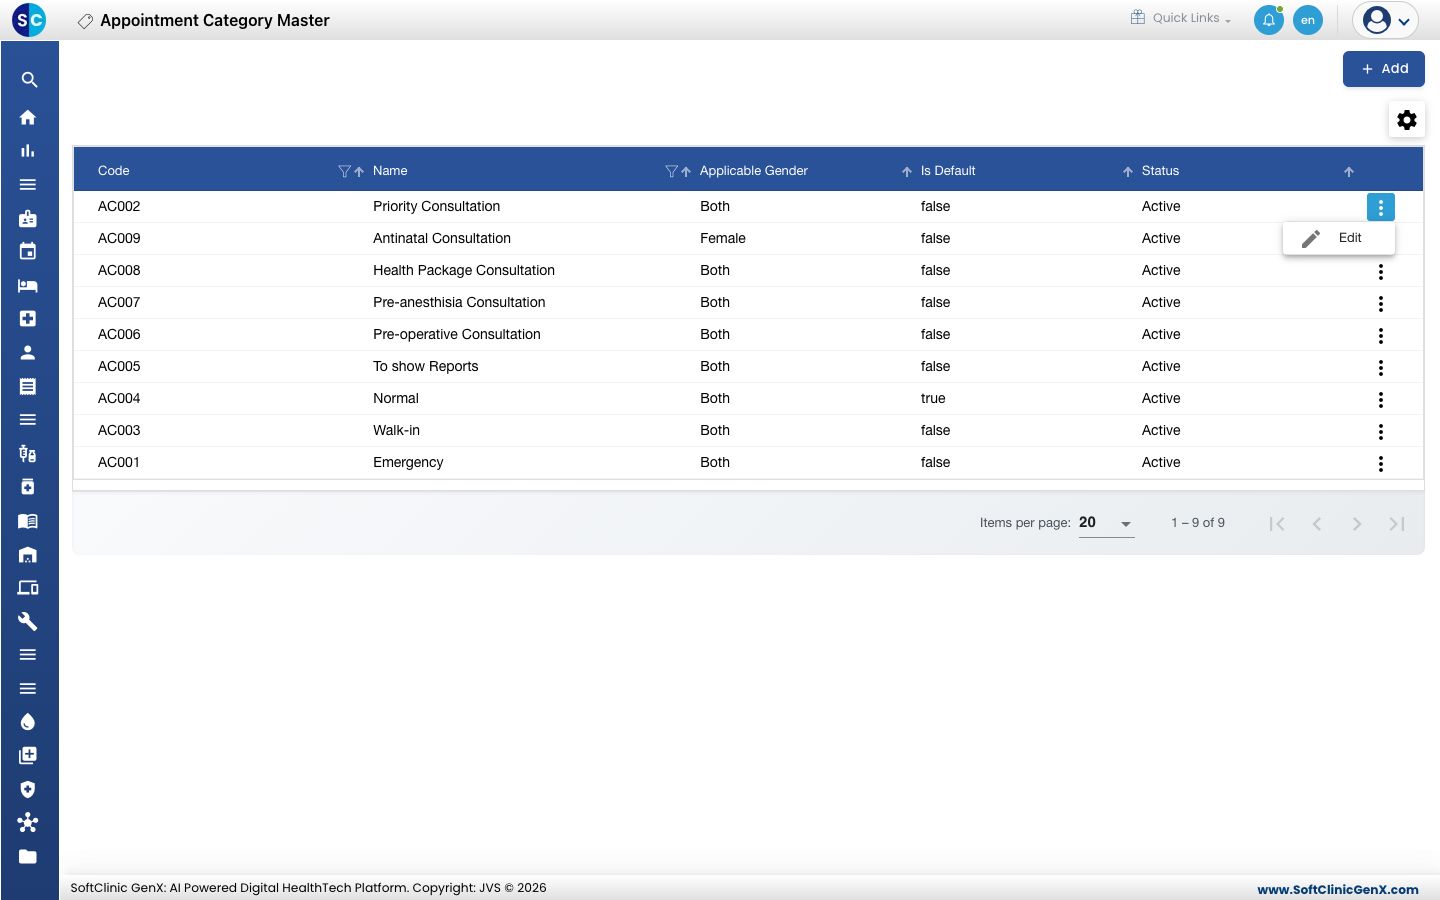
- Change the fields you need. To stop using the category, switch Status to Inactive.
- Click Save.
Appointment categories cannot be deleted from this screen. Make a category Inactive instead.
Good to know
- Keep only one category ticked Is Default. When exactly one is ticked, it is filled in automatically on new bookings.
- The service in Service Name must already exist in your service list before you can pick it.
- Use the filter and sort icons in the column headers to find a category quickly.
- Click Back to List or Cancel to leave the form without saving.
Related
- Previous: Set up Clinic
- Next: Set up Appointment Slot Types
- Appointments FAQs