Upload a patient document
Attach scanned reports, ID copies, consent forms and other files to a patient's record.
Keep a patient's paper documents with their record: scan or photograph them and upload them in Document Entry. Anyone with access can open them later from the same screen.
note
Who can do this: front desk, medical records and clinical staff
Where: File Manager › Document Entry
Steps
- Go to File Manager › Document Entry.
- In the search box at the top, type the patient's name, mobile number or CR number, and click the patient in the list that appears.
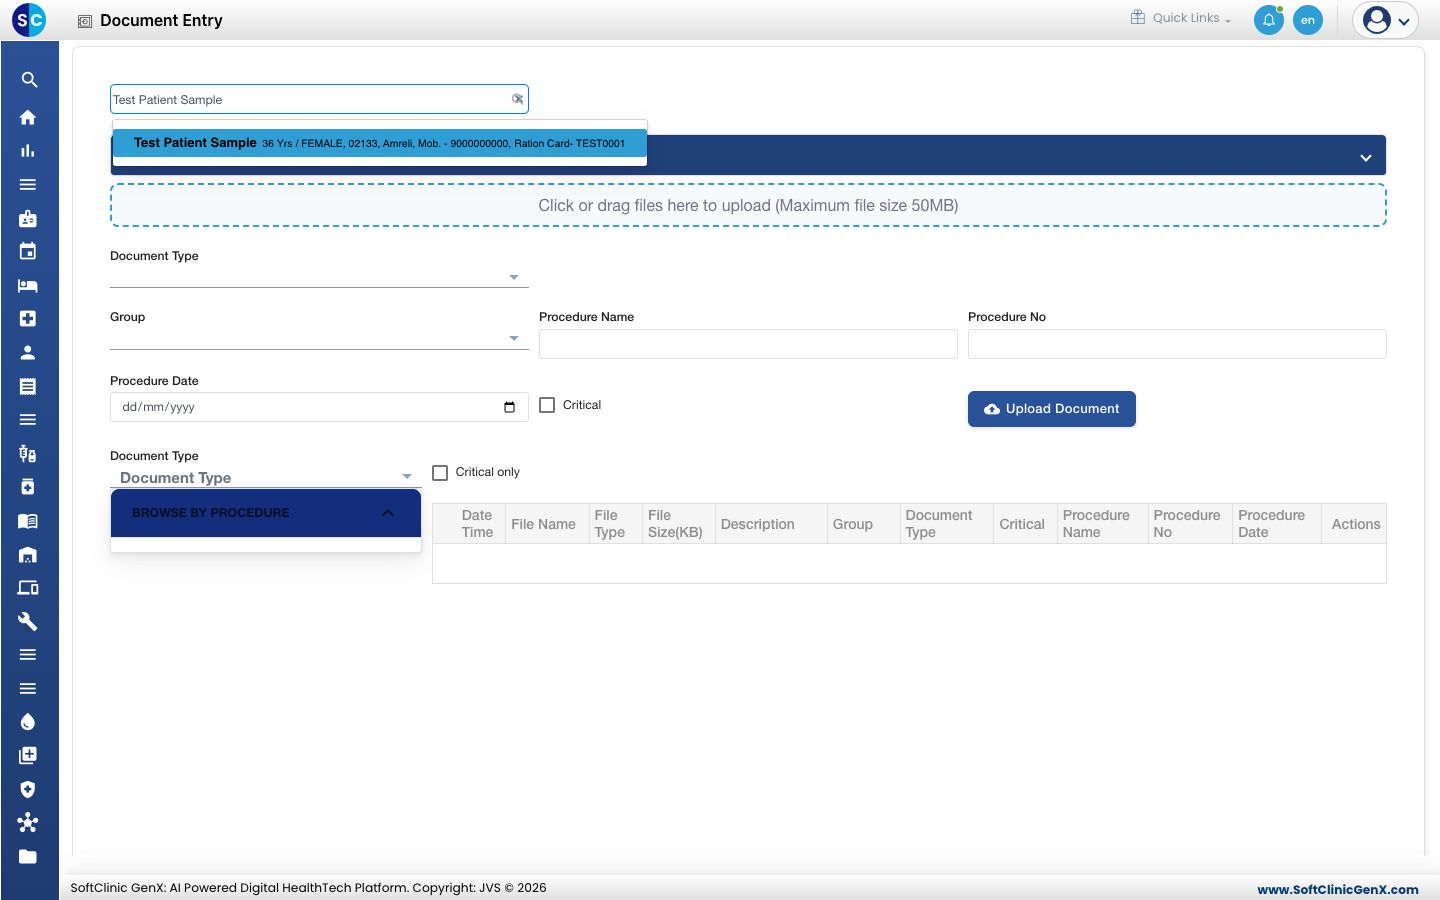
- The patient's name, age and gender show in the blue bar. Click the dashed box, or drag files onto it, to add the documents. Each file can be up to 50 MB.
- Pick the Document Type, for example ID Proof, Lab Report, Consent or Discharge Summary. Fill in Group, Procedure Name, Procedure No and Procedure Date if the document belongs to a procedure, and tick Critical for documents staff must not miss.
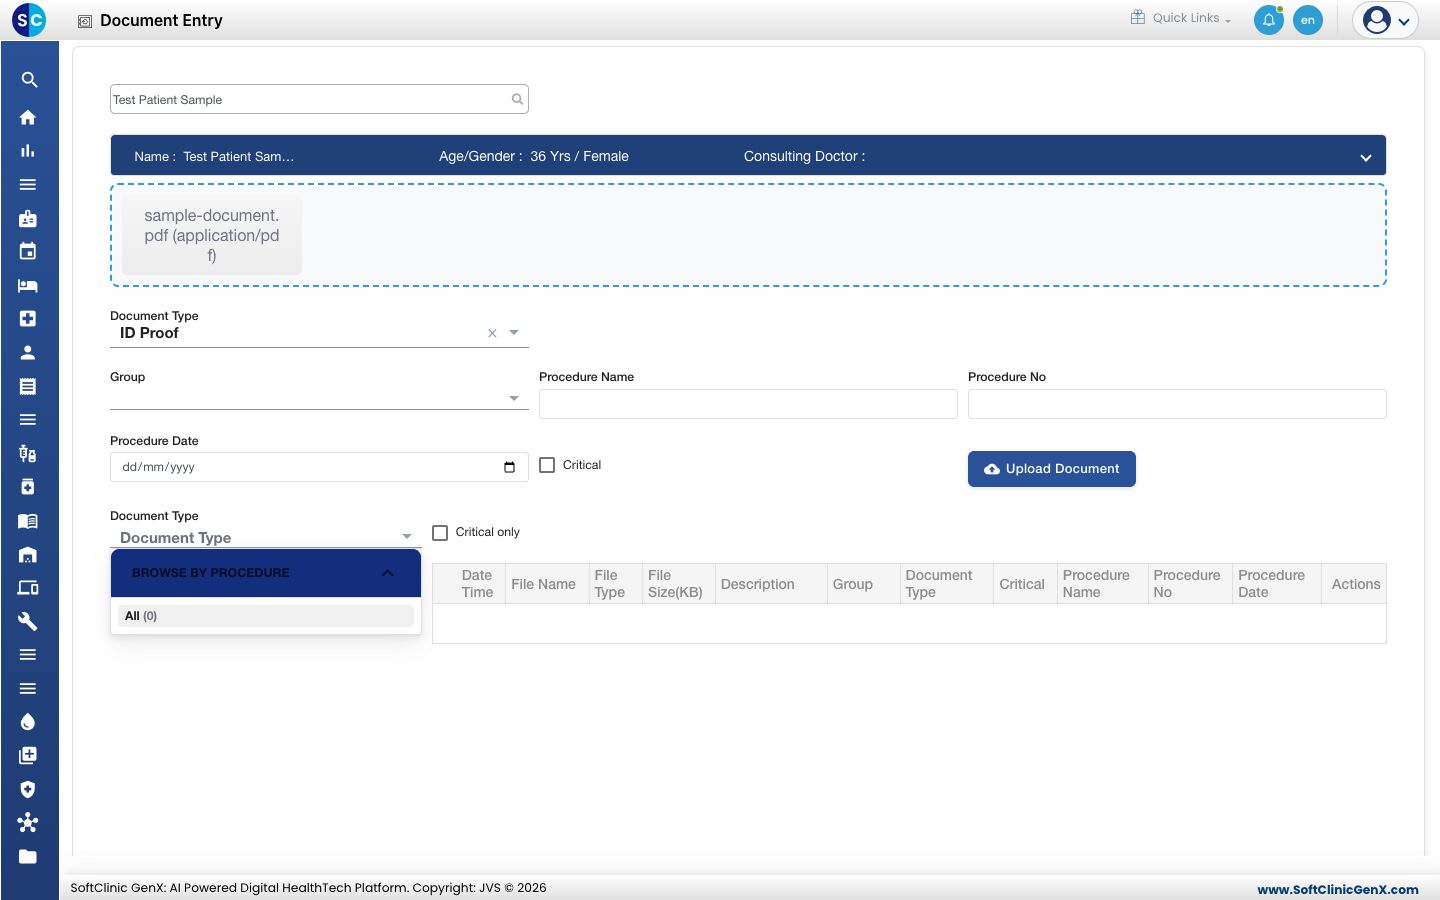
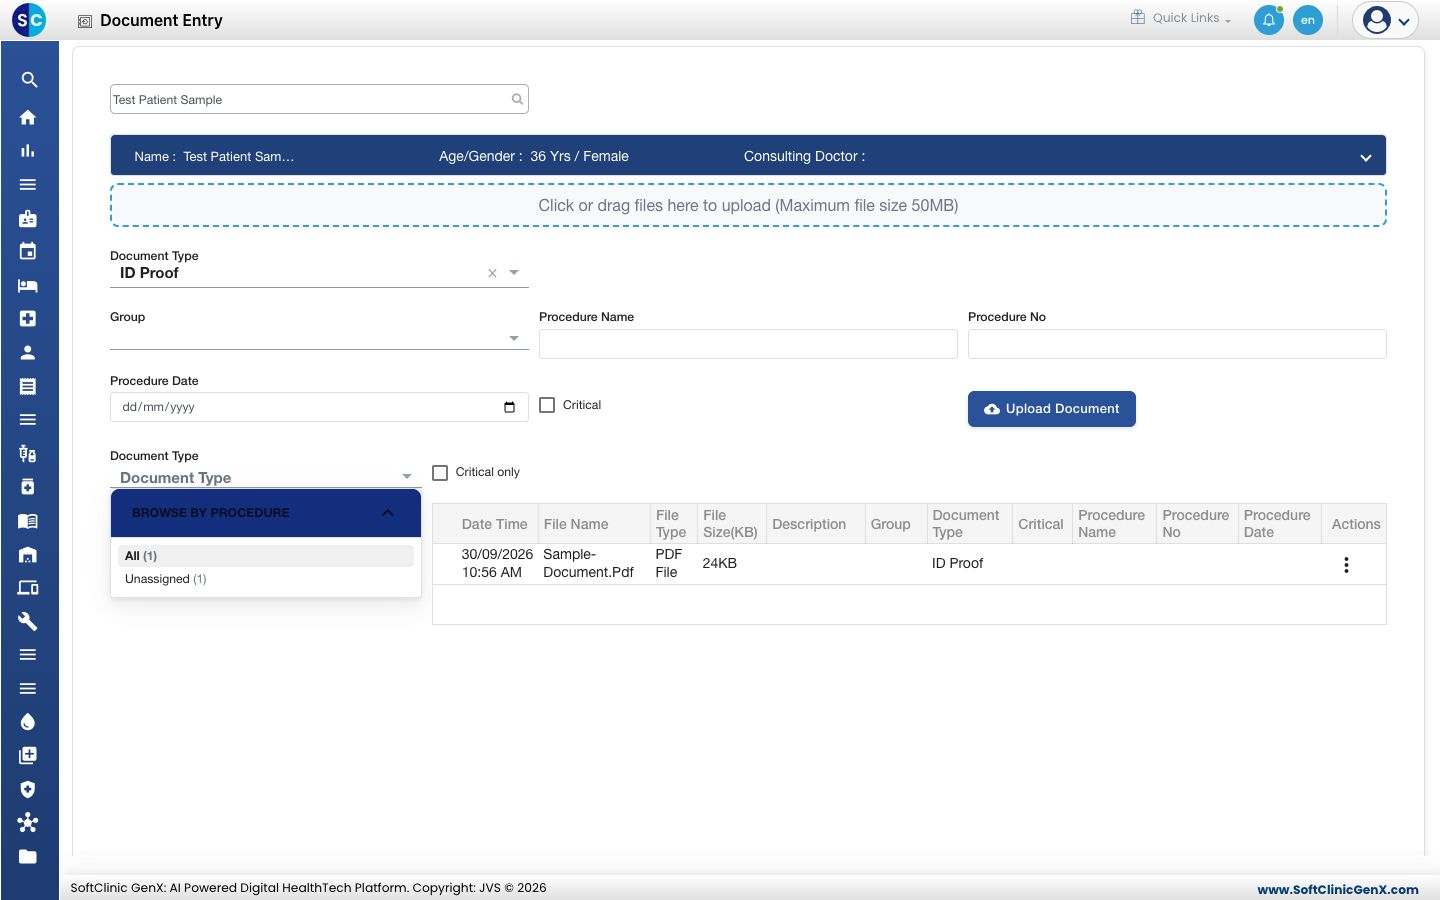
- Click Upload Document. The file appears in the list below with its date, name, type and size.
Good to know
- Use Browse by Procedure on the left and the Document Type and Critical only filters to narrow the list.
- Use the ⋮ button on a document's row to work with it.
- To see documents across patients, use File Manager › Views › Document List.
If something goes wrong
| What you see | What it means | What to do |
|---|---|---|
| The file is not accepted | It is larger than 50 MB. | Scan at a lower resolution or split it into smaller files. |
| The patient does not appear in the search | The name is spelled differently. | Search by mobile number or CR number instead. |