Register a patient with full details
Register a patient with ID proof, full address, referral, photograph and insurance details in one go.
Use a full registration when the patient needs a complete record from the first visit — for example an admission, an insurance patient or a referred case. Picking any registration type other than Quick Registration opens the extra tabs.
note
Who can do this: front desk and registration staff
Where: Patients › Quick Registration, then change Registration Type
Before you start
- Search for the patient first so you do not create a duplicate.
- The Registration Type list comes from Registration Type, Patient Type from Patient Type and the titles from Prefix.
Steps
- Go to Patients › Quick Registration.
- In Registration Type, pick the type you need, for example General. Six tabs appear: Registration, Personal & Identity Information, Contact, Referral, Biometrics and Insurance and Eligibility Details.
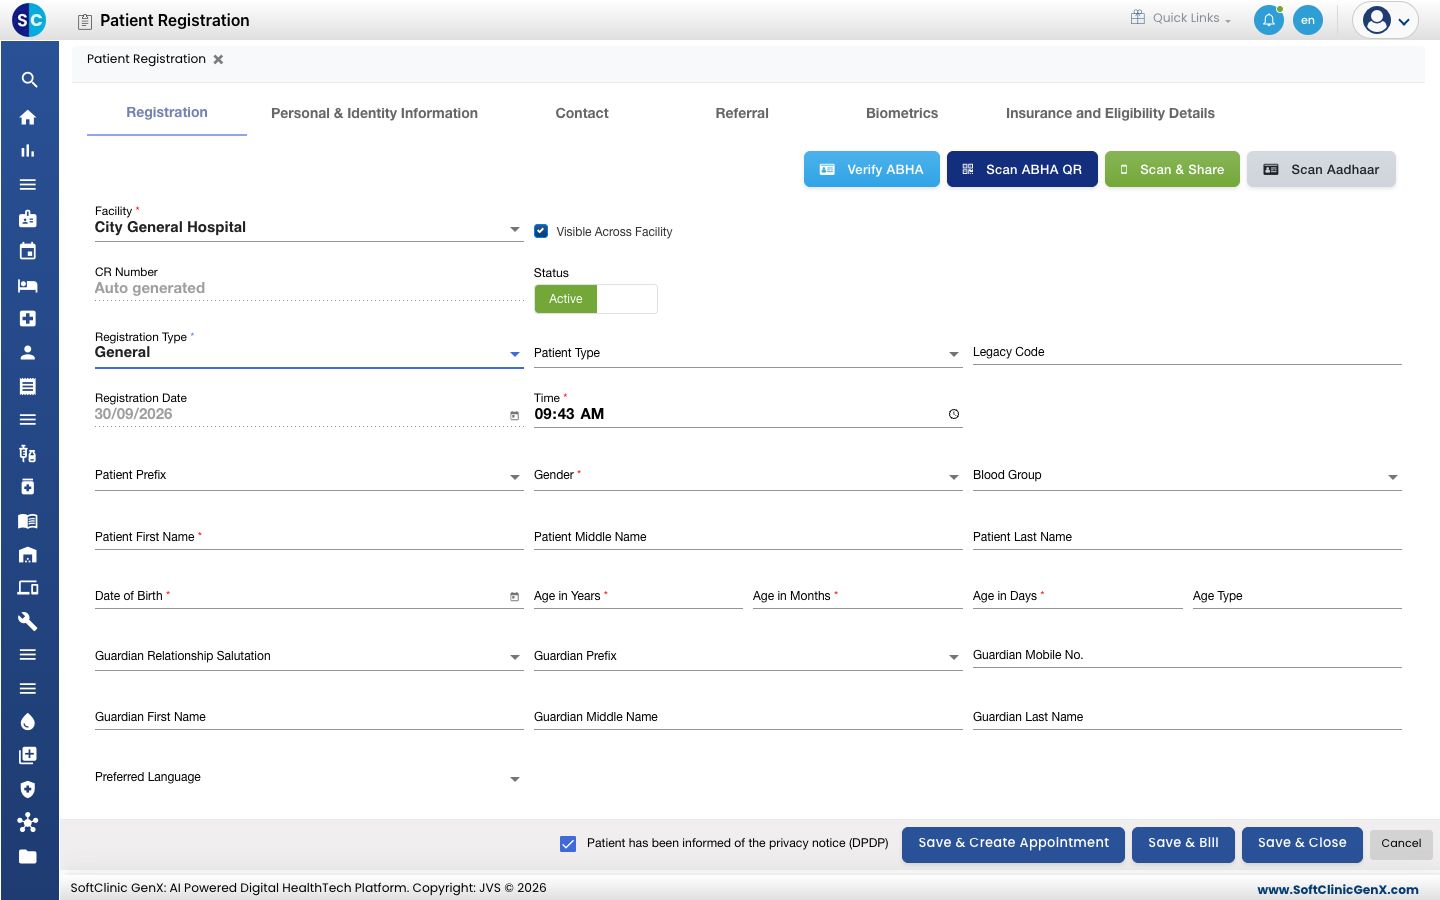
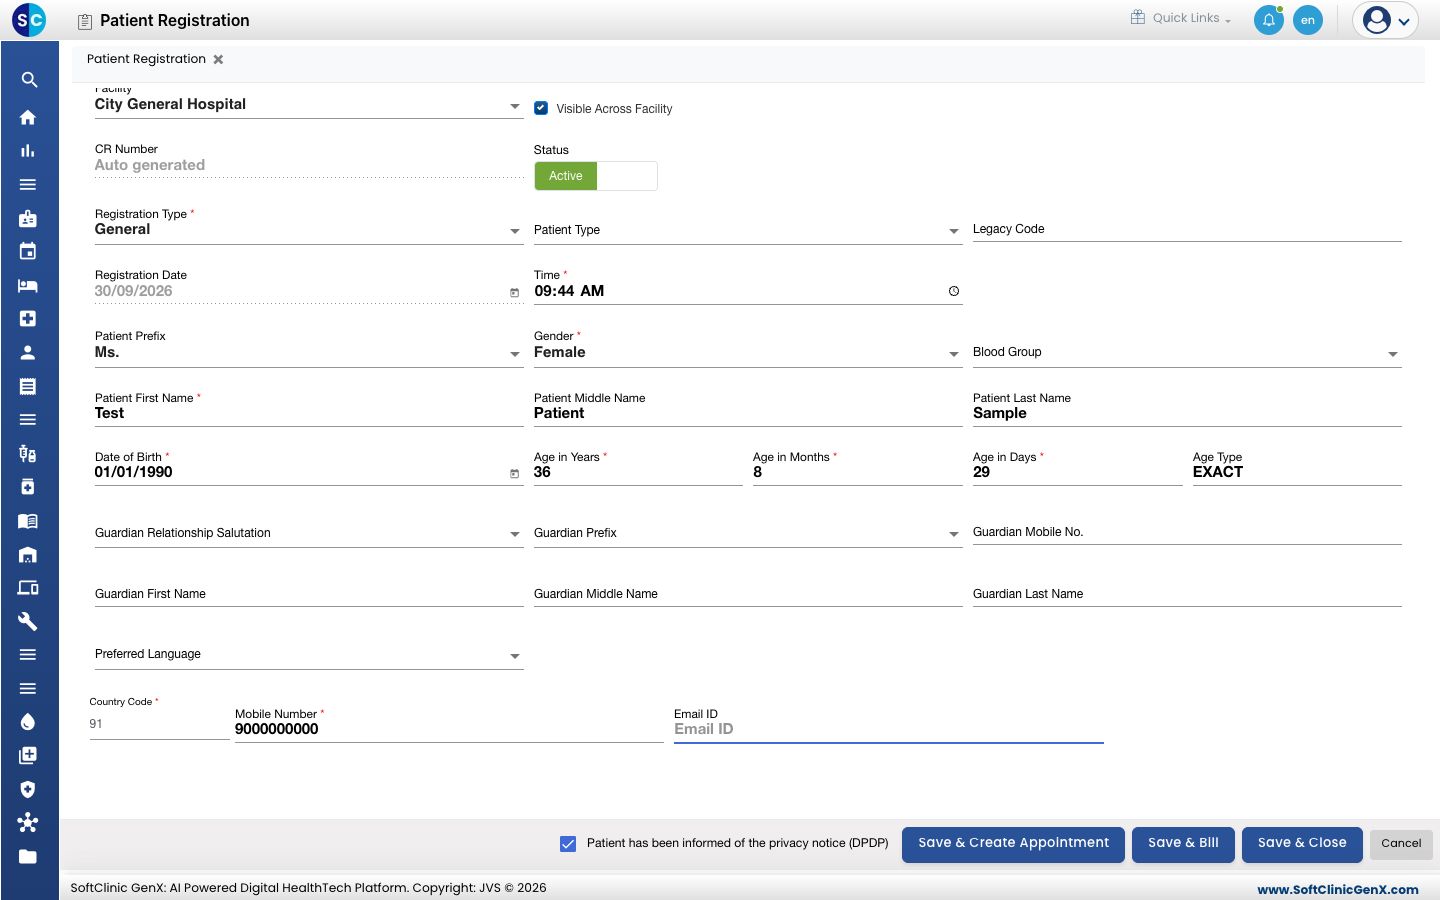
- On the Registration tab, fill in the patient's name, Date of Birth (or Age in Years), Gender and Mobile Number. Add a guardian's name and mobile number if the patient is a child or needs one. Registration Date and Time are filled in for you.
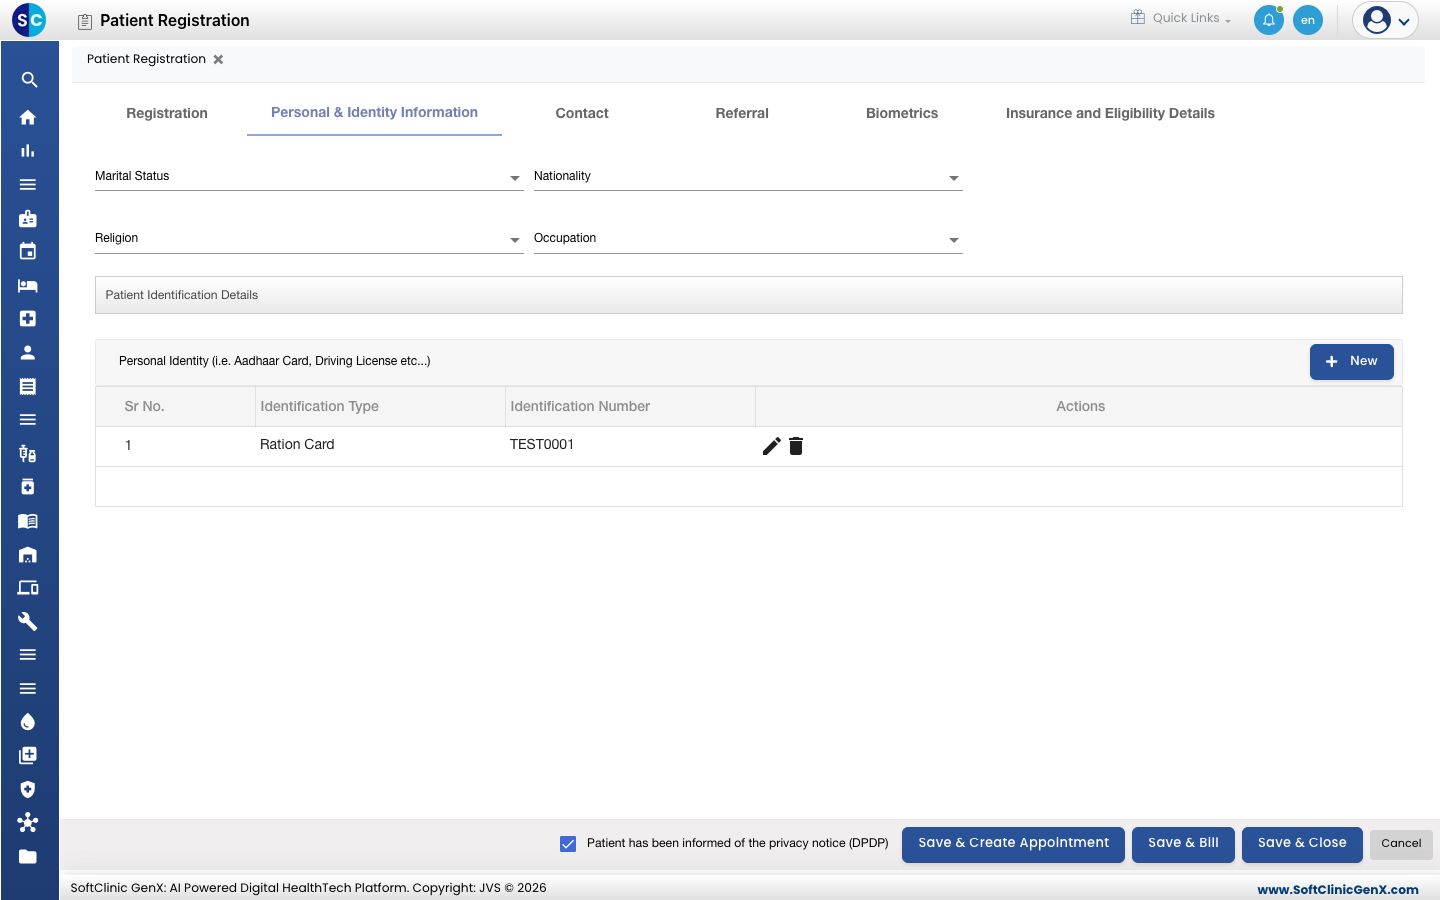
- Open Personal & Identity Information. Pick Marital Status, Nationality, Religion and Occupation if you record them. To add an ID proof, click New, pick the Identification Type, type the Identification Number and click the save icon on the row.
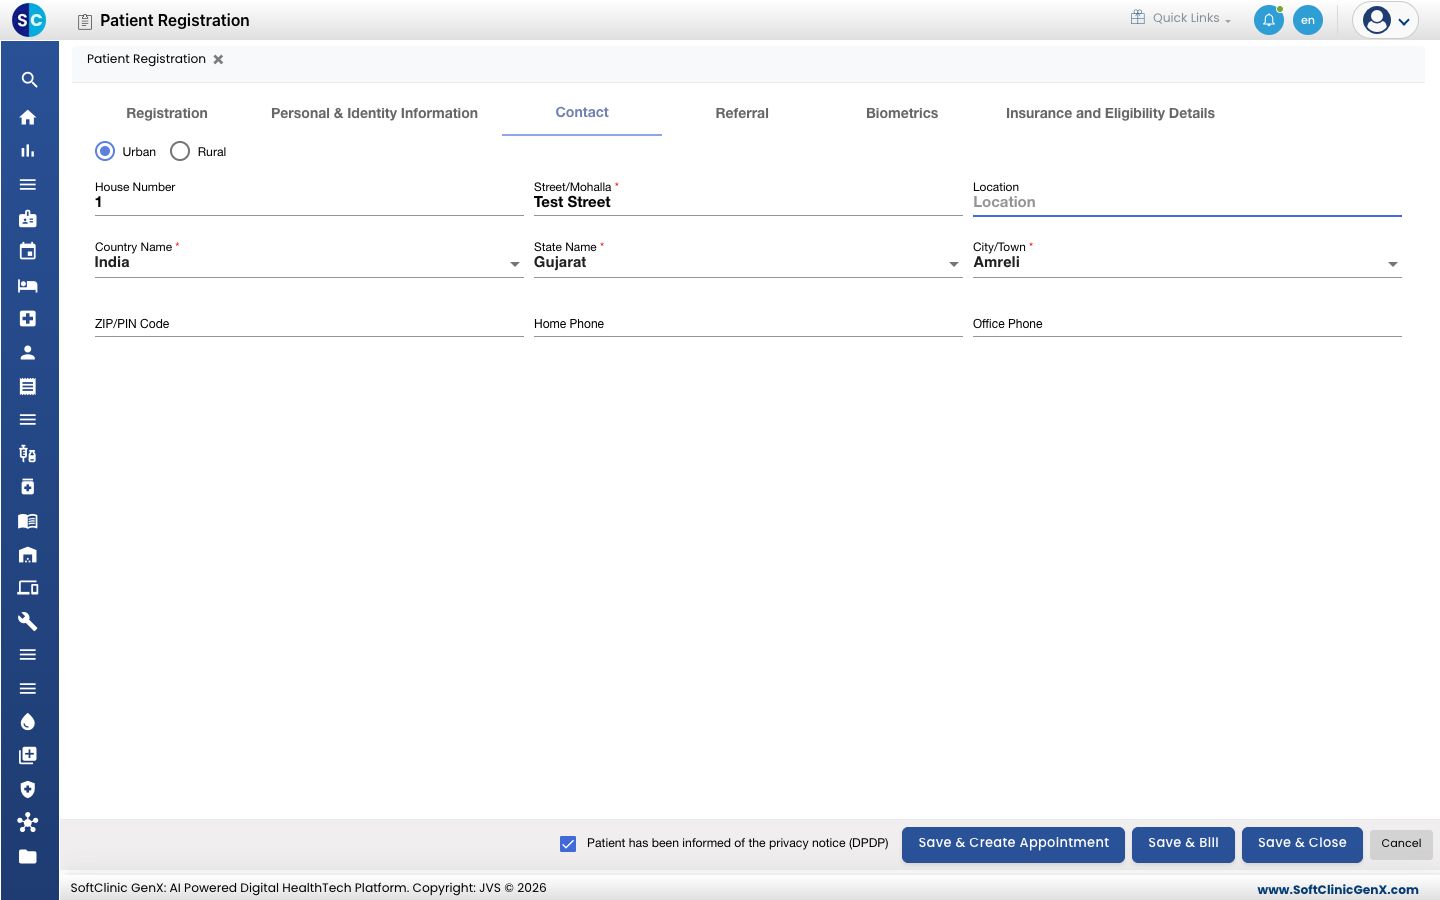
- Open Contact. Choose Urban or Rural and fill in the address. Country, state and city start with your hospital's defaults.
- Open Referral if someone referred the patient. Pick Referred By, choose whether the referral is from a Hospital, Doctor or Other, and add the reason.
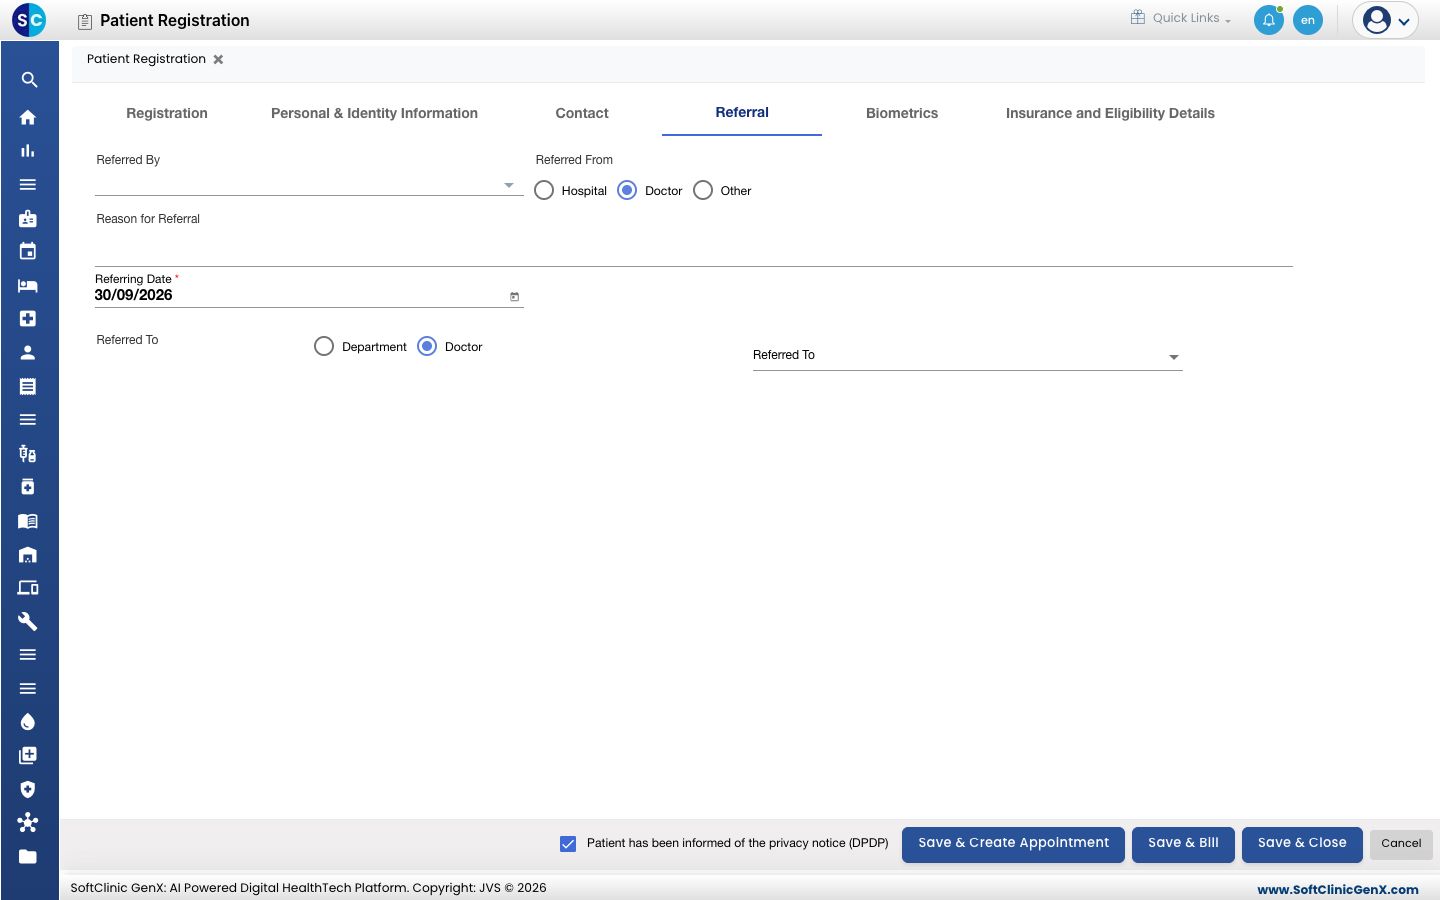
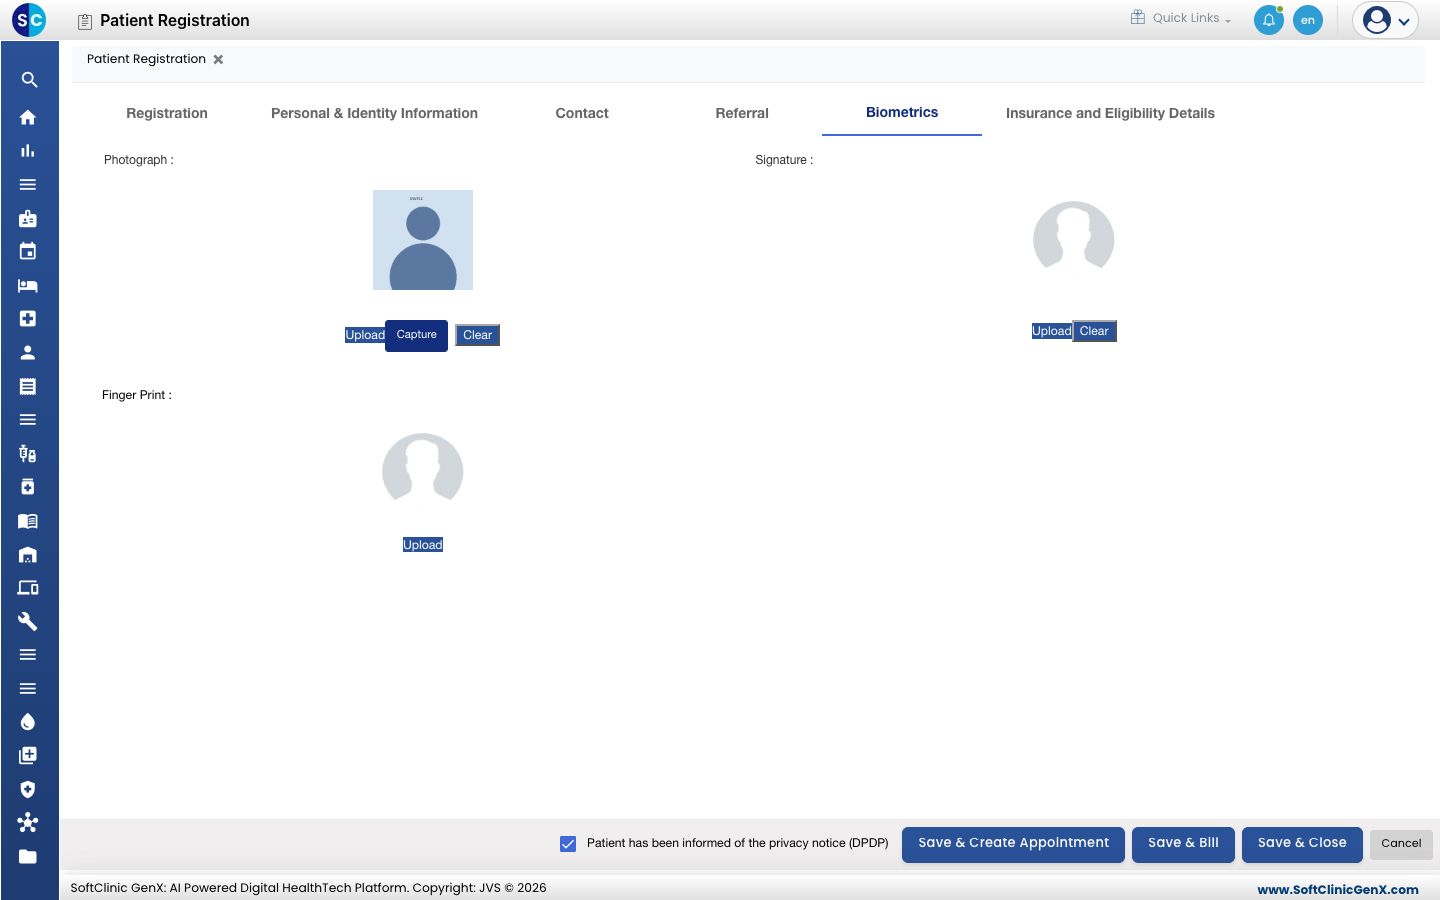
- Open Biometrics to add the patient's photograph. Click Upload to choose a picture, or Capture to take one with the computer's camera. You can also upload a signature and a fingerprint image.
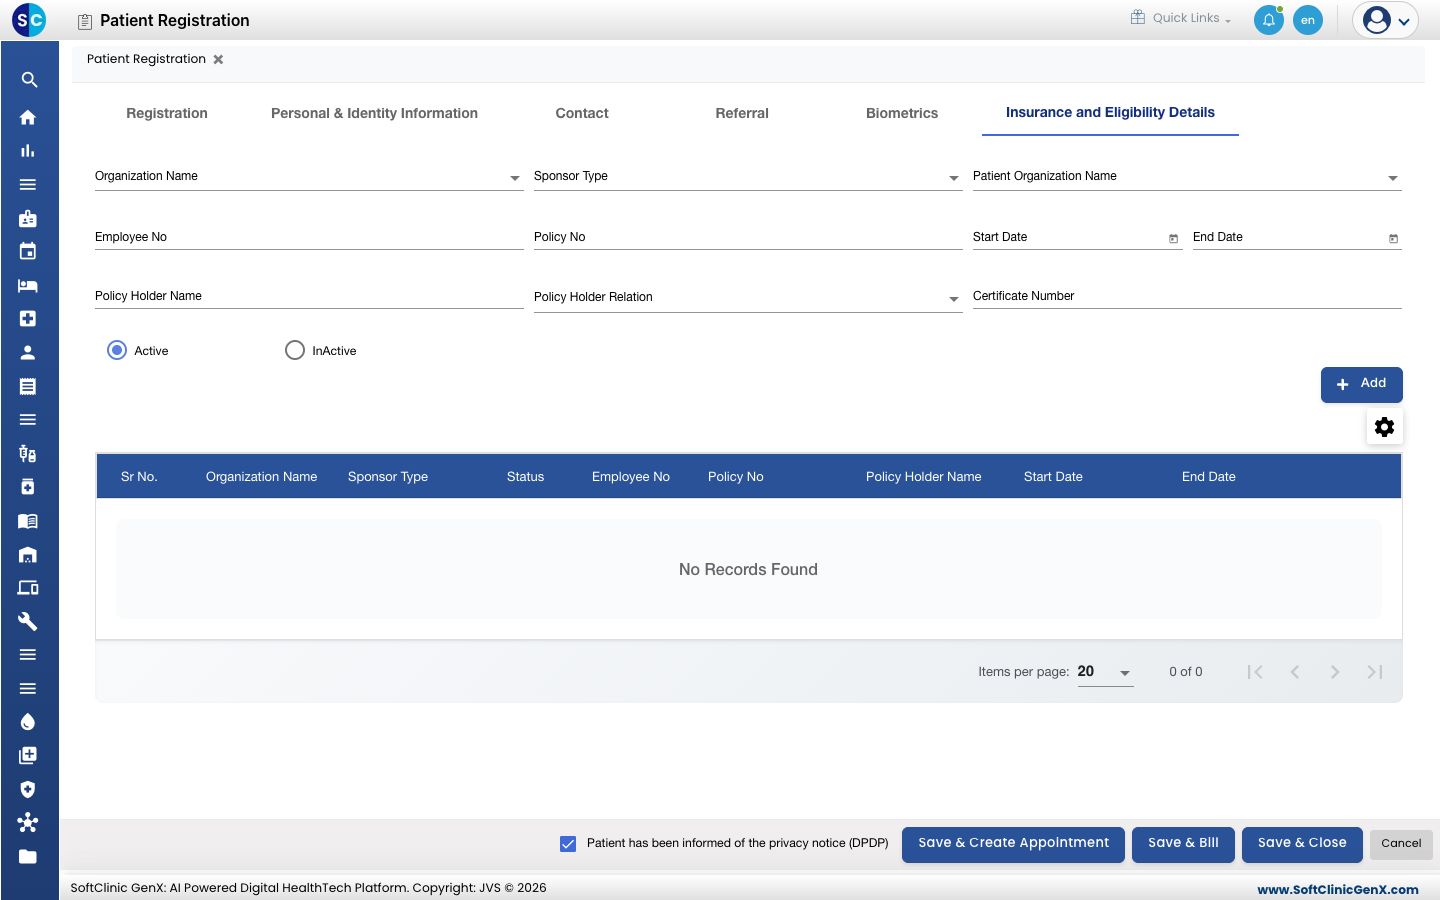
- Open Insurance and Eligibility Details if the patient is covered by an insurer or company. Pick the Organization Name and Sponsor Type, fill in the policy details and click Add.
- Click Save & Close (or Save & Create Appointment / Save & Bill to go straight on). If a warning lists other patients with the same mobile number, check it and click Ok only if this is a new patient.
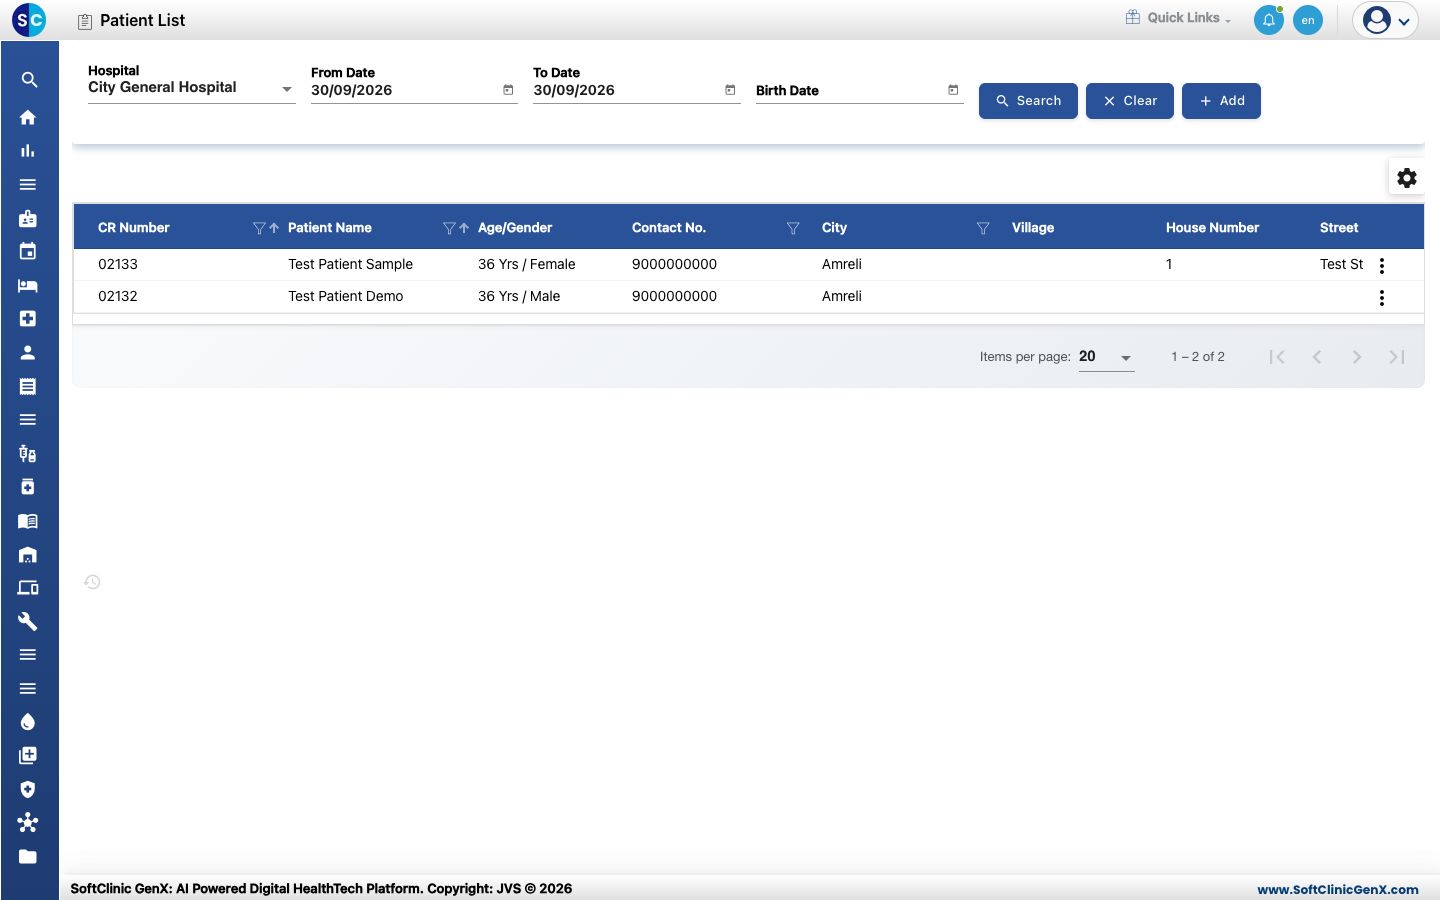
- You see Your record has been saved. The patient appears in Patient List with a new CR number.
If something goes wrong
| What you see | What it means | What to do |
|---|---|---|
| Personal Identification is Required | Your hospital requires an ID proof for this registration type. | Open Personal & Identity Information, click New and add at least one ID. |
| patient already exists | A patient with the same name, date of birth, gender and mobile number is already registered. | Use the existing record from Patient List. |
| Capture does not show a picture | The browser has no access to a camera. | Allow camera access in the browser, or use Upload instead. |
Related
- Register a new patient (Quick Registration): the fast way for walk-ins.
- Add or change a patient's photo: to add the photo later.
- Upload a patient document: for scanned reports and ID copies.
- Patients FAQs