Register a new patient (Quick Registration)
Register a walk-in patient in under a minute with just a name, age, gender and mobile number, and get a CR number.
Quick Registration takes only the details you need to start a visit. The patient gets a CR number the moment you save, and you can add the rest of the details later.
Who can do this: front desk and registration staff
Where: Patients › Quick Registration (or Patients › Views › Patient List › Add)
Before you start
- Make sure the patient is not already registered: search for the patient first to avoid a duplicate record.
- The titles (Mr., Mrs.) come from Prefix, and the Patient Type list comes from Patient Type.
Steps
-
Go to Patients › Quick Registration. The Patient Registration screen opens with Registration Type set to Quick Registration.
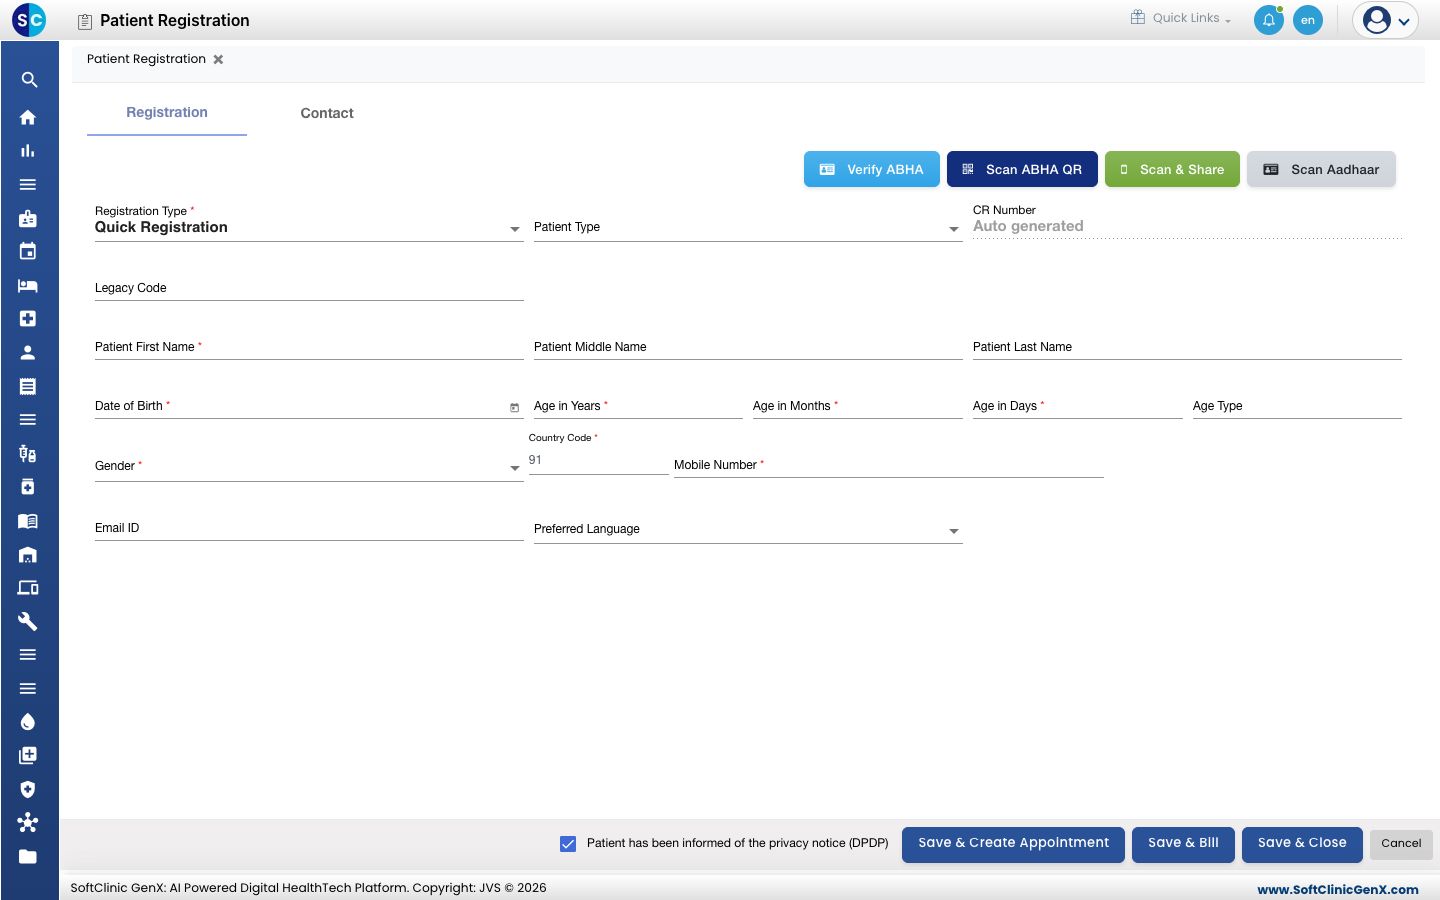
-
Fill in the patient's details:
Field What to enter Required Patient Type The patient's category, if your hospital uses one. No Patient First Name, Middle Name, Last Name The patient's name as it should print on bills and reports. First name only Date of Birth The date of birth. The age fills in by itself. If you only know the age, type it in Age in Years instead and the date of birth is worked out for you. Yes Gender The patient's gender. The title (Mr., Ms., Mrs.) is picked from the gender and age. Yes Country Code, Mobile Number The patient's mobile number. The country code is filled in for you. Yes Email ID, Preferred Language Optional contact details. No 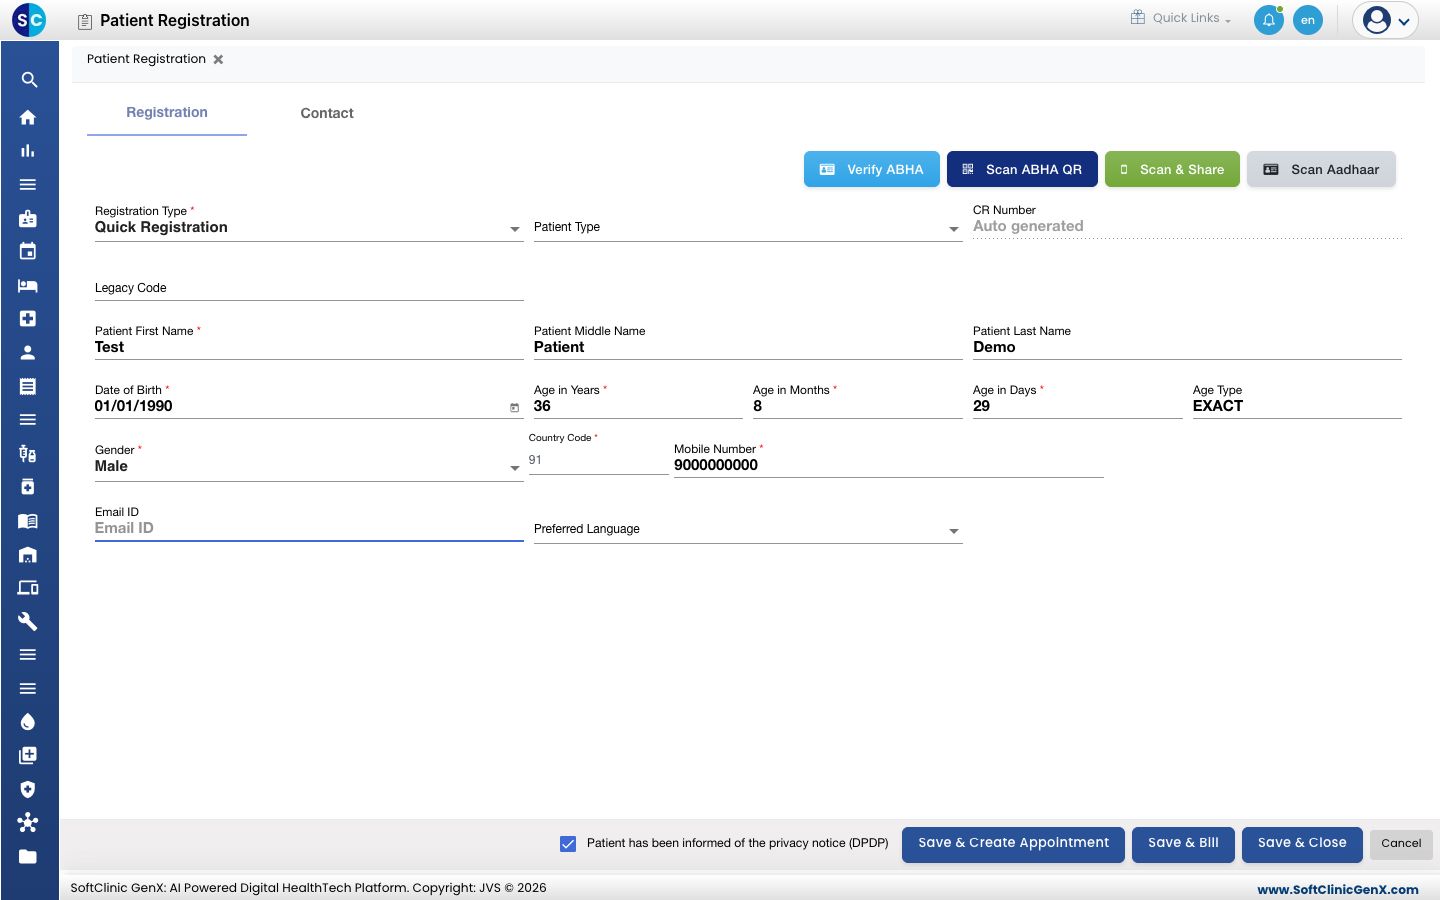
-
To add an address, open the Contact tab. Country, state and city are filled in with your hospital's defaults; change them if needed.
-
Leave Patient has been informed of the privacy notice (DPDP) ticked once you have told the patient about it.
-
Click one of the save buttons:
- Save & Close — saves and returns to the patient list.
- Save & Create Appointment — saves and goes on to book an appointment.
- Save & Bill — saves and goes on to billing.
-
If other patients are already registered with the same mobile number, a Warning lists them. Check the list:
- If the patient is already there, click Cancel and open the existing record instead.
- If this really is a new patient (for example, a family member sharing a phone), click Ok to save.
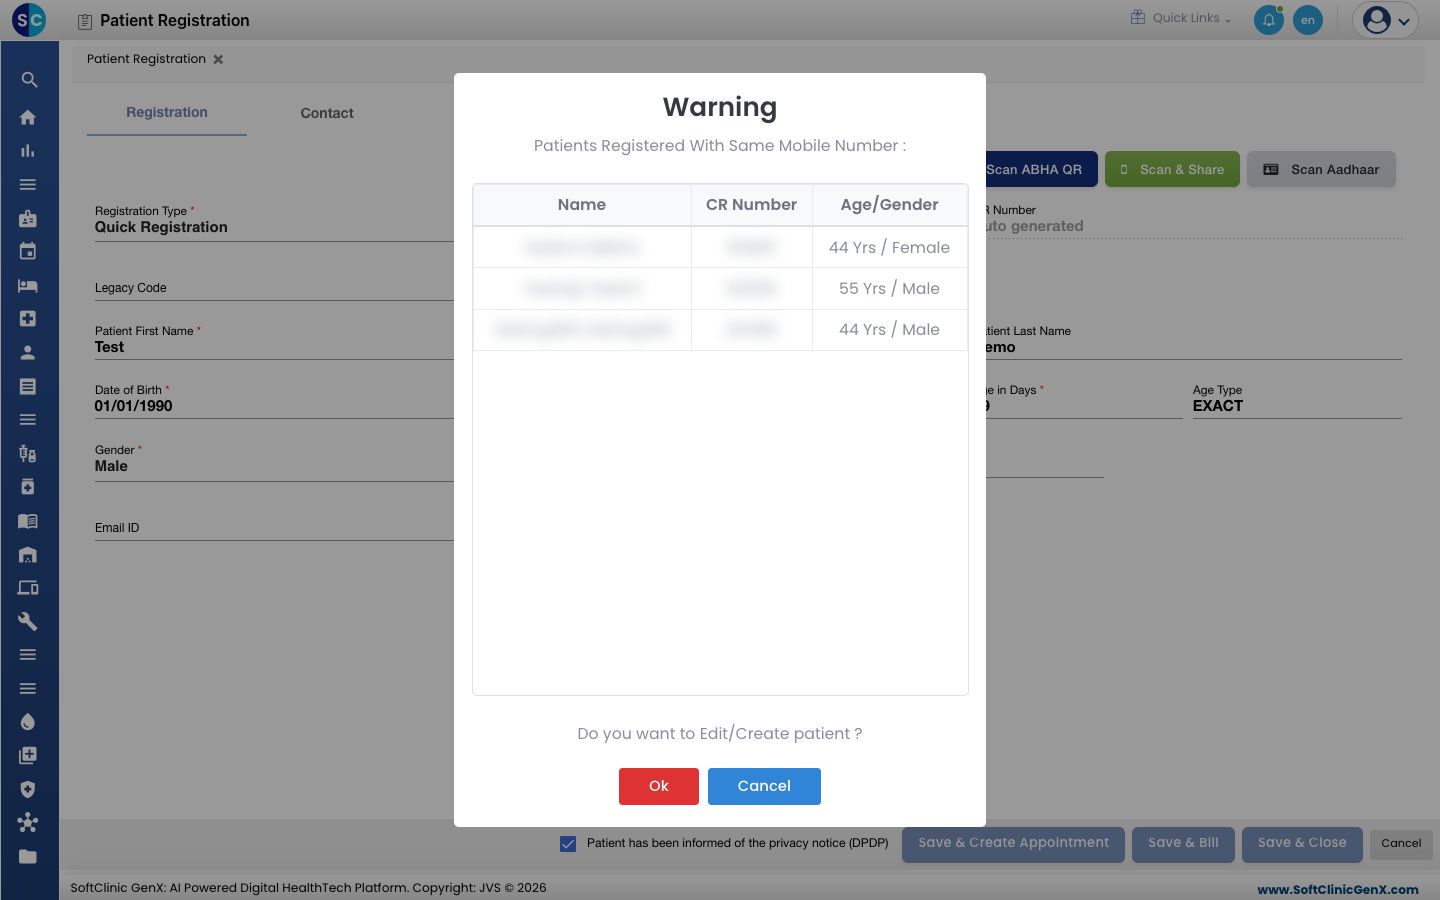
-
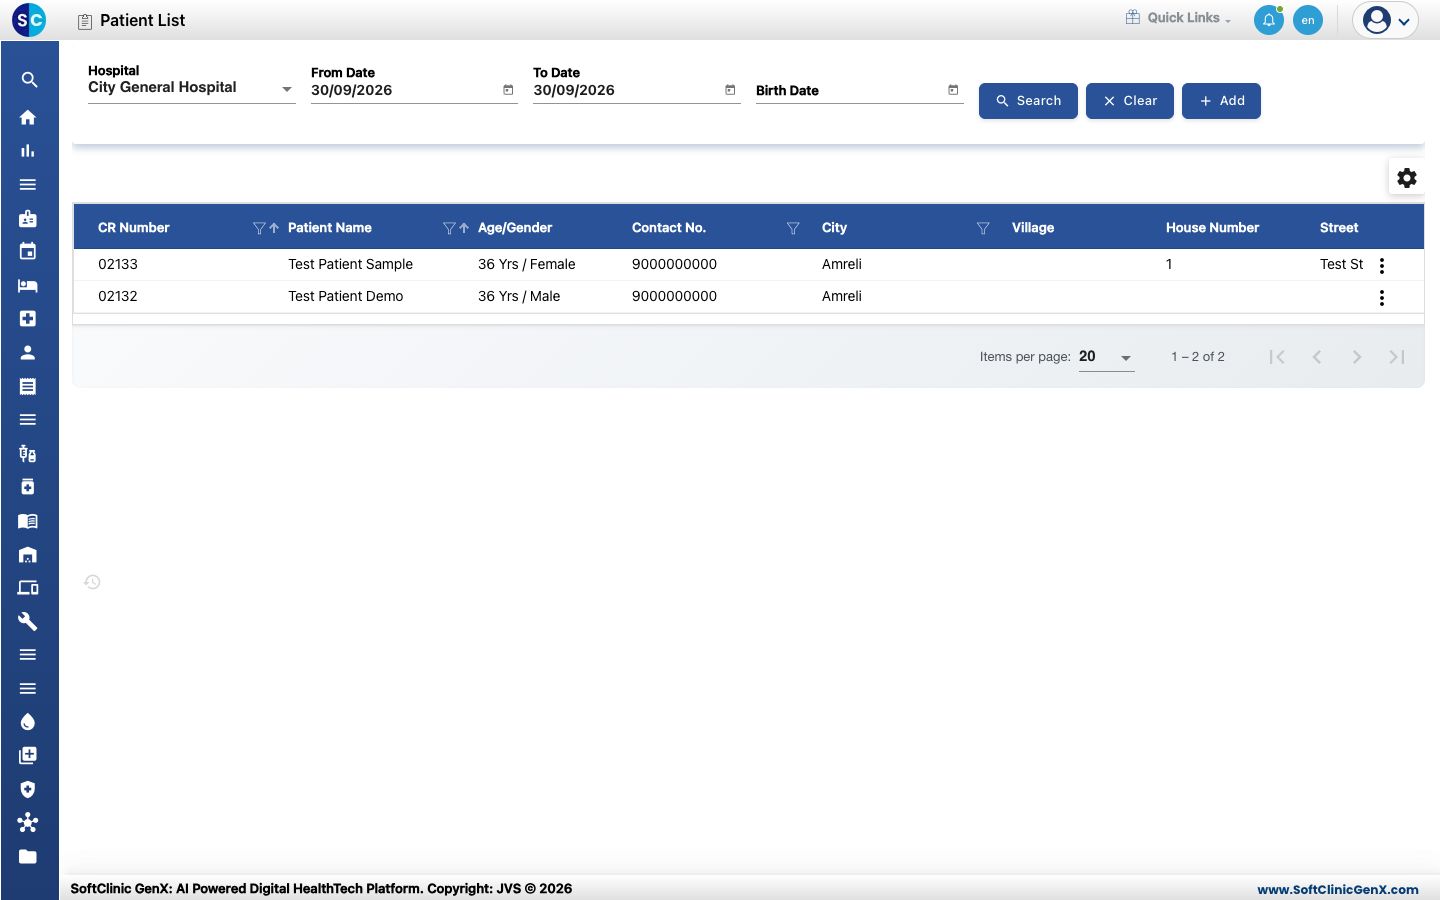
You see Your record has been saved. The new patient appears in Patient List with its CR number.
If something goes wrong
| What you see | What it means | What to do |
|---|---|---|
| patient already exists | A patient with the same name, date of birth, gender and mobile number is already registered. | Search for the patient in Patient List and use the existing record. |
| A field is underlined in red | A required field is empty. | Fill in the field and save again. |
| The title you need is missing from Patient Prefix | The prefix has not been set up or is inactive. | Ask your administrator to add it in Prefix. |
Related
- Register a patient with full details: when you need ID proof, address, referral, photo or insurance at registration.
- Edit a patient's details: to complete the record later.
- Patients FAQs