Mark a patient as arrived
Check in a patient who booked ahead so that a token number is issued and the patient joins the doctor's queue.
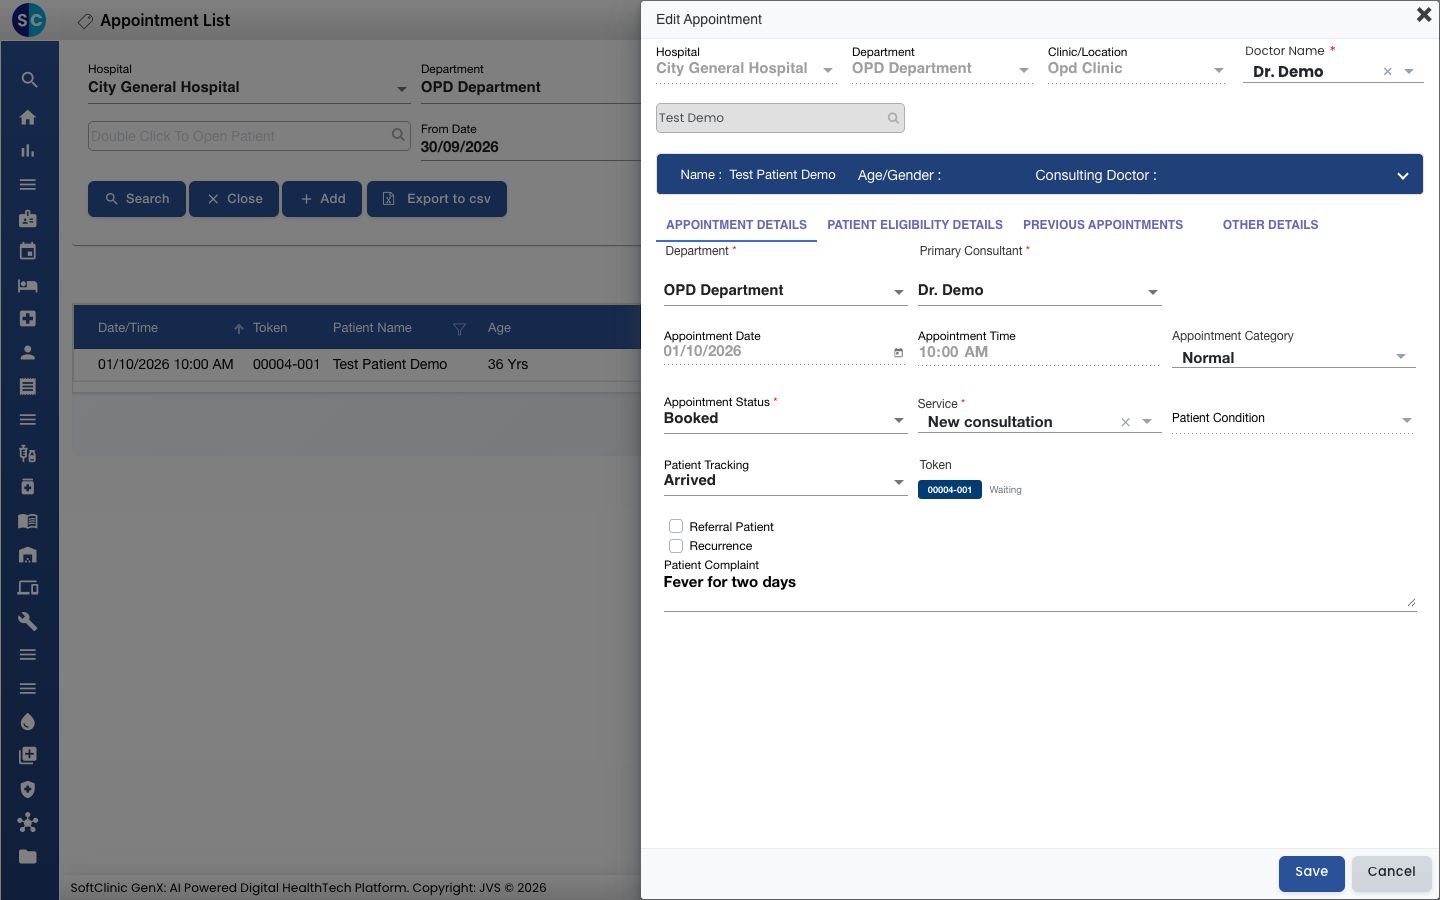
When a patient with a booking reaches the desk, set Patient Tracking to Arrived on the appointment. The patient gets a token number, which is the patient's place in the doctor's queue.
Who can do this: front desk and appointment staff
Where: Appointments › Views › Appointment List › row menu › Edit Appointment
Before you start
- The appointment must be booked. See Book an appointment.
- A walk-in booked with Add is already marked as arrived. See Book a walk-in appointment.
Mark the arrival
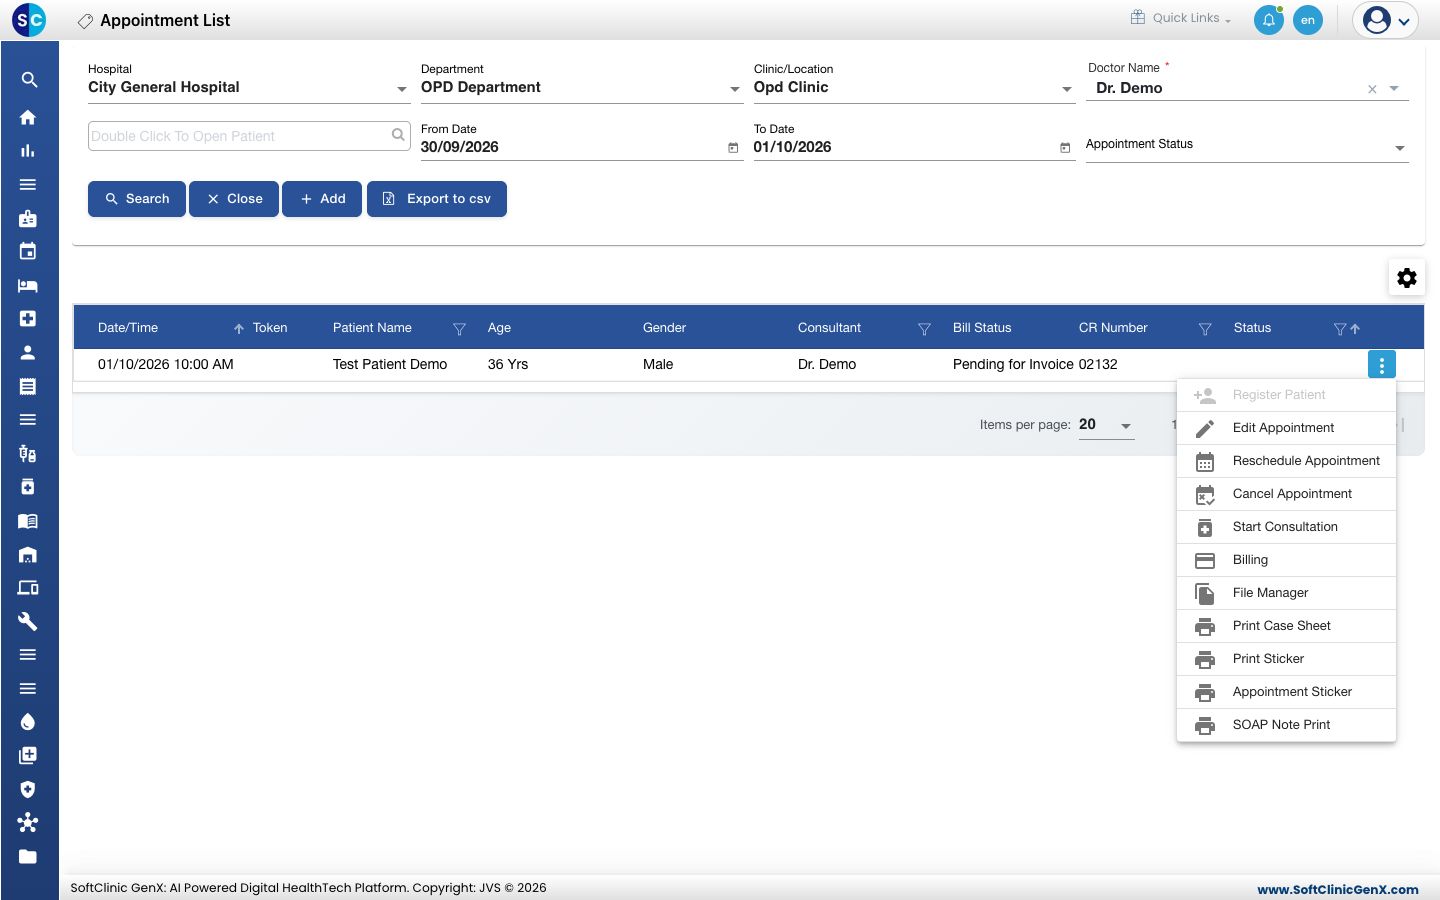
- Go to Appointments › Views › Appointment List and find the patient. See View the day's appointments.
- Click the three dots at the end of the row and choose Edit Appointment.
- Open Patient Tracking.
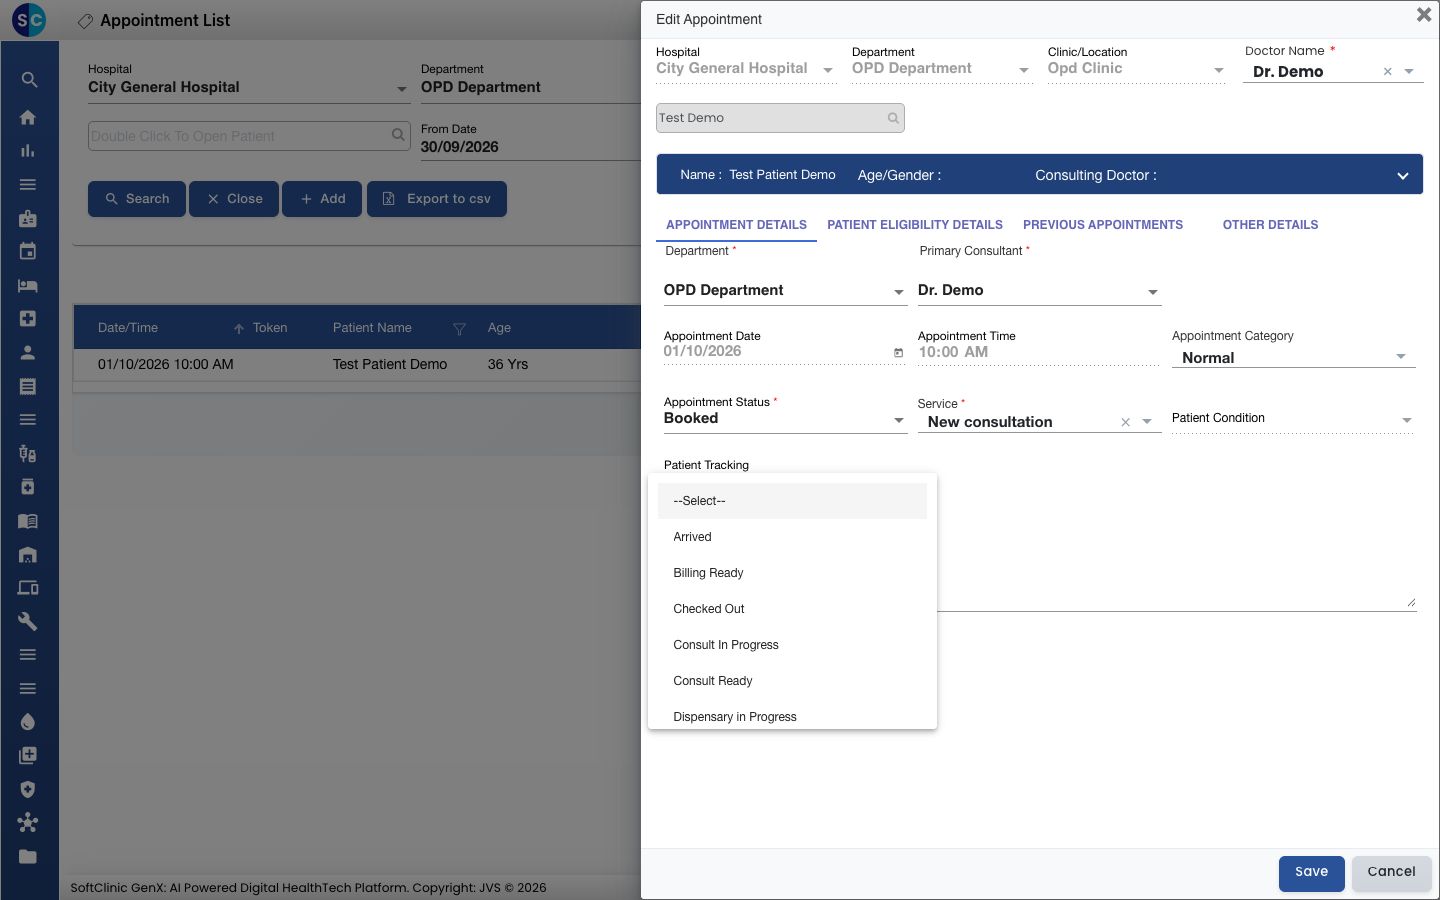
- Choose Arrived.
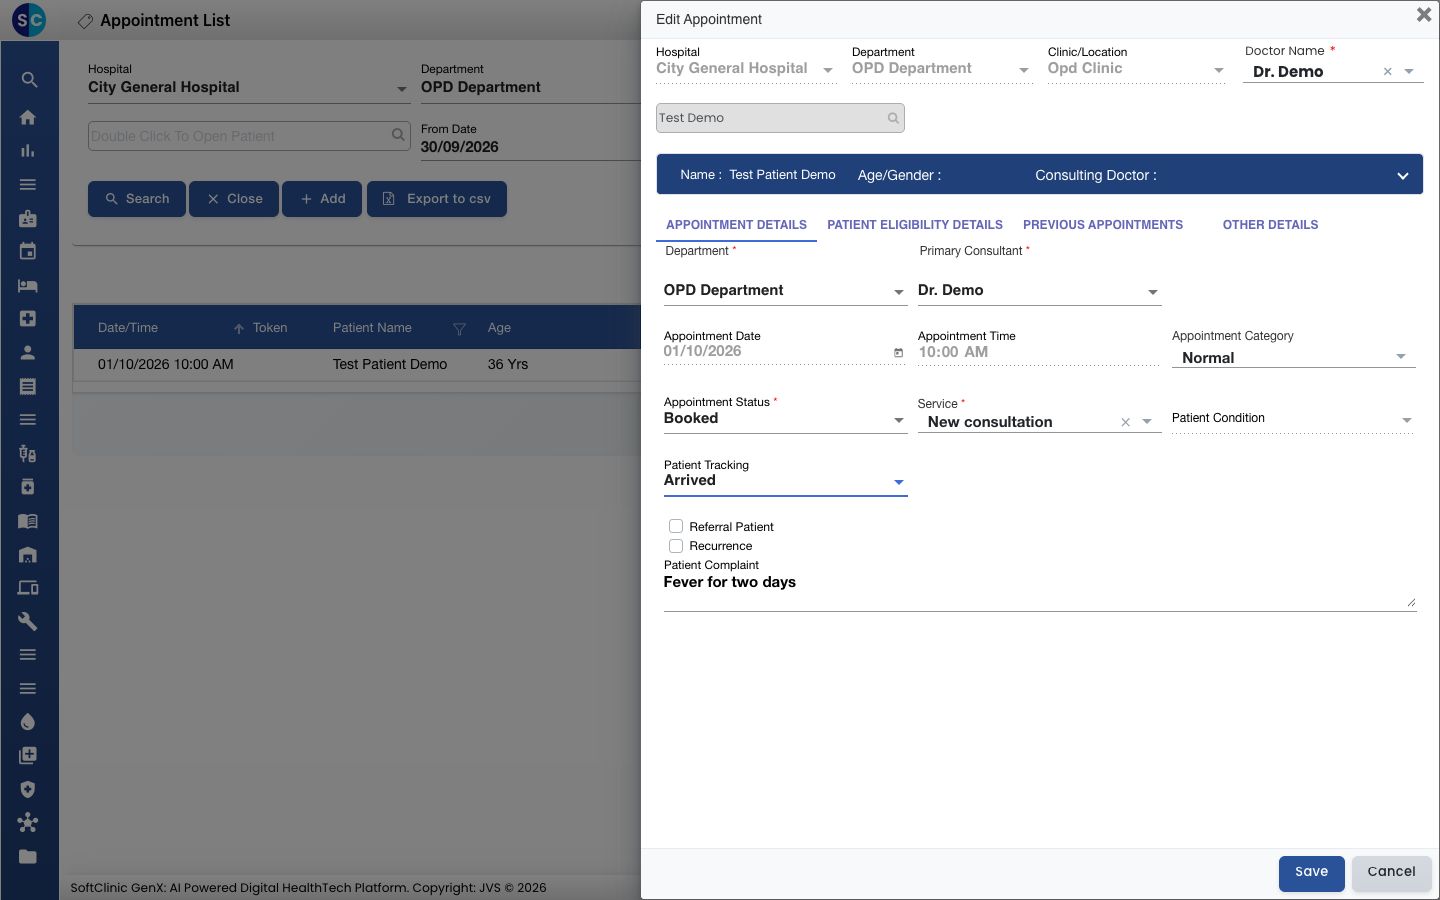
- Click Save. You see Record updated successfully.
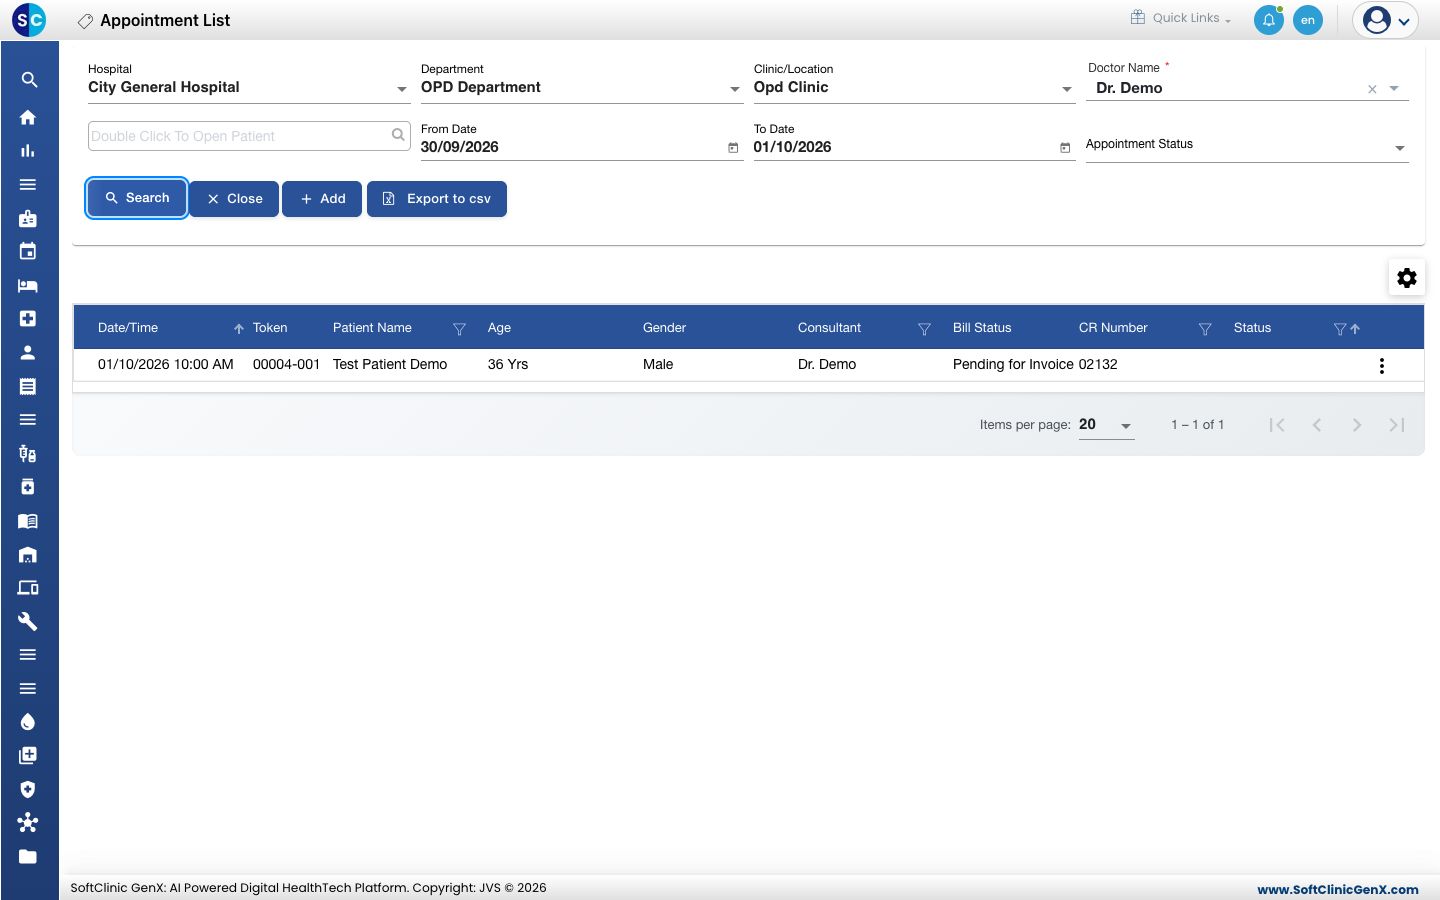
- Read the token number in the Token column of the list and tell the patient.
When you open the appointment again, the token shows next to Patient Tracking with its queue state, for example Waiting.
The same Edit Appointment option is on the calendar: click the appointment in Outpatient Scheduling.
Other tracking stages
Patient Tracking also has stages such as Nurse Ready, Consult Ready, Billing Ready and Checked Out. Use them if your hospital tracks where each patient is during the visit.
Troubleshooting
| What you see | What it means | What to do |
|---|---|---|
| The Token column is still empty | The change was not saved, or the list was not refreshed. | Click Search on the list. If it is still empty, edit the appointment and save Arrived again. |
| The patient is not in the list | The list is filtered to another doctor or date. | Set Doctor Name to All and both dates to today, then click Search. |
Related
- Book a walk-in appointment: book and check in at the same time.
- Print an appointment sticker: print a label for the patient's file.
- Appointments FAQs: common questions about the list.