Collect a sample
Record sample collection for a lab order, generate the sample number and print the sample label.
Sample collection records who collected which sample, and when. When you save it, the sample number is generated and the test moves to Sample Collected. You need the sample number before you can enter results.
Who can do this: phlebotomist or laboratory staff · Where: Laboratory › Lab Dashboard › Sample Collection icon
Before you start
- Find the order on the Lab Dashboard. See Find lab orders on the Lab Dashboard.
- The test's specimen and container are set up. See Specimen and Container Type.
Collect the sample
- Open the order card and click the Sample Collection icon (the red dropper) on the test line. The Sample Collection panel opens with the tests in the order.
- Tick the tests you are collecting a sample for.
- Check Collection Date and Collection Time. They are filled with the current date and time.
- Choose Collected Mode, for example Collected At Laboratory, and choose Collected By. Both are required. Collecting Location is optional.
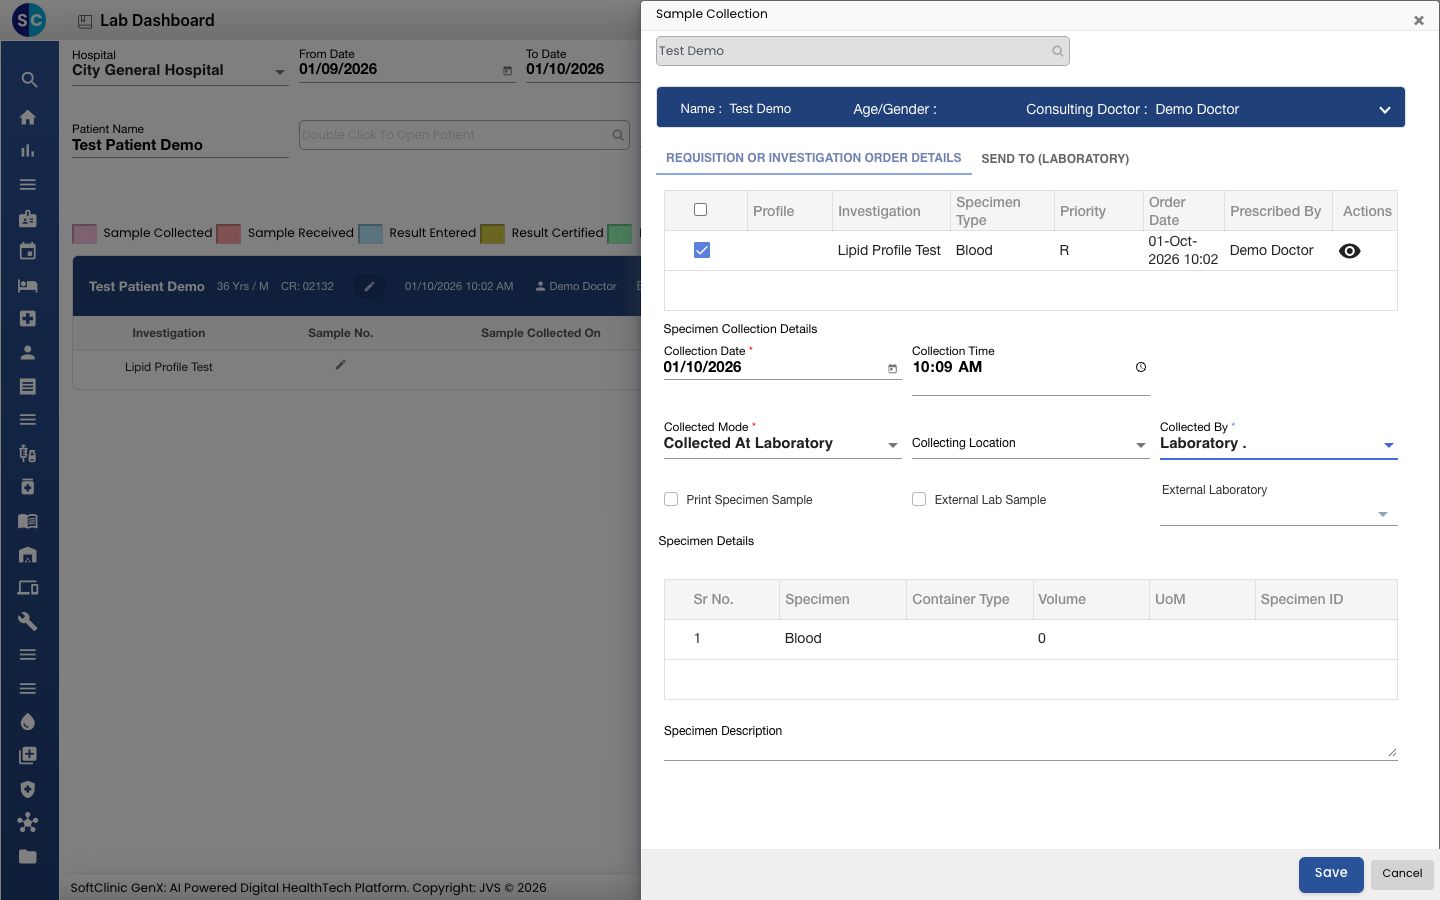
- Check the Specimen Details grid. It shows the specimen and container for each sample.
- Click Save. The panel closes, the line turns pink and the order shows SAMPLE COLLECTED.
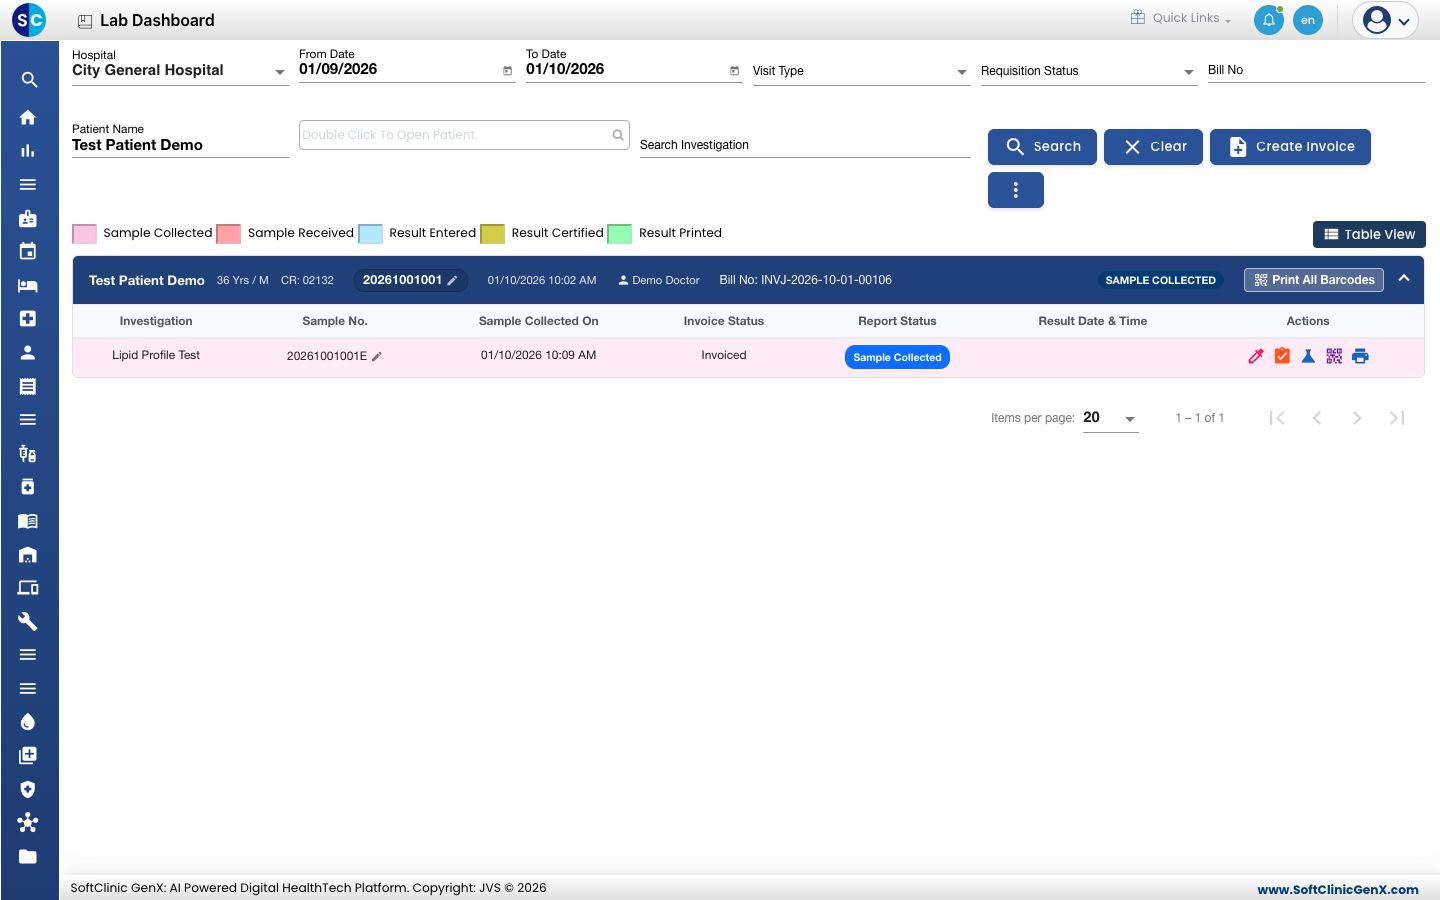
The sample number appears on the card header and on each test line. You do not type it: it is generated when you save. Tests that share one sample share one number; depending on your lab's settings a letter is added for each specimen or lab section.
To correct a sample number, click the pencil next to it on the card or on the test line.
Send a sample to an external lab
Tick External Lab Sample before you save and choose the External Laboratory. The SEND TO (LABORATORY) tab records when and by whom the sample was sent. For such a test, the result is added as an outsourced report instead of through result entry.
Print the sample label
- One label: click the Barcode icon on the test line.
- All labels for the order: click Print All Barcodes on the card.
The icons appear once the sample number exists.
Receive the sample in the lab
If your lab records receipt separately, click the Sample Receive Acceptance icon on the test line. Tick Received and Accepted for each sample. To reject a sample, use Recollect/Rejection and give a Reason For Rejection. Then click Save.
Troubleshooting
| What you see | What it means | What to do |
|---|---|---|
| Please fill required field(s) | Collected Mode or Collected By is empty. | Choose both, then click Save. |
| Sample collection has not been done yet for this test. | You opened result entry before collecting the sample. | Collect the sample first. |
| Sample number generation is incomplete for this test. Please re-run Sample Collection for this requisition. | The test has no sample number. | Open Sample Collection again for the order and save. |
| No Sample Collection icon on the line | The bill for the test is cancelled. | Check the bill in the Billing Dashboard. |
Related
- Enter test results: the next step once the sample is collected.
- Find lab orders on the Lab Dashboard: statuses and colours.
- Laboratory FAQs: common questions.