Set up Bed Masters
Who does this: hospital administrator Where: In-Door Management › Masters › Bed Masters Set up before: Facility, Bed Type, Class Master
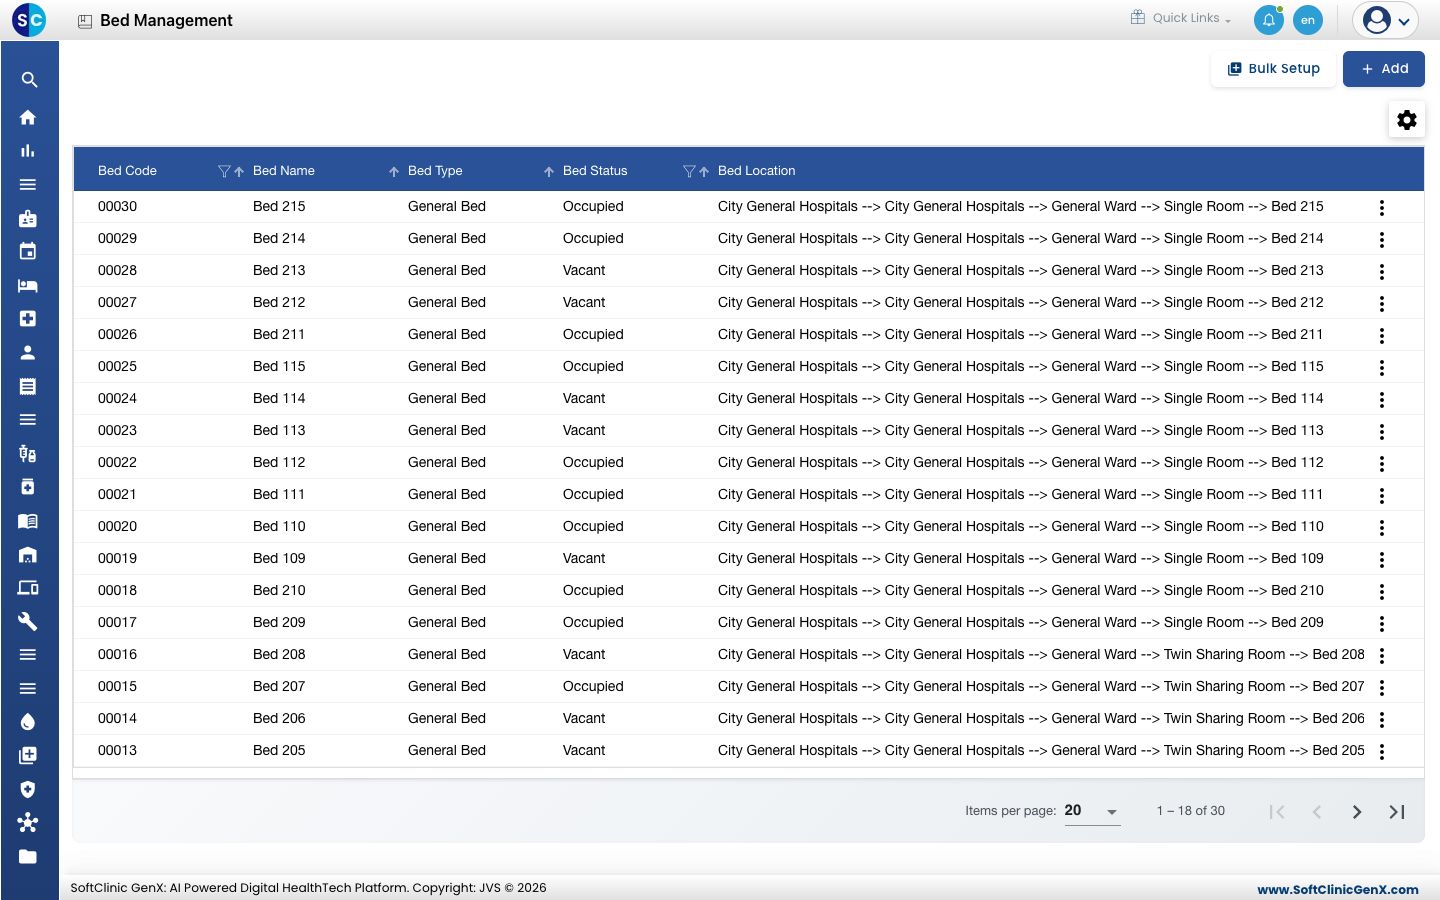
Each bed in the hospital is a record here. A bed sits in a room, and the room in a ward, so the list shows the full path to every bed, for example General Ward --> Single Room --> Bed 215. Only the beds in this list can be chosen when a patient is admitted or transferred, and they are what the Bed Chart shows as vacant or occupied.
Add a bed
-
Go to In-Door Management › Masters › Bed Masters.
-
Click Add. The Add Bed form opens on the right.
-
Fill in the fields:
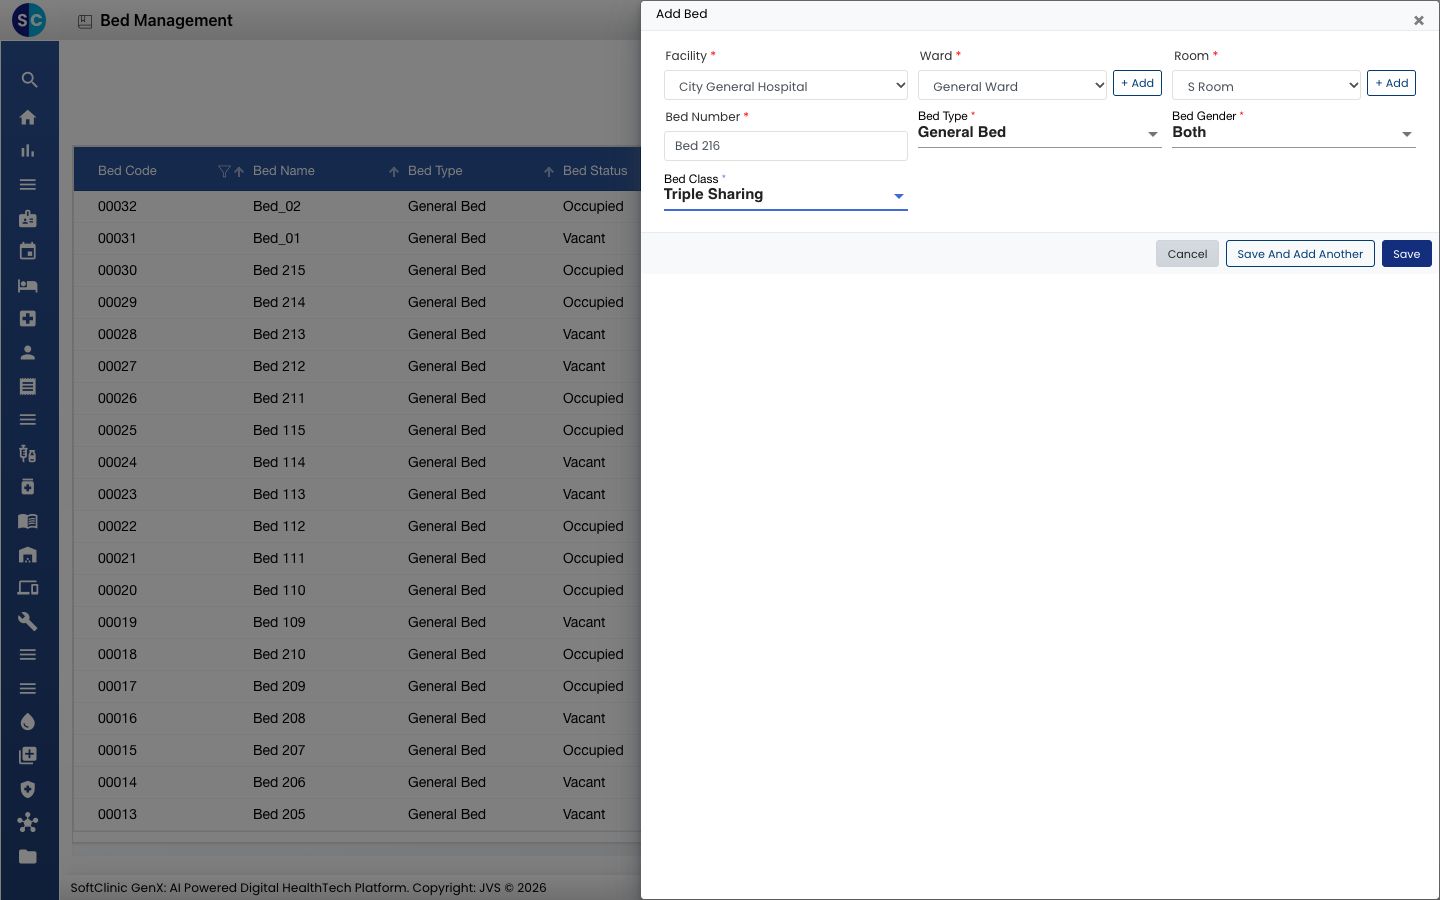
Field What to enter Required Facility The facility the bed belongs to. Yes Ward The ward. If the ward does not exist yet, click + Add next to it to create it here. Yes Room The room inside the ward. Click + Add to create a new room. Yes Bed Number The bed's name, for example Bed 216. Up to 50 characters. Yes Bed Type The kind of bed, for example General Bed. Yes Bed Gender Male, Female or Both: who the bed can be given to. Yes Bed Class The class that sets the deposit and bed charges, for example Triple Sharing. Yes -
Click Save to add the bed and close the form, or Save And Add Another to add the next bed in the same room. Save And Add Another keeps the ward, room, type, gender and class and clears only the bed number.
Add many beds at once
Use Bulk Setup when you are setting up a whole ward.
- On the list, click Bulk Setup.
- Choose the Facility, Ward, Bed Type, Bed Gender and Bed Class. They apply to every bed you create in this run.
- Under Rooms And Ranges, enter one row per room: the Room name, a Prefix for the bed names, and the first and last bed numbers in From and To. Click + Add Room for the next room.
- Click Preview. The list of beds to be created appears, with a name for each bed.
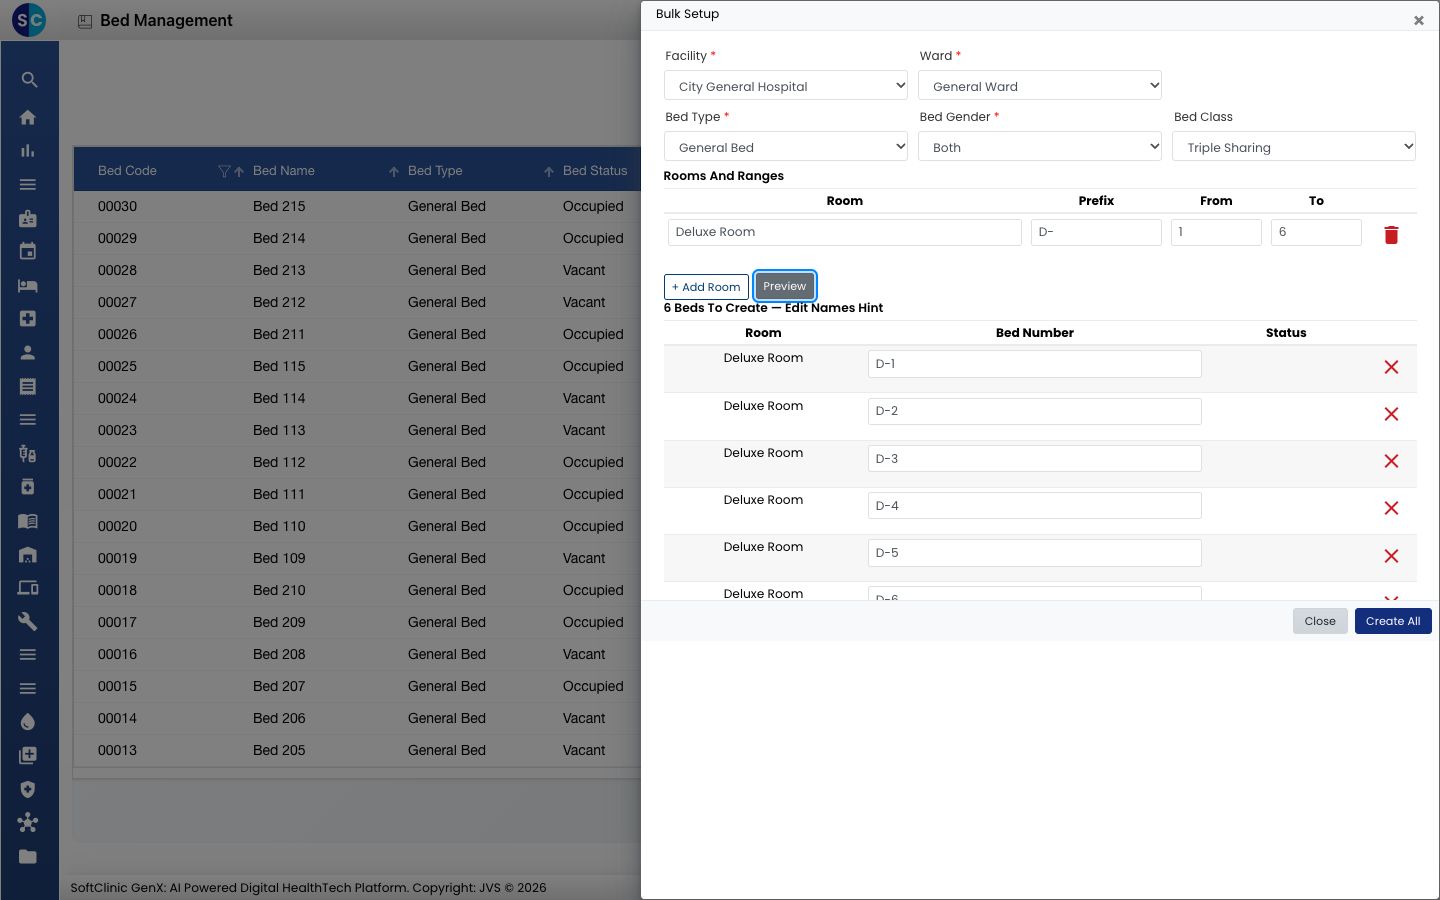
- Change any bed name you need, or click ✕ to leave a bed out.
- Click Create All. Rooms that do not exist yet are created along with the beds.
Change a bed's details
The Add Bed form covers what a bed needs to be used. Charges, consultant and other settings are set by editing the bed.
-
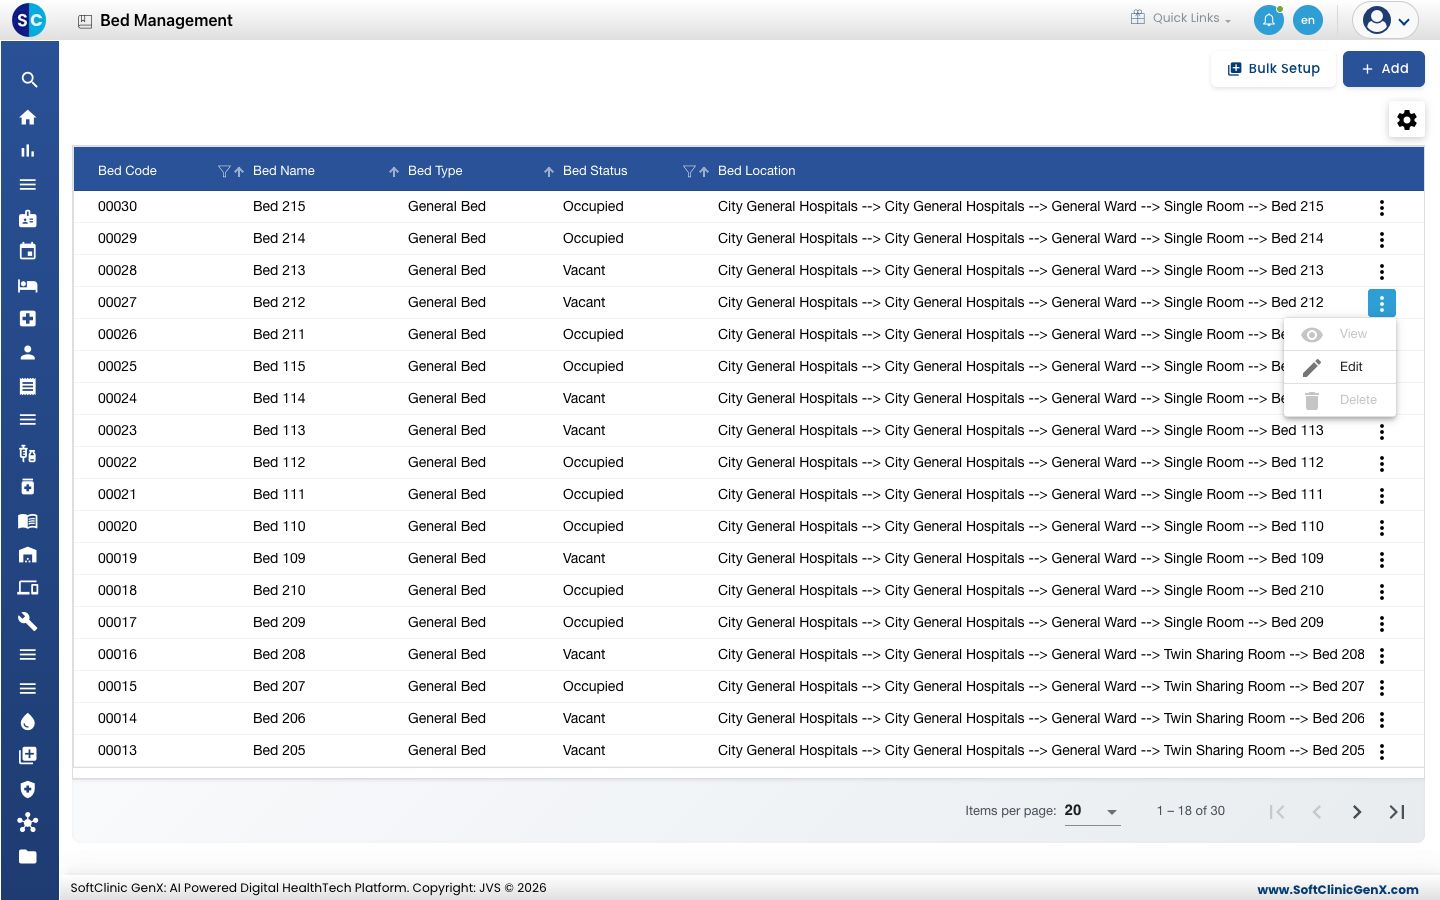
In the list, click the ⋮ button at the end of the row and choose Edit.
-
The Bed Definition form opens.
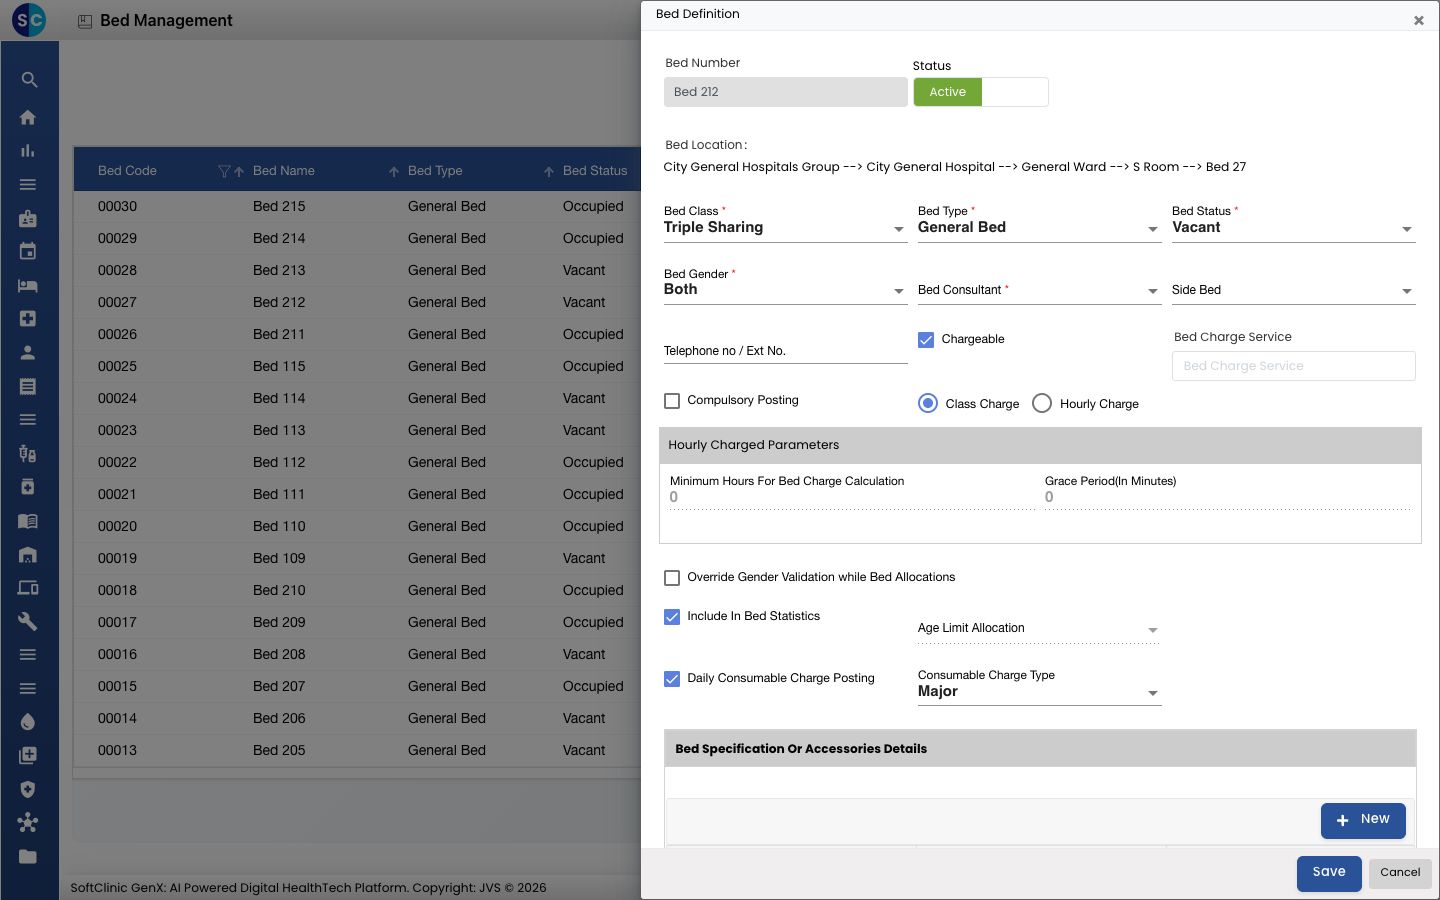
Field What it does Required Status Active beds can be allotted. Switch to Inactive to take the bed out of use. — Bed Class, Bed Type, Bed Gender As on the Add Bed form. Yes Bed Status The bed's current state: Vacant, Occupied, Maintenance, Retained or Under House-keeping. Yes Bed Consultant The consultant in charge of the bed. Yes Side Bed Another bed that is paired with this one as its side bed, if any. No Telephone no / Ext No. The bedside phone or extension. No Chargeable Tick if the bed is charged. Then choose the Bed Charge Service that is billed. No Compulsory Posting Tick if the bed charge must always be posted. No Class Charge / Hourly Charge Class Charge bills the bed at its class rate. Hourly Charge bills by the hour; then fill in Minimum Hours For Bed Charge Calculation and Grace Period(In Minutes). — Override Gender Validation while Bed Allocations Tick to allow the bed to be given to a patient of any gender. No Include In Bed Statistics Leave ticked to count the bed in occupancy figures. No Daily Consumable Charge Posting Tick to add a daily consumable charge, then choose the Consumable Charge Type. No Bed Specification Or Accessories Details Click New to attach accessories and equipment from Bed Specifications. No -
Click Save.
Beds cannot be deleted. Make a bed Inactive instead.
Good to know
- Bed names must be unique across the hospital.
- Bulk Setup takes up to 500 beds per room. If some beds fail to save, run it again: beds that already exist are skipped.
- Wards and rooms can also be created in advance in Location.
- The bed classes offered in Bed Class come from Class Master, which is also opened from In-Door Management › Masters › Bed Class.
- Click Cancel to close a form without saving.