Set up Location
Who does this: hospital administrator Where: General Masters › Location Masters › Location
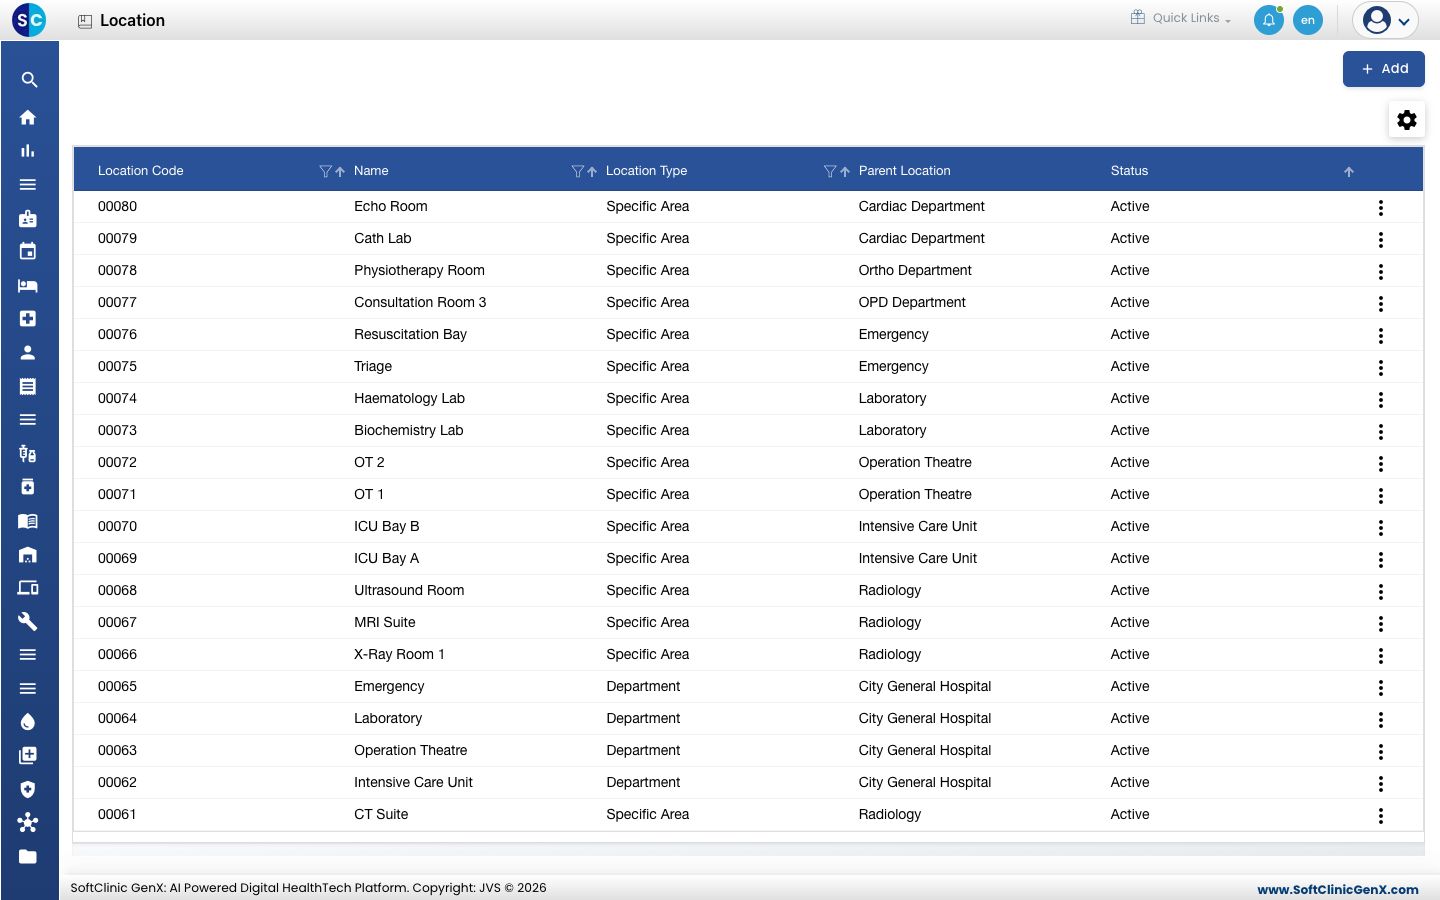
Locations describe where things happen in the hospital, from the whole group down to a single bed. Each location has a type and sits under a parent location, forming a tree: EnterpriseGroup › Facility › Department › Specific Area, for example. Facilities, departments, wards, rooms, beds and stores are all picked from this tree on other screens.
Add a location
-
Go to General Masters › Location Masters › Location.
-
Click Add. The Location Master panel opens on the right.
-
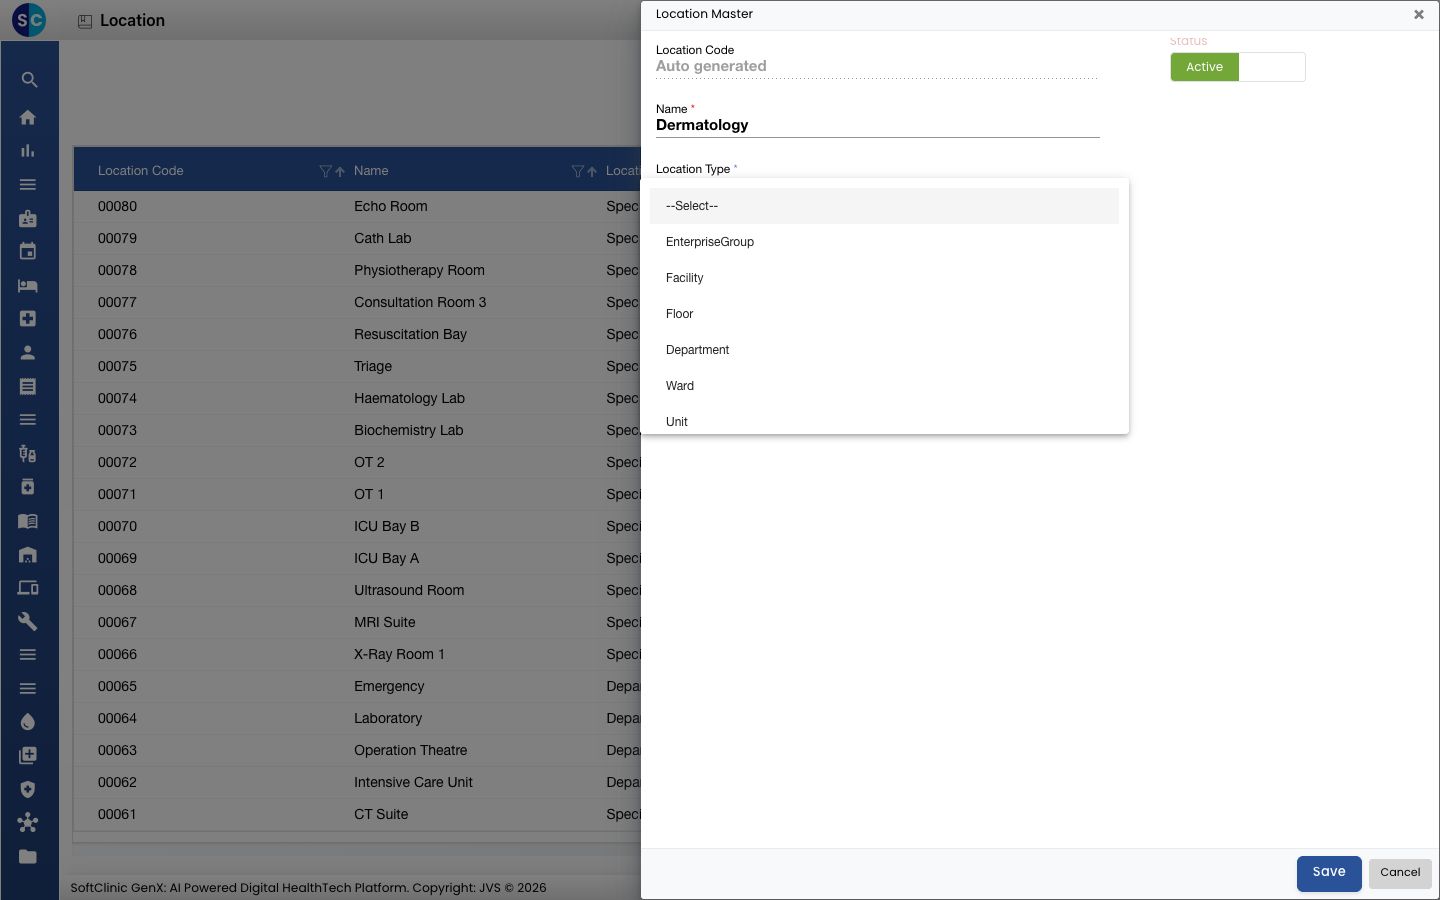
Enter the Name and pick the Location Type.
-
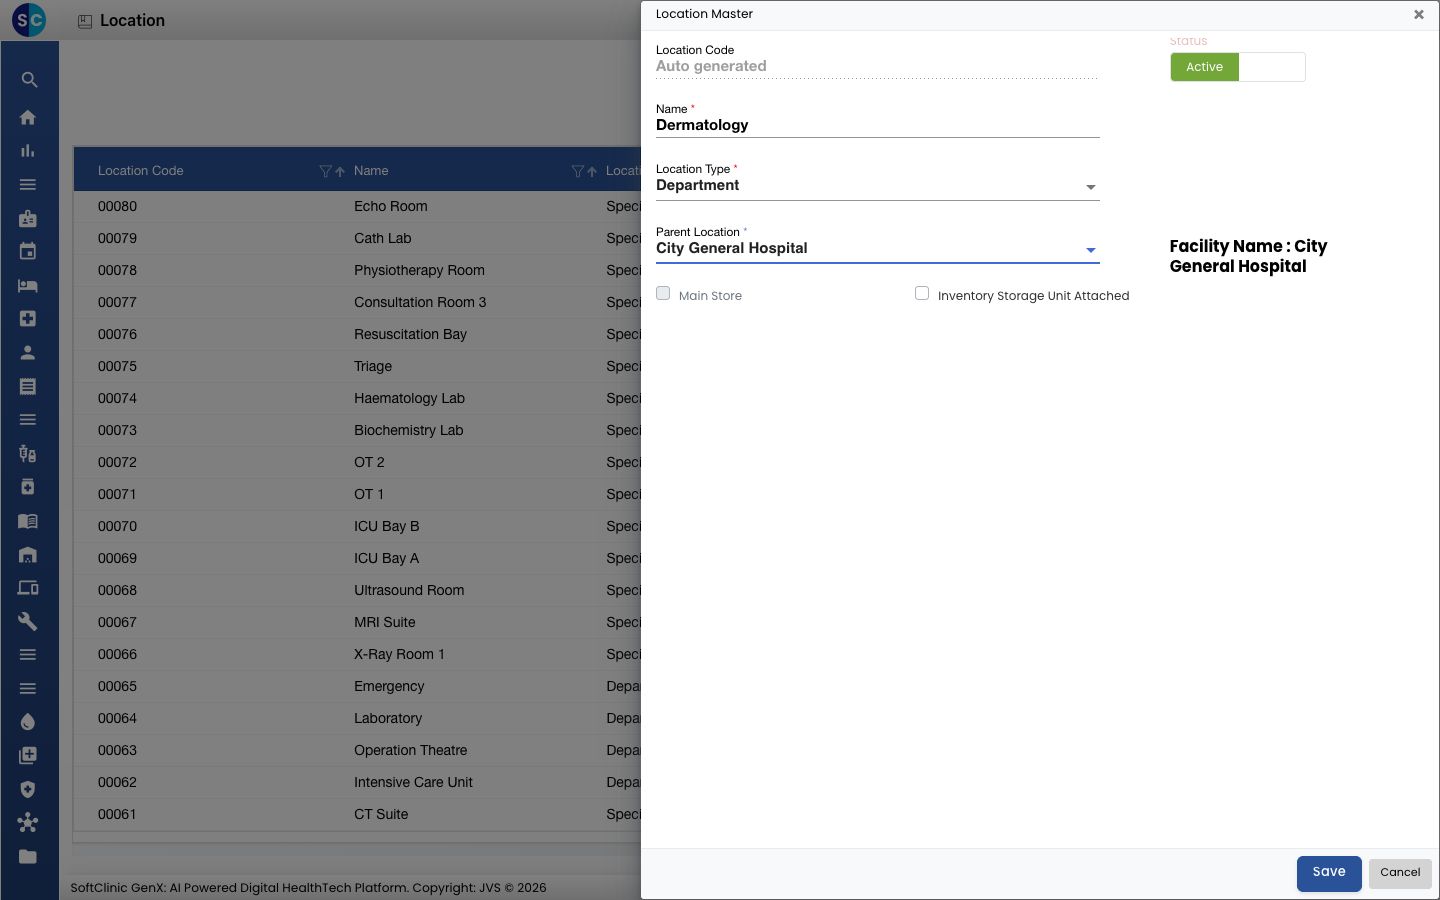
Pick the Parent Location. The list shows only the locations this type can sit under. The facility the location belongs to is shown next to it.
-
Fill in the fields:
Field What to enter Required Location Code Filled in automatically when you save. — Status Leave on Active. — Name The location's name, for example DermatologyorWard 3. Up to 150 characters.Yes Location Type What kind of place it is. Yes Parent Location The location it sits under. Not needed for EnterpriseGroup. Yes, except for EnterpriseGroup Main Store For a Store location only: tick if this is the hospital's main store. No Inventory Storage Unit Attached Tick if this location has its own storage unit for stock. No -
Click Save. The panel closes and the location appears in the list with its code.
Which parent each type needs
| Location Type | Parent Location |
|---|---|
| EnterpriseGroup | None — this is the top of the tree |
| Facility | EnterpriseGroup |
| Department, Ward, Floor, Unit, Store, Laboratory, Sample Location, Facility Pharmacy, Operation Theatre, Area/Desk, Bay Area | Facility |
| Clinic, Specific Area | Department |
| Room | Ward, Department or Specific Area |
| Bed | Room |
Change or deactivate a location
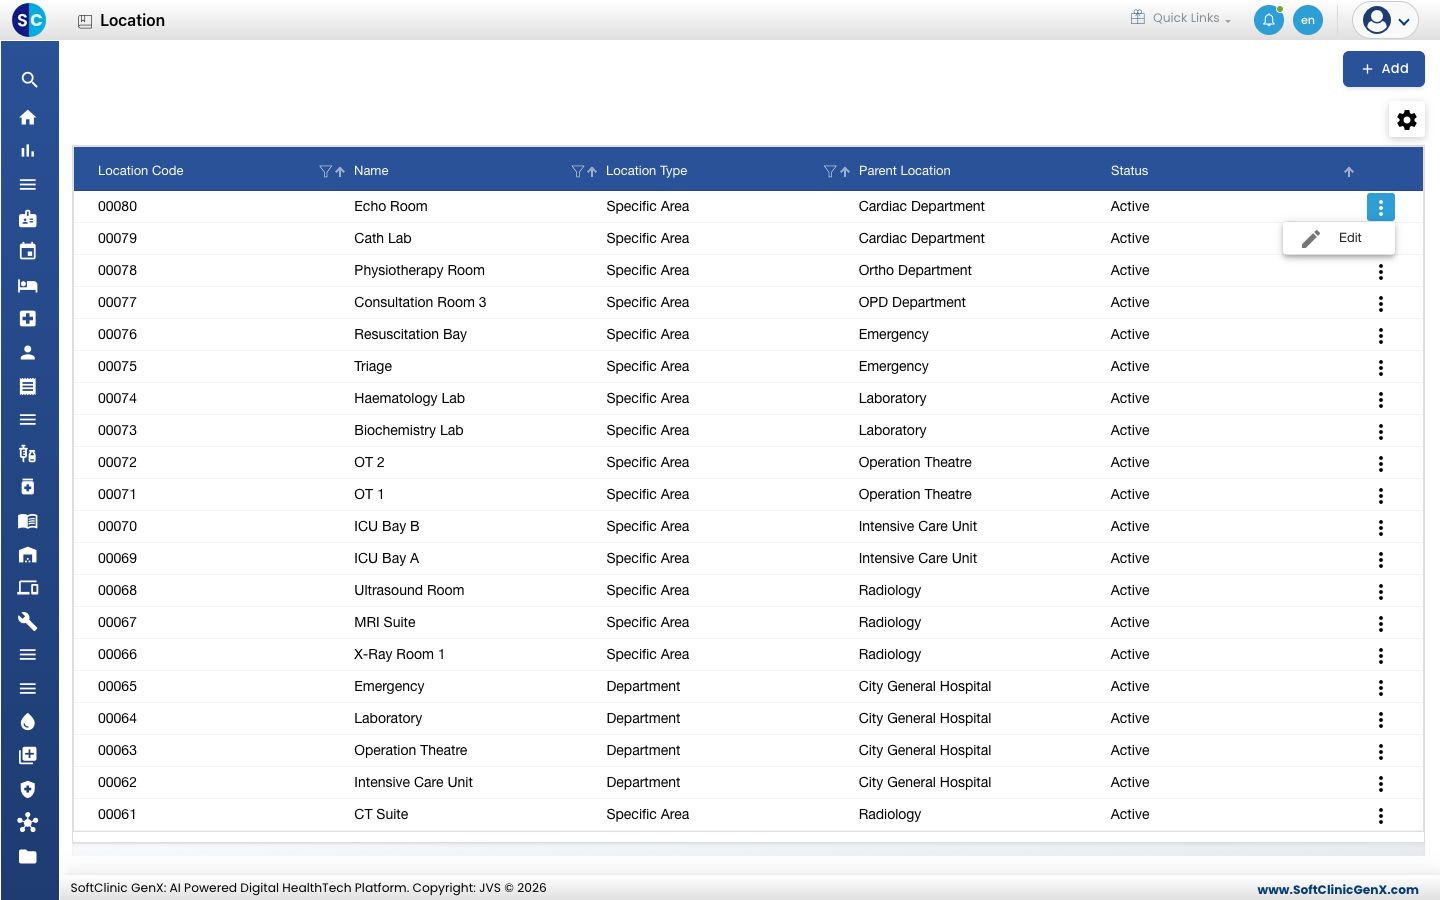
- In the list, click the ⋮ button at the end of the row and choose Edit.
- Change the fields you need. To stop using the location, switch Status to Inactive.
- Click Save.
Locations cannot be deleted. Make a location Inactive instead.
Good to know
- Build the tree from the top: the EnterpriseGroup first, then each Facility, then departments, wards and the rest.
- There can be only one EnterpriseGroup.
- Saving a Department location adds it to the Department list automatically. Renaming or deactivating it here updates the department too.
- A Facility location still needs its details filled in on the Facility screen.
- You cannot rename a location to a name already used by another location of the same type under the same parent.
Related
- Previous: Set up Department
- Next: Set up Country
- General Masters FAQs