Set up Diagnosis
Who does this: hospital administrator or medical records in-charge Where: Doctor Work Bench › Masters › Diagnosis
The diagnosis master holds the diagnoses doctors search when they record a diagnosis in the consultation note. It is arranged as a tree: the coding system at the top (for example ICD-10 or ICD-11), then chapters, groups and the diagnoses inside them — up to four levels. The standard ICD chapters are already in place. Add your own entries where your doctors need them.
The coding systems at the top of this tree are also what the Terminology field offers on the Allergen, Reaction and Chief Complaints masters.
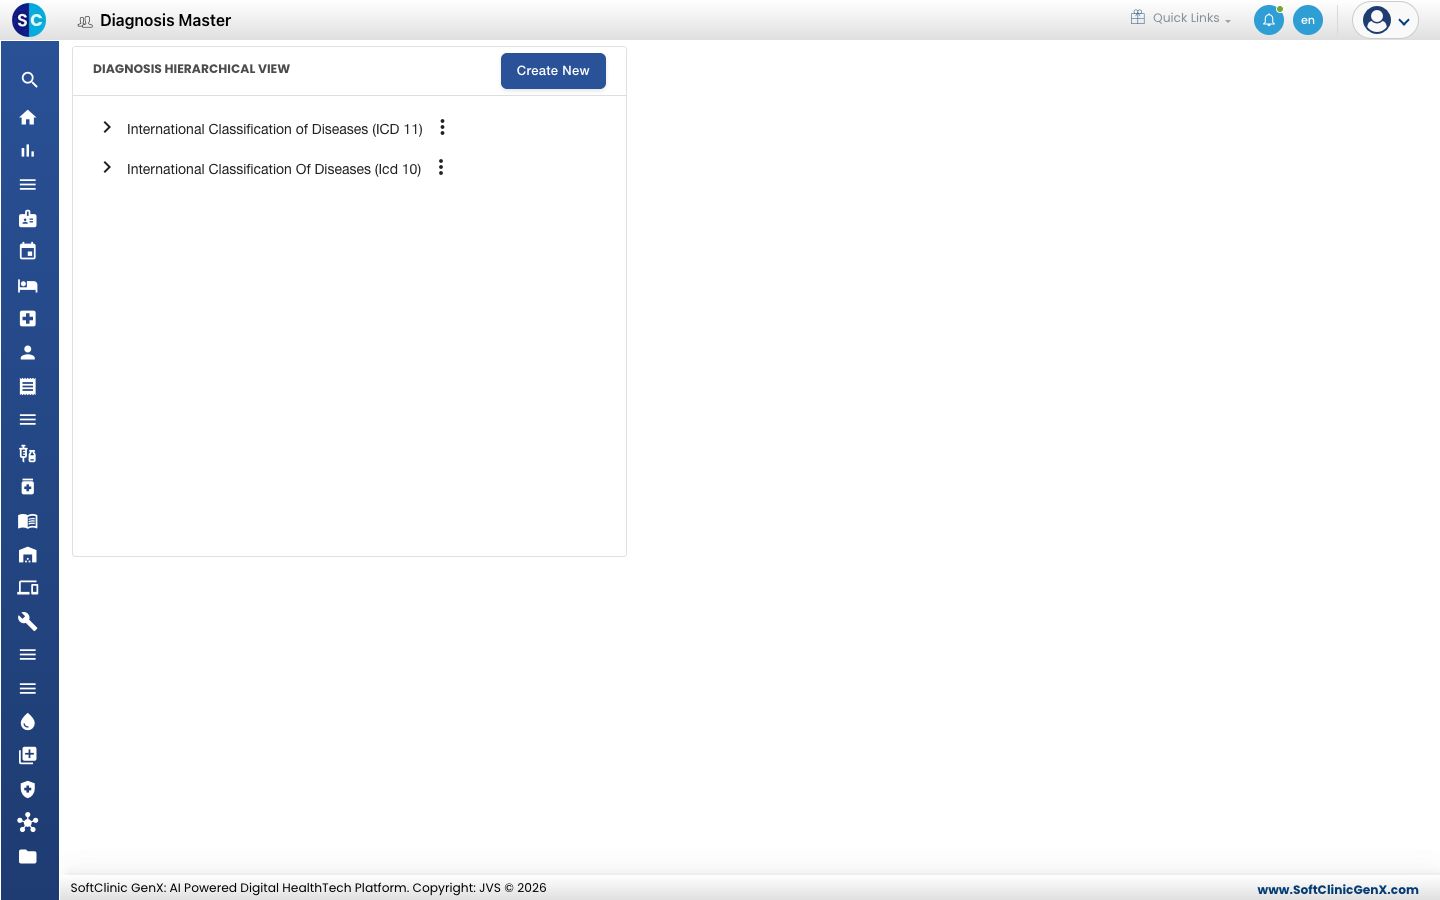
Find a diagnosis
- Go to Doctor Work Bench › Masters › Diagnosis.
- Click the › arrow next to an entry to open the level below it.
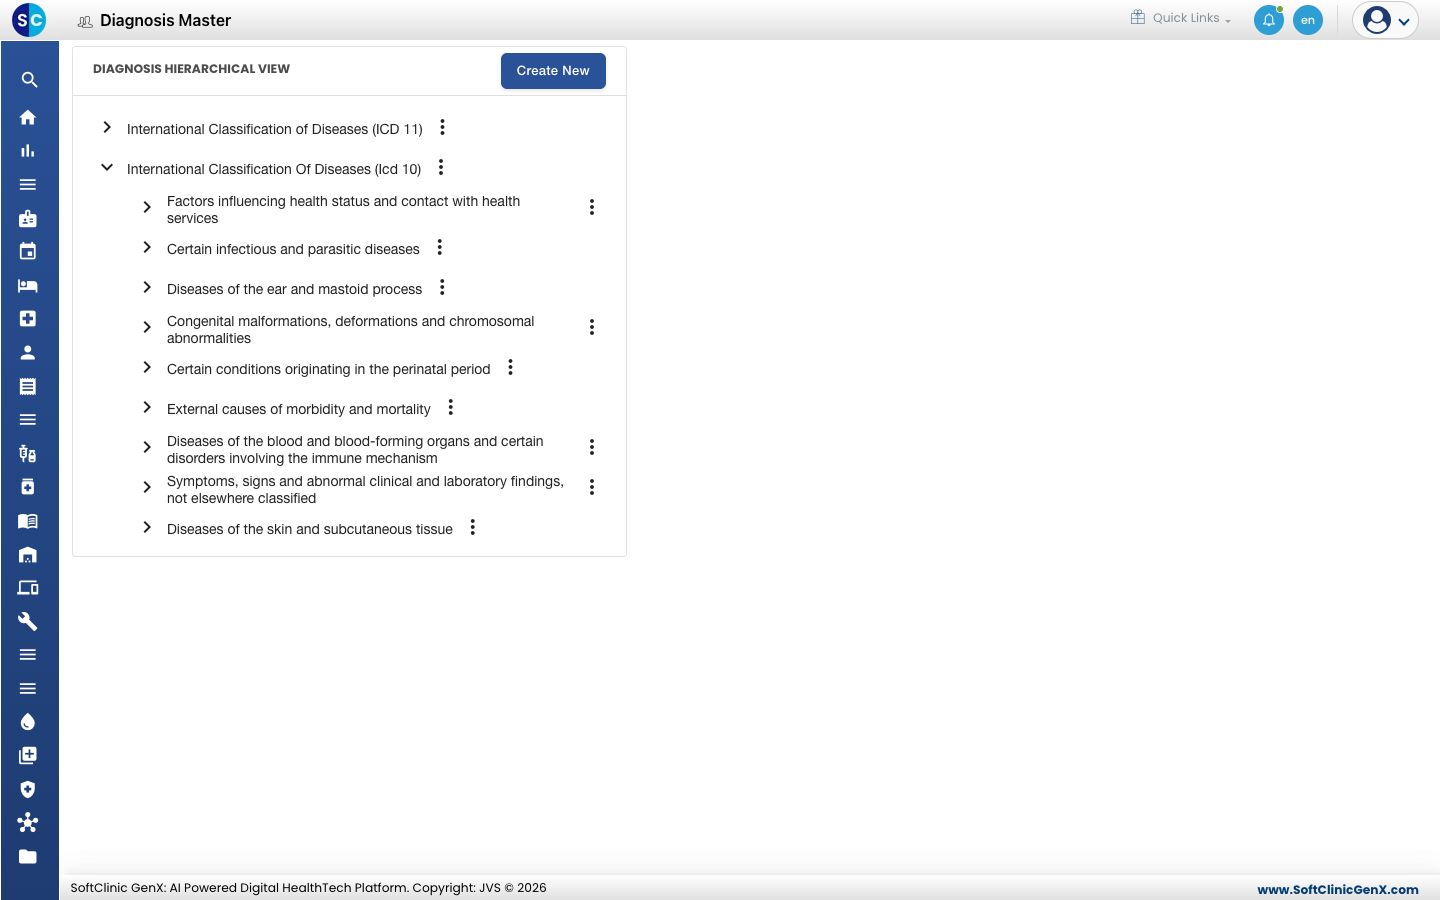
Add a diagnosis under an existing entry
-
Open the tree to the entry the new diagnosis belongs under.
-
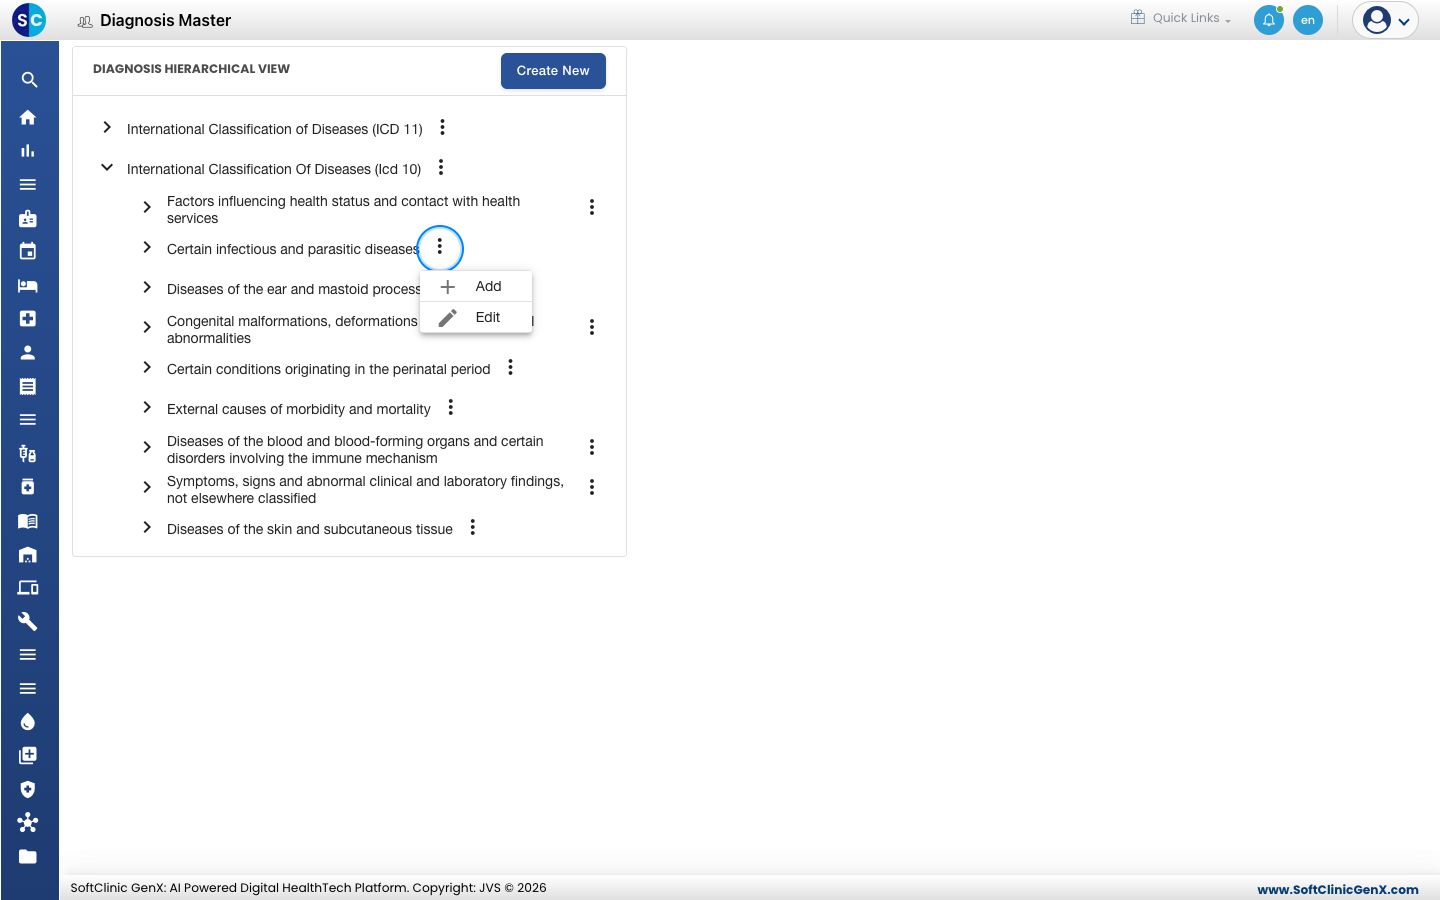
Click the ⋮ button next to that entry and choose Add.
-
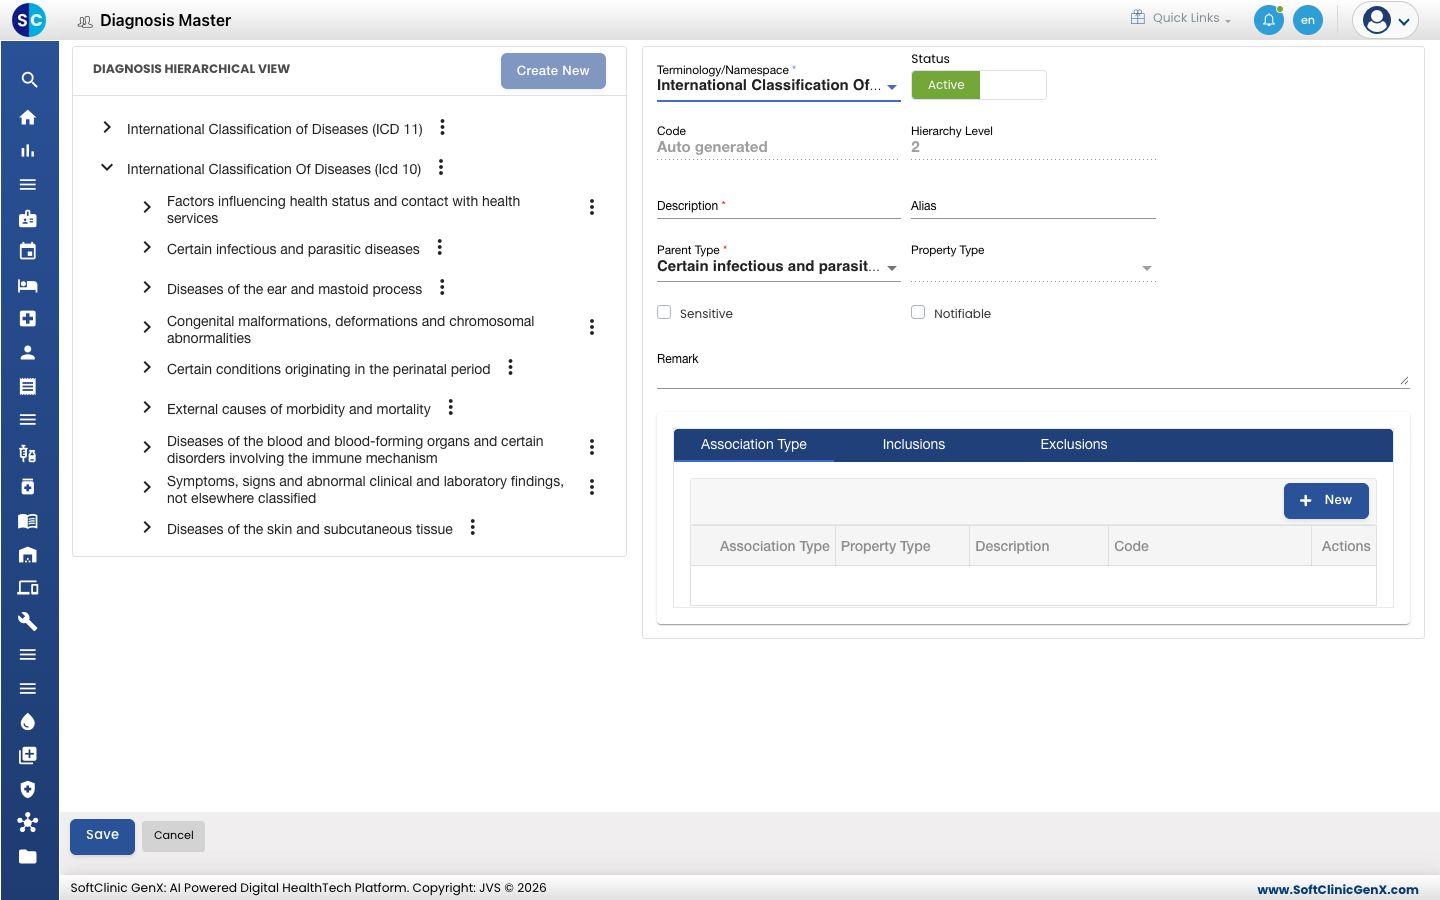
The form opens on the right with Terminology/Namespace, Hierarchy Level and Parent Type already filled in from the entry you chose.
-
Fill in the fields:
Field What to enter Required Terminology/Namespace The coding system. Filled in from the parent entry. Yes Status Leave on Active. — Code Filled in automatically when you save. — Hierarchy Level The level in the tree, from 1 to 4. Filled in from the parent entry. Yes Description The diagnosis as doctors should see it, for example Typhoid fever. Up to 400 characters. Yes Alias Another name for the diagnosis. No Parent Type The entry this diagnosis sits under. Filled in from the entry you chose. Yes Property Type The kind of entry at this level. Set for you from the level. Yes Sensitive Tick if the diagnosis is sensitive and should be handled with extra care. No Notifiable Tick if the disease must be reported to the health authorities. No Remark Any note for your staff. No -
To link related diagnoses, open the Association Type, Inclusions or Exclusions tab at the bottom and click New.
-
Click Save. The new entry appears in the tree.
Add a new coding system
- Click Create New. The form opens on the right with Hierarchy Level set to 1.
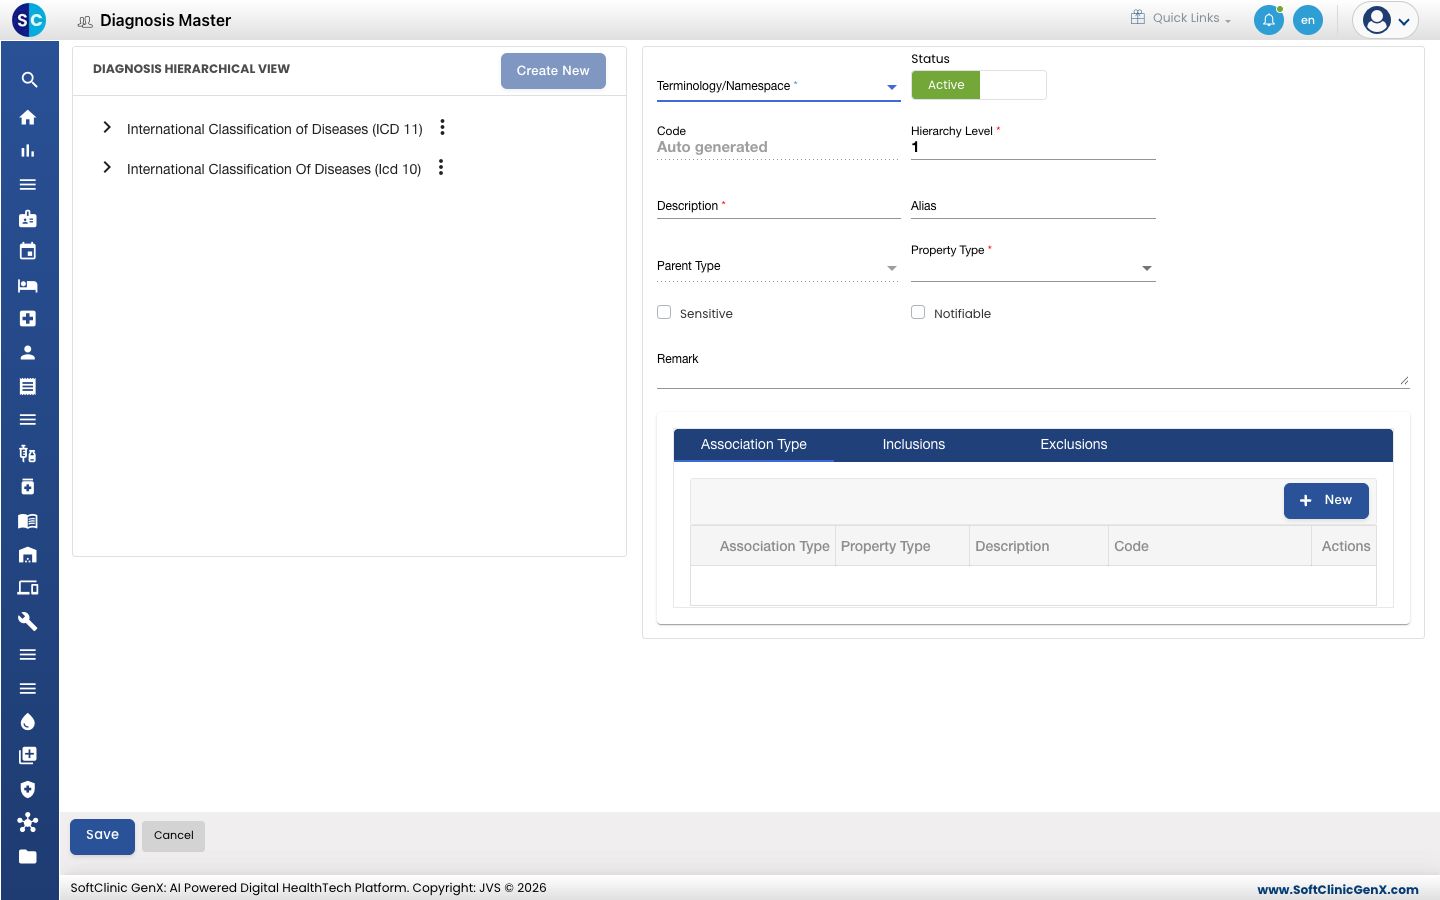
- Pick the Terminology/Namespace, type the Description and fill in the other fields as above.
- Click Save. The new entry appears at the top of the tree.
Change, deactivate or delete an entry
- Click the ⋮ button next to the entry and choose Edit.
- Change the fields you need. To stop offering the entry, switch Status to Inactive.
- Click Save.
Delete appears in the ⋮ menu only for an entry that has nothing under it. You are asked to confirm before it is removed.
Good to know
- The tree has at most four levels.
- Every entry below the top level needs a parent.
- Codes and descriptions must be unique within the master.
- Click Cancel to close the form without saving.