Cancel a bill and refund the patient
Cancel a whole bill or chosen services on it, record the reason and refund the amount the patient paid.
You cancel a bill when it was raised by mistake or the service was not given. On the Invoice Cancellation screen you pick the bill, tick the services to cancel and record how the money is returned. The bill is not deleted: it stays in the lists as Cancelled Invoice.
note
Who can do this: billing staff with the right to cancel bills
Where: Billing › Invoice Cancellation
Before you start
- Find the bill date and the patient's CR number. See View bills and the daily collection.
- To give the patient a lower price instead, apply a discount on a new bill. To return an advance, refund the deposit.
Cancel the bill
- Go to Billing › Invoice Cancellation.
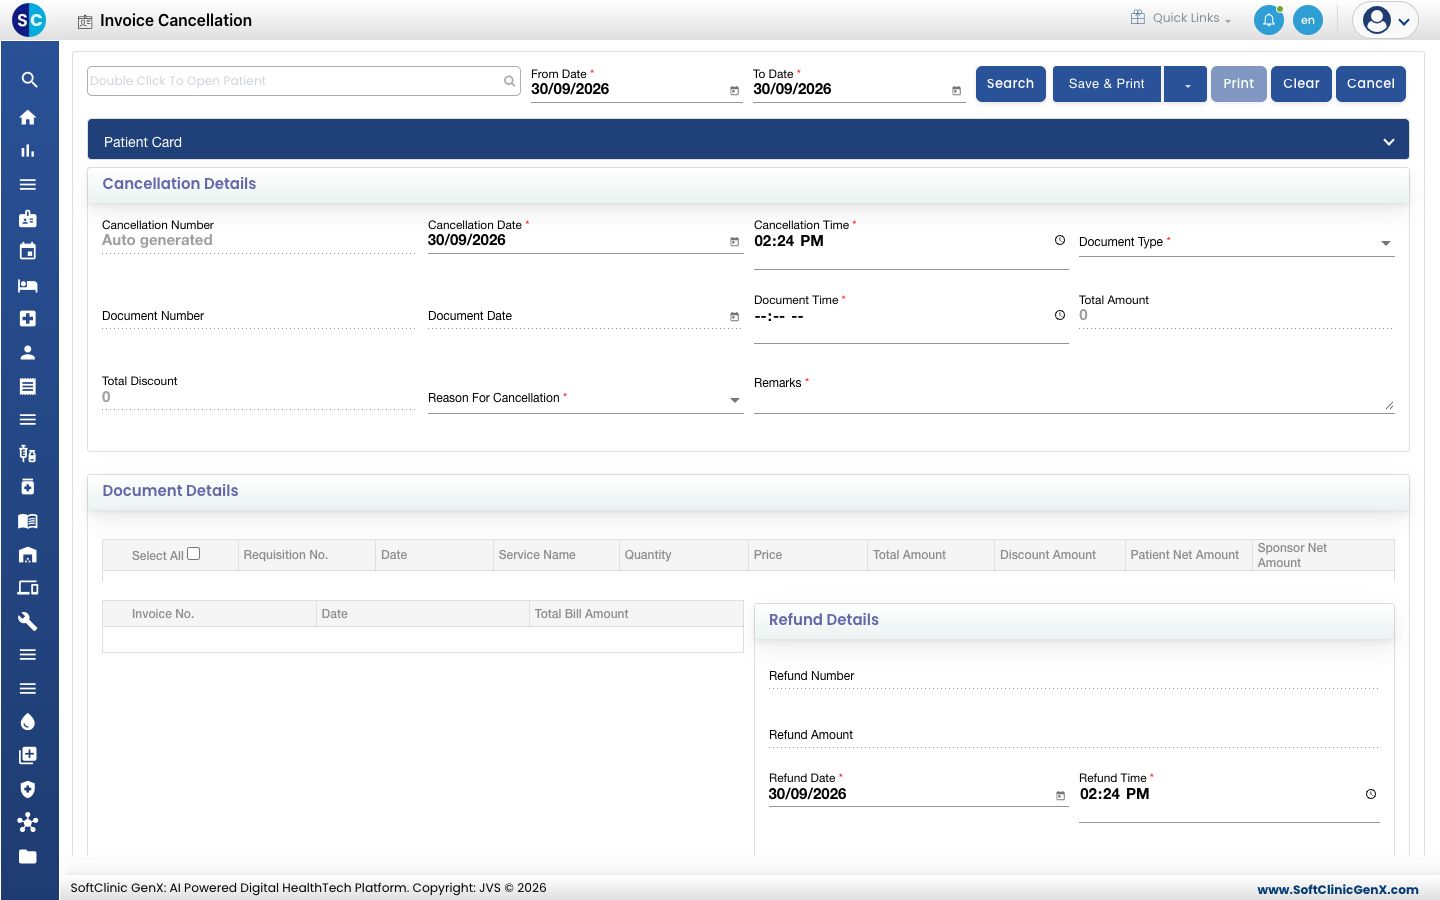
- Type the patient's CR number, name or mobile number in the box at the top left and pick the patient.
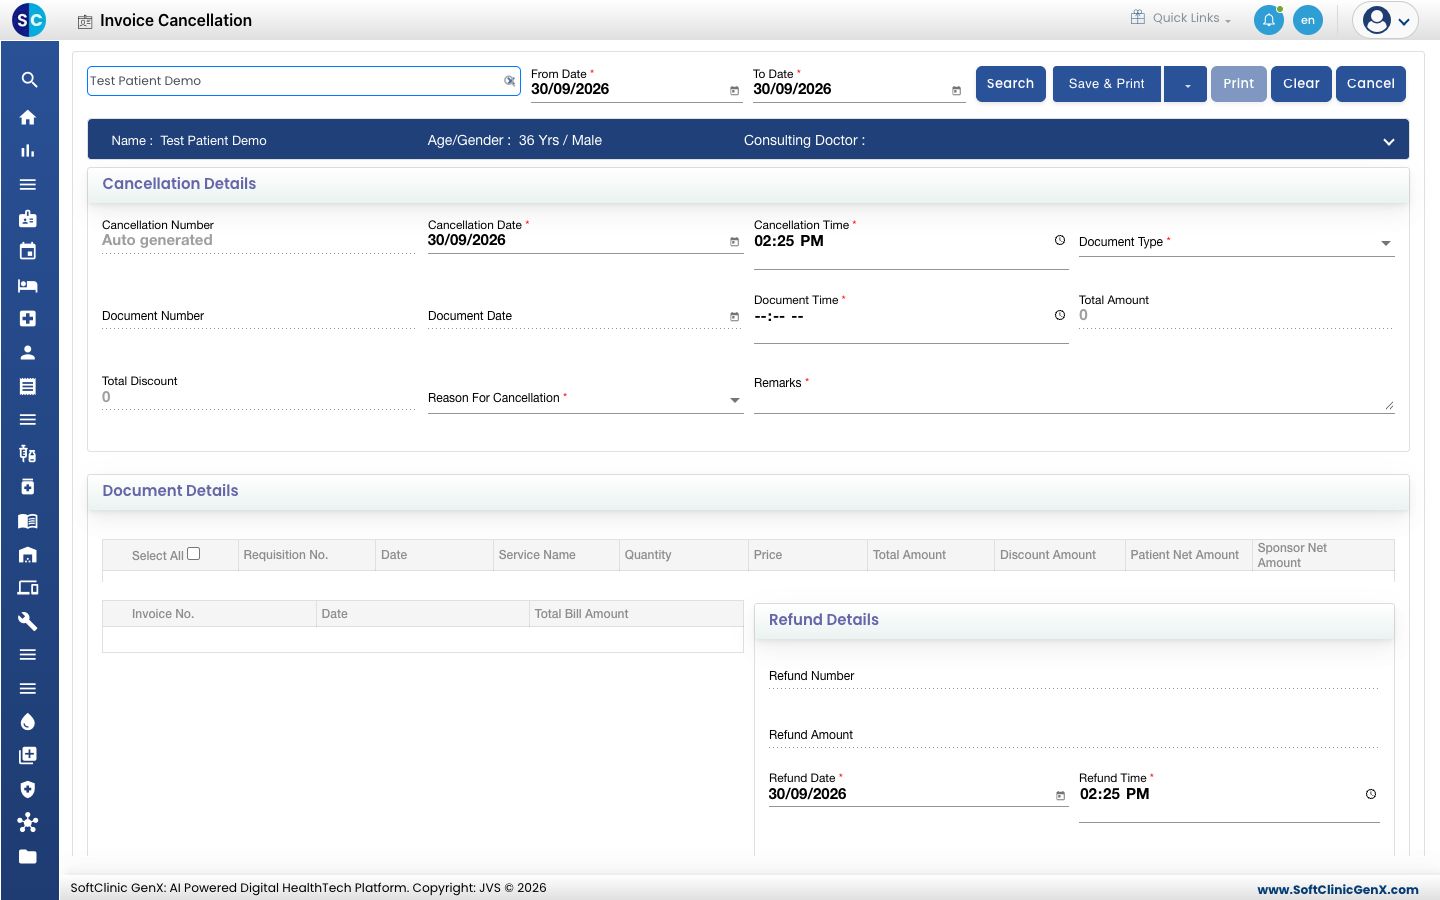
- Set From Date and To Date to cover the bill date and click Search. The Patient invoices box lists the patient's bills in that period.
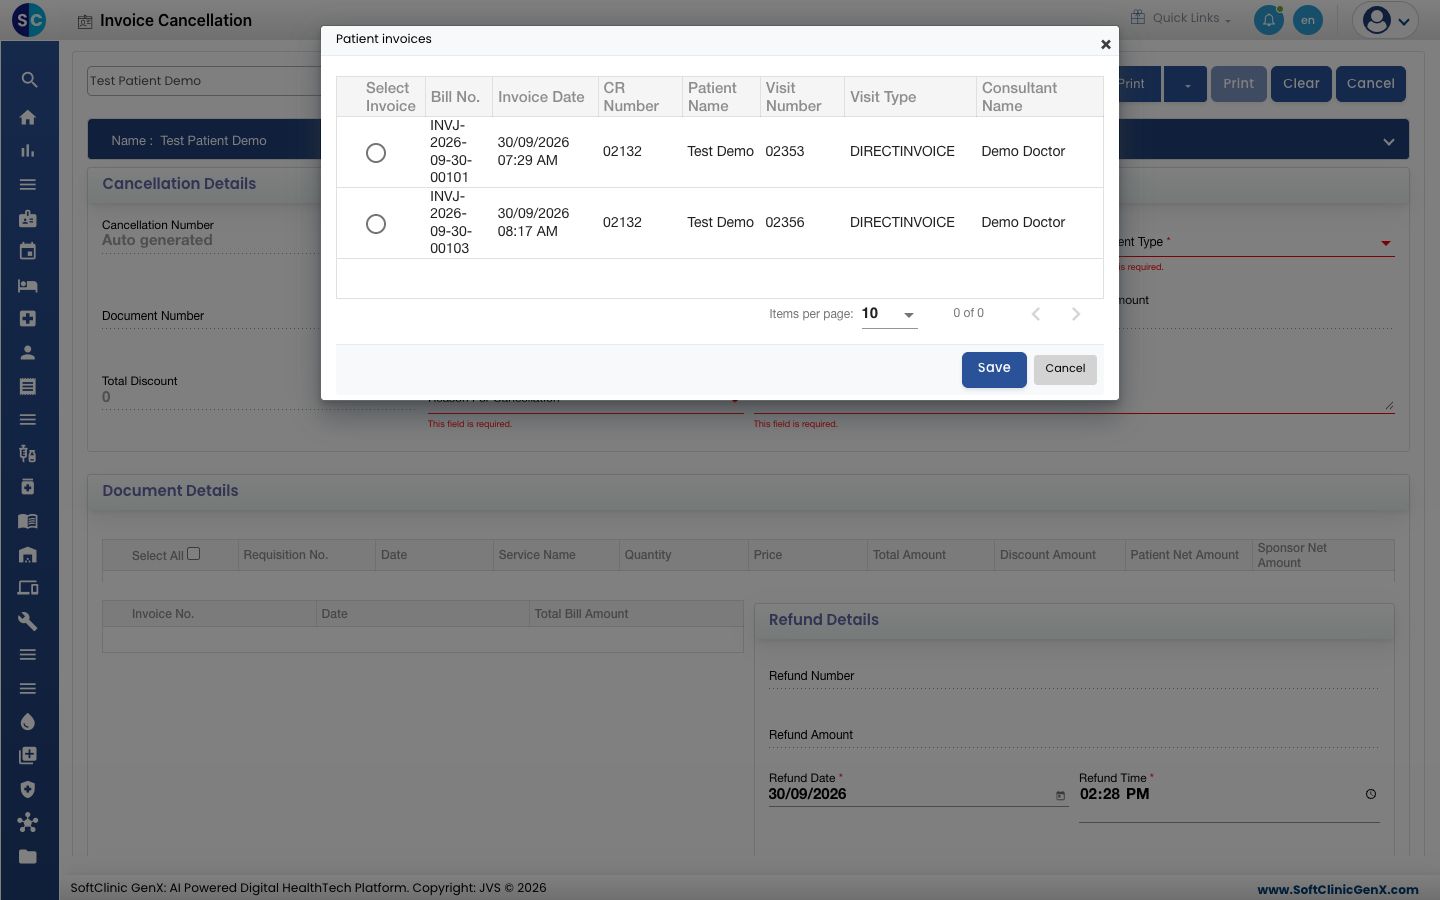
- Select the bill and click Save. The bill number, date and amount fill in, and its services show under Document Details.
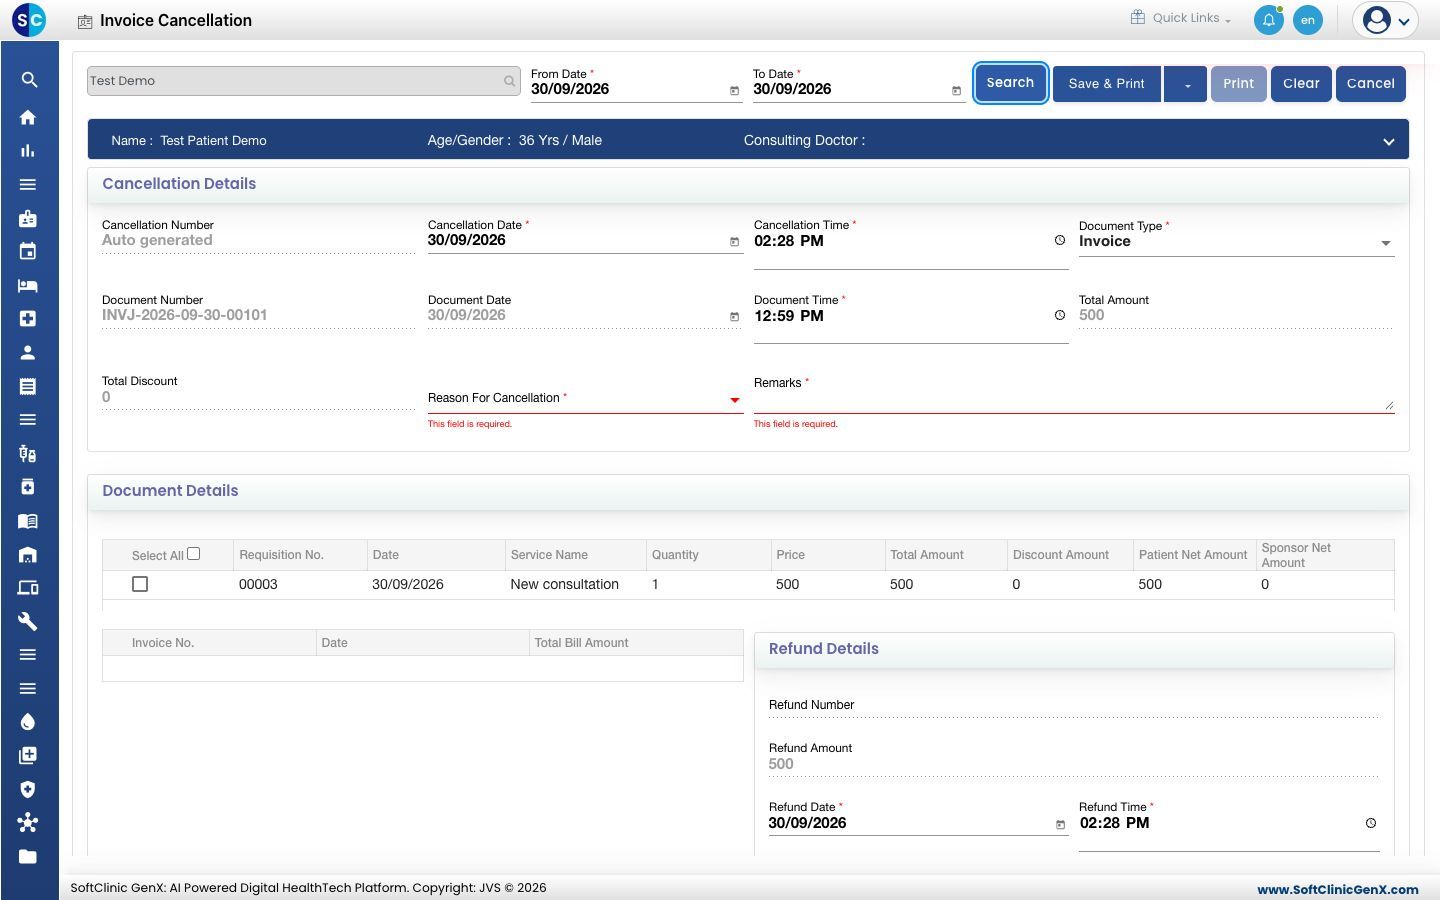
- Tick the services to cancel. Tick Select All to cancel the whole bill.
- Select the Reason For Cancellation and type the Remarks. Both are required.
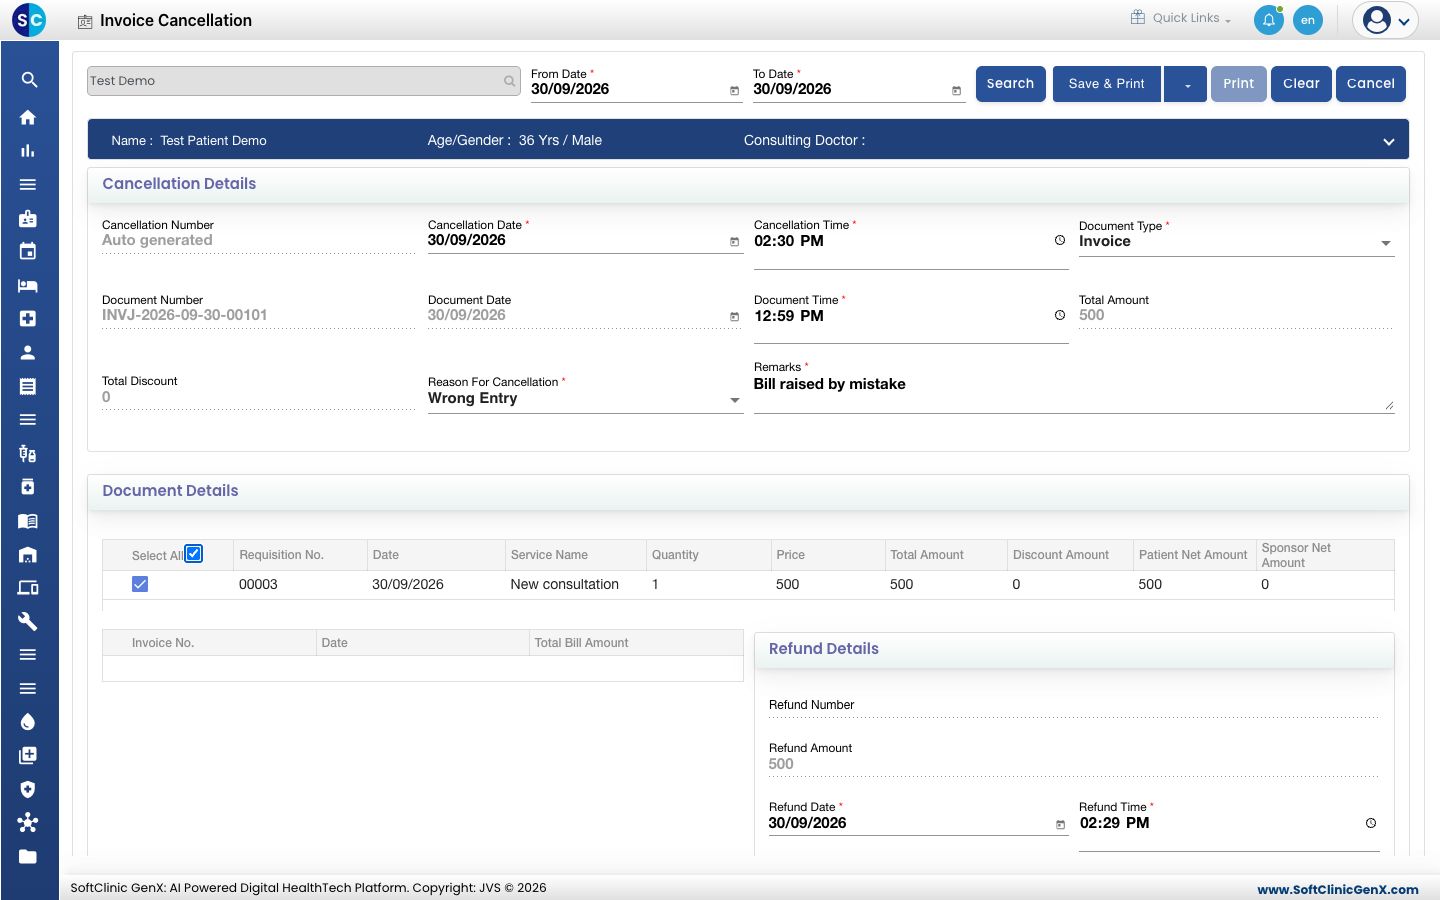
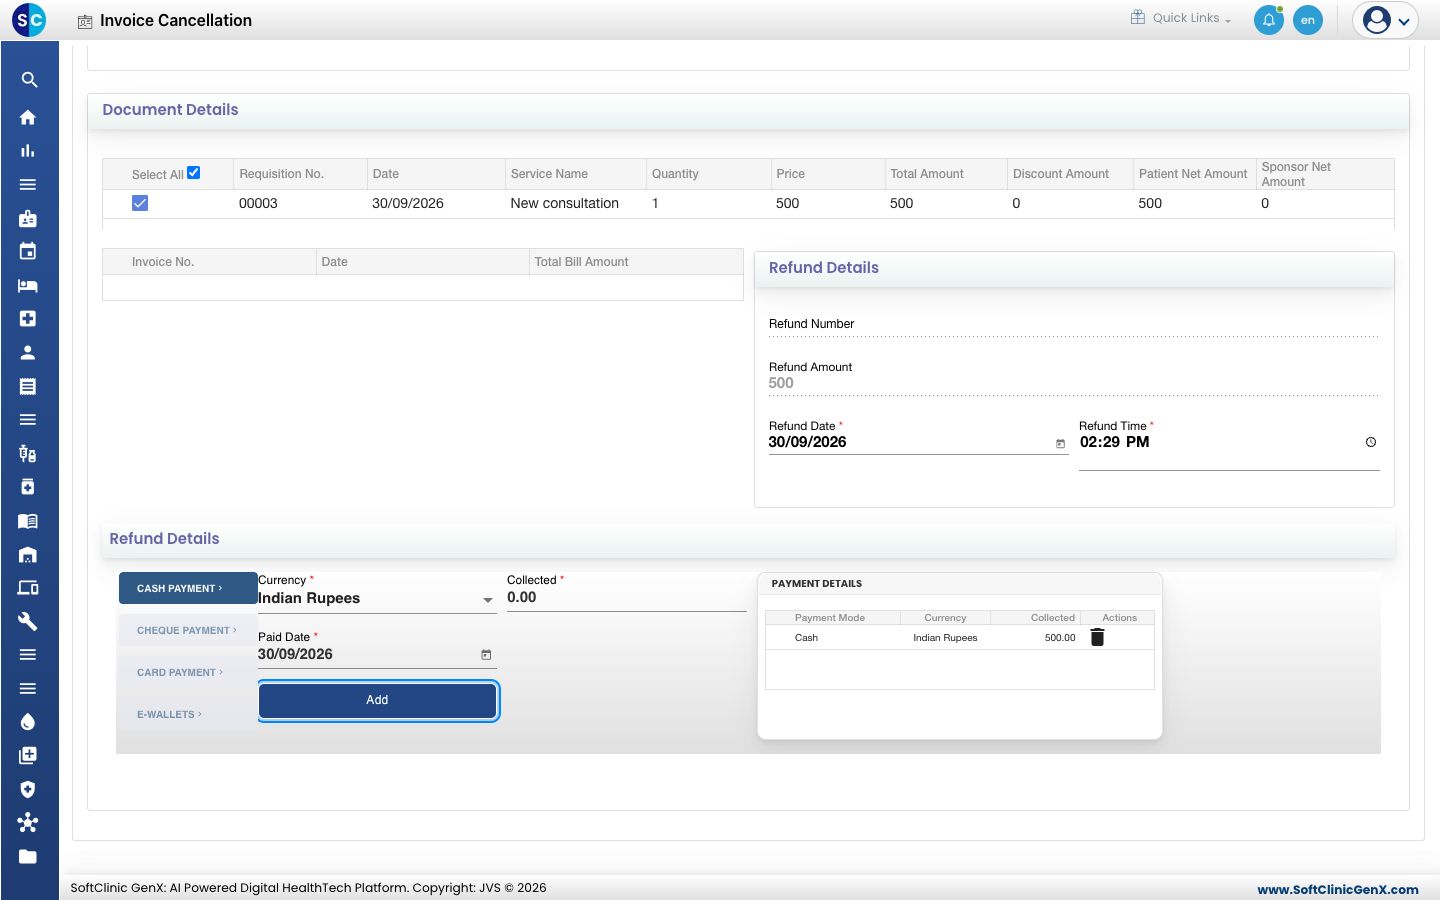
- Scroll down to Refund Details. Refund Amount shows the amount of the ticked services. Choose the refund mode, check that Collected equals the Refund Amount and click Add.
- Click the arrow beside Save & Print and choose Save, or click Save & Print to print the cancellation. A confirmation appears.
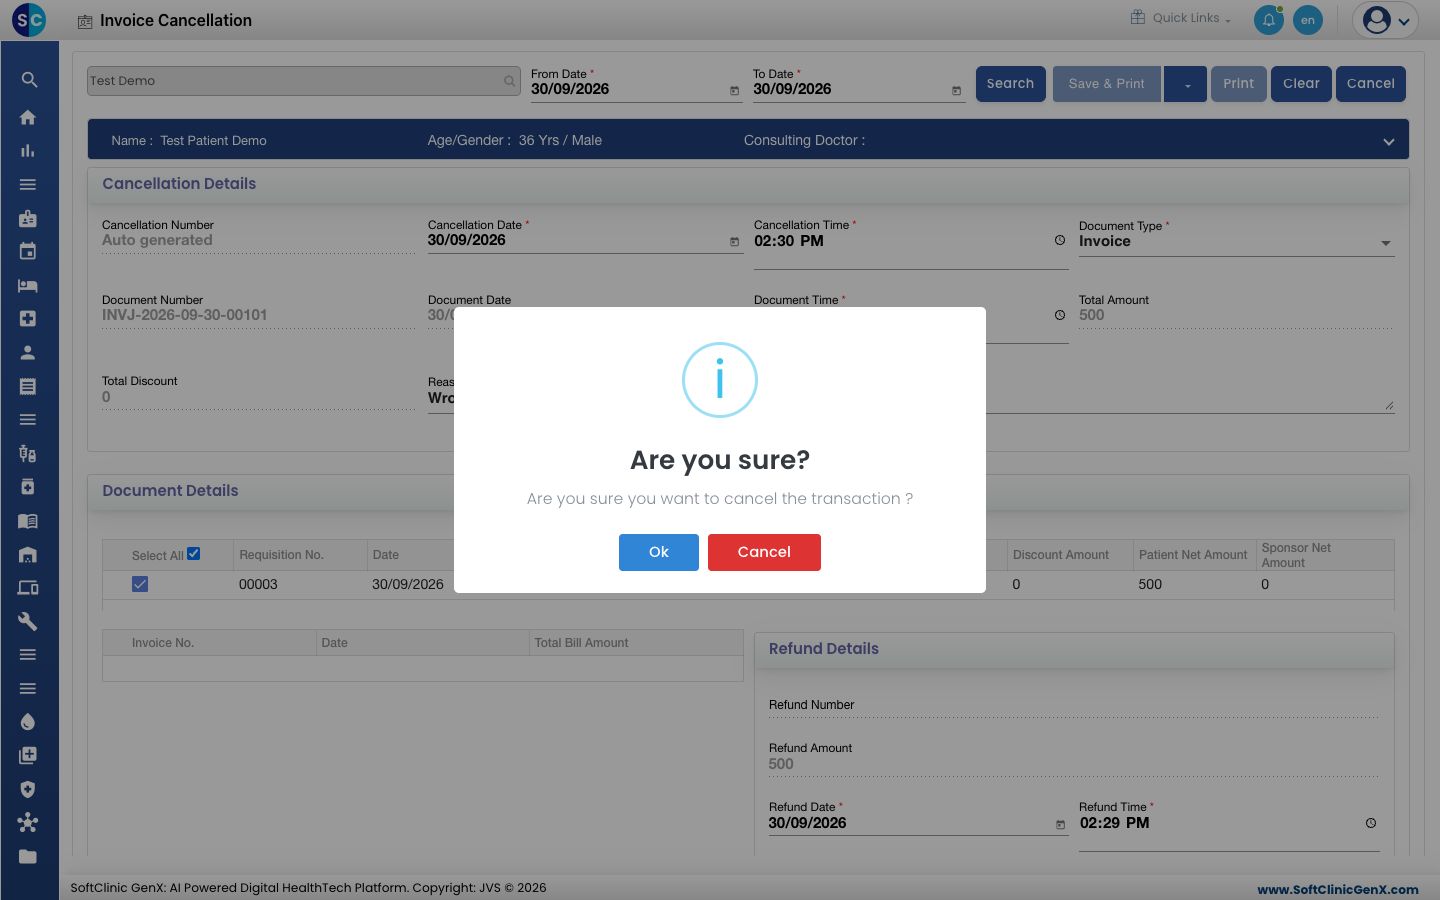
- Click Ok. You see Updated!, then Record saved successfully, and you return to the Billing Dashboard.
warning
A cancellation cannot be undone. If the bill was cancelled by mistake, create a new bill for the patient.
Check the result
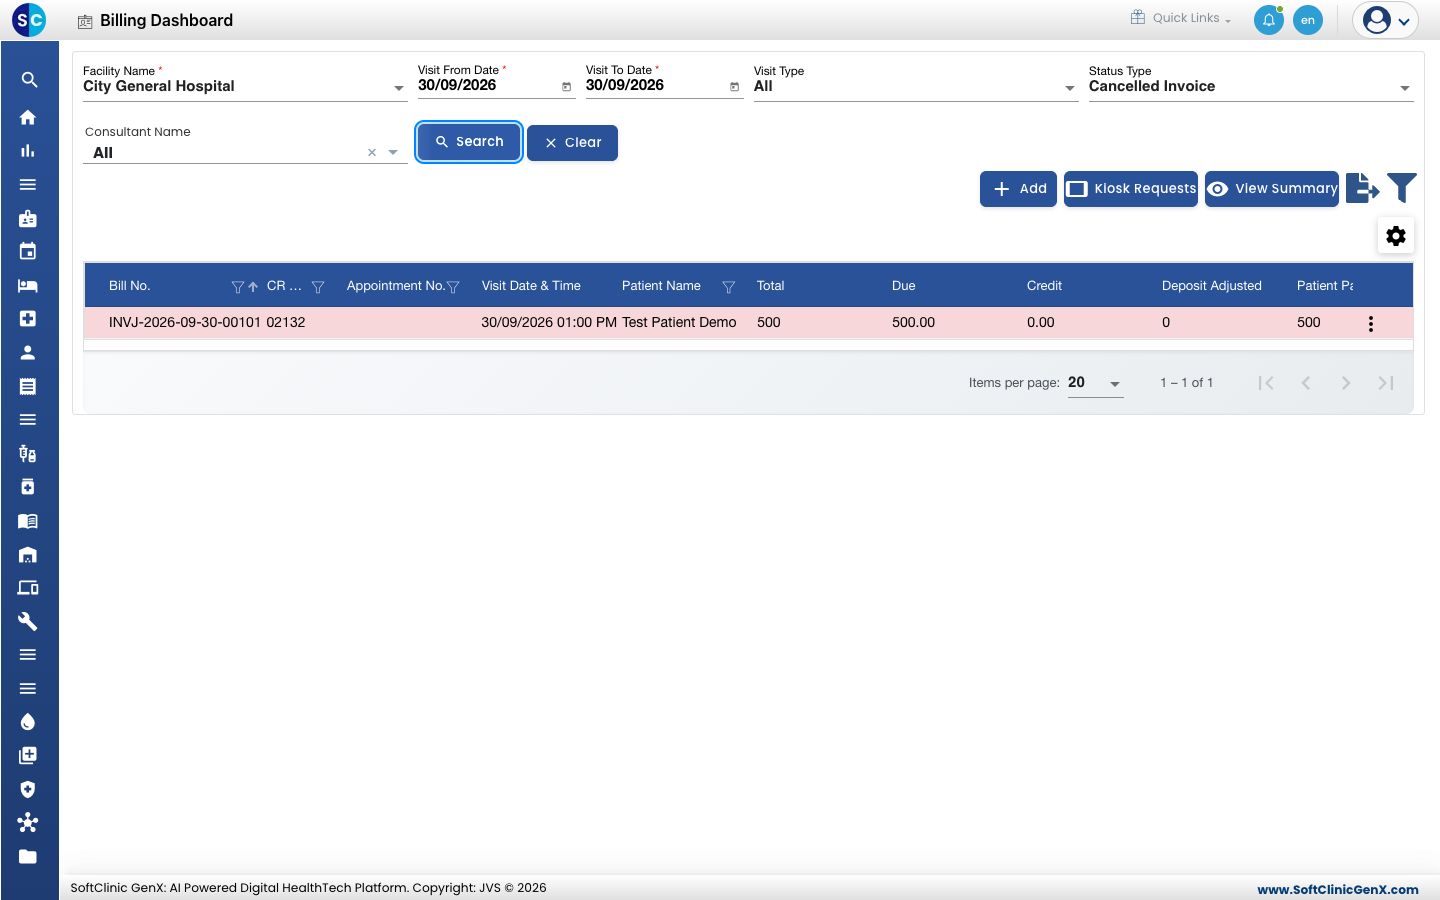
- On the Billing Dashboard, choose Cancelled Invoice in Status Type and click Search. The bill is listed with the status Cancelled Invoice.
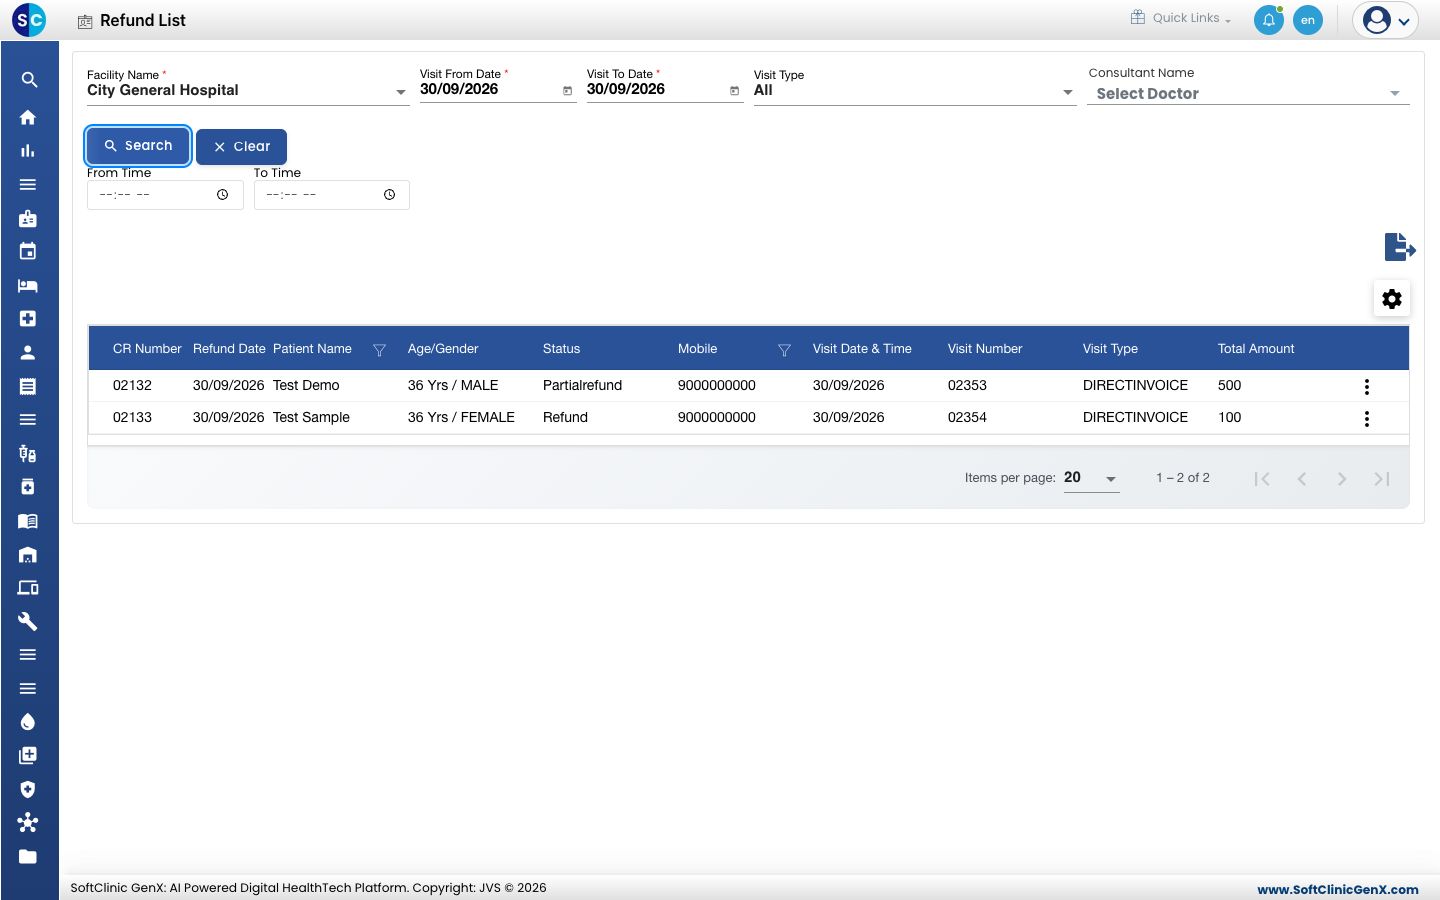
- Go to Billing › Views › Refund List and click Search. The refund is listed with its Refund Amount. Use the three dots on the row to Print it.
Fields on the screen
| Field | What to enter | Required |
|---|---|---|
| Cancellation Number | Filled for you on save. | — |
| Cancellation Date / Cancellation Time | When the bill is cancelled. Now by default. | Yes |
| Document Type | Invoice. Filled when you pick the bill. | Yes |
| Document Number | The bill number. Filled when you pick the bill. | — |
| Reason For Cancellation | Wrong Entry, Not Justified or Stay extended due to patient condition. | Yes |
| Remarks | A short explanation. | Yes |
| Refund Amount | The amount of the ticked services. Filled for you. | — |
| Refund Date / Refund Time | When the money is returned. | Yes |
Troubleshooting
| What you see | What it means | What to do |
|---|---|---|
| Please select patient! | No patient is selected. | Pick the patient in the box at the top left. |
| The Patient invoices box is empty | The patient has no bill in the date range. | Widen From Date and To Date and search again. |
| Please add items for cancellation | No service is ticked under Document Details. | Tick at least one service. |
| This field is required. | Reason For Cancellation or Remarks is empty. | Fill both fields. |
| Refundable Amount does not match with Bill Refund Amount | The refund lines do not equal the Refund Amount. | Correct the refund lines under PAYMENT DETAILS. |
| You are not allowed to perform this operation | Your role cannot cancel bills. | Ask your administrator for the cancellation right. |
Related
- Refund a patient deposit: return an unused advance.
- View bills and the daily collection: find the bill and see the refund in the day's totals.
- Billing FAQs: common questions about cancelling a bill.