Admit a patient
Create an admission for a registered patient, give a doctor and a bed, and print the wristband.
An admission puts a registered patient on a bed under a doctor and gives the stay an Admission Number. Every in-patient task that follows, such as nursing, billing and discharge, works on this admission.
Who can do this: admission desk and front desk staff with Admission List rights
Where: In-Door Management › Admission List › Add
Before you start
- The patient is registered. If not, register the patient first.
- Wards, rooms and beds exist in Bed Masters, and at least one bed is vacant.
- The admission types you use exist in Admission Type Profile.
Create the admission
- Go to In-Door Management › Admission List and click Add. A blank admission form opens.
- Click the box that says Double Click To Open Patient and type at least three letters of the name, the CR number or the mobile number. Pick the patient from the list. The blue card shows the name and Age/Gender.
- Leave Normal selected for a regular stay, or choose Daycare for a same-day stay.
- Select the Admission Type, the Doctor Name and the Admitting Consultant.
- Check the Admission Date and Admission Time. Both are filled with the current date and time.
- Select the Bed, or click Bed Details to pick it from a chart. Bed Class, Room and Ward fill in from the bed. See Choose a bed for an admission.
- Select the Patient Condition.
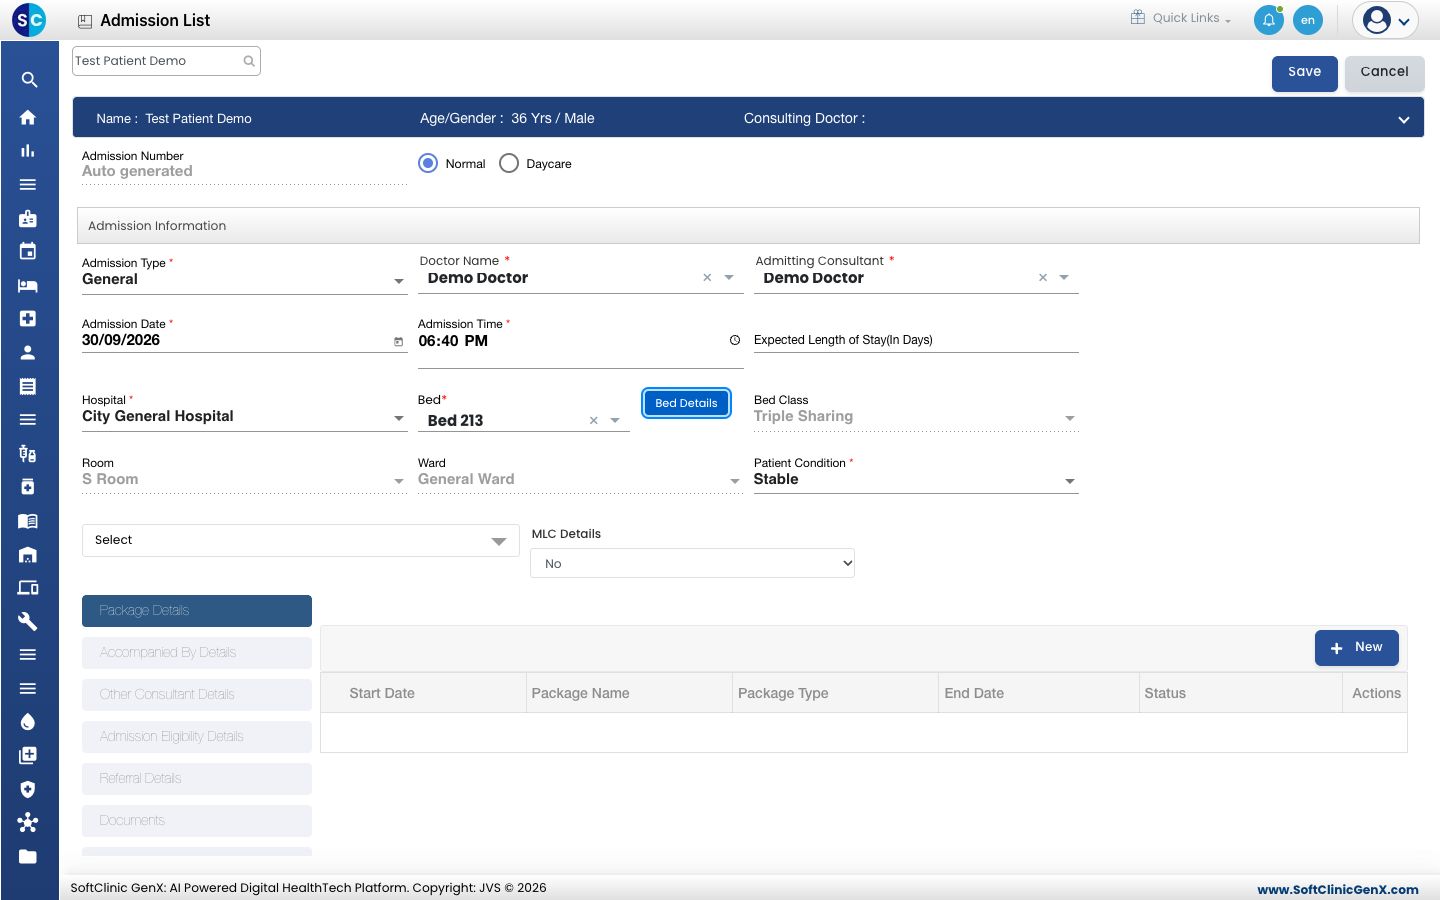
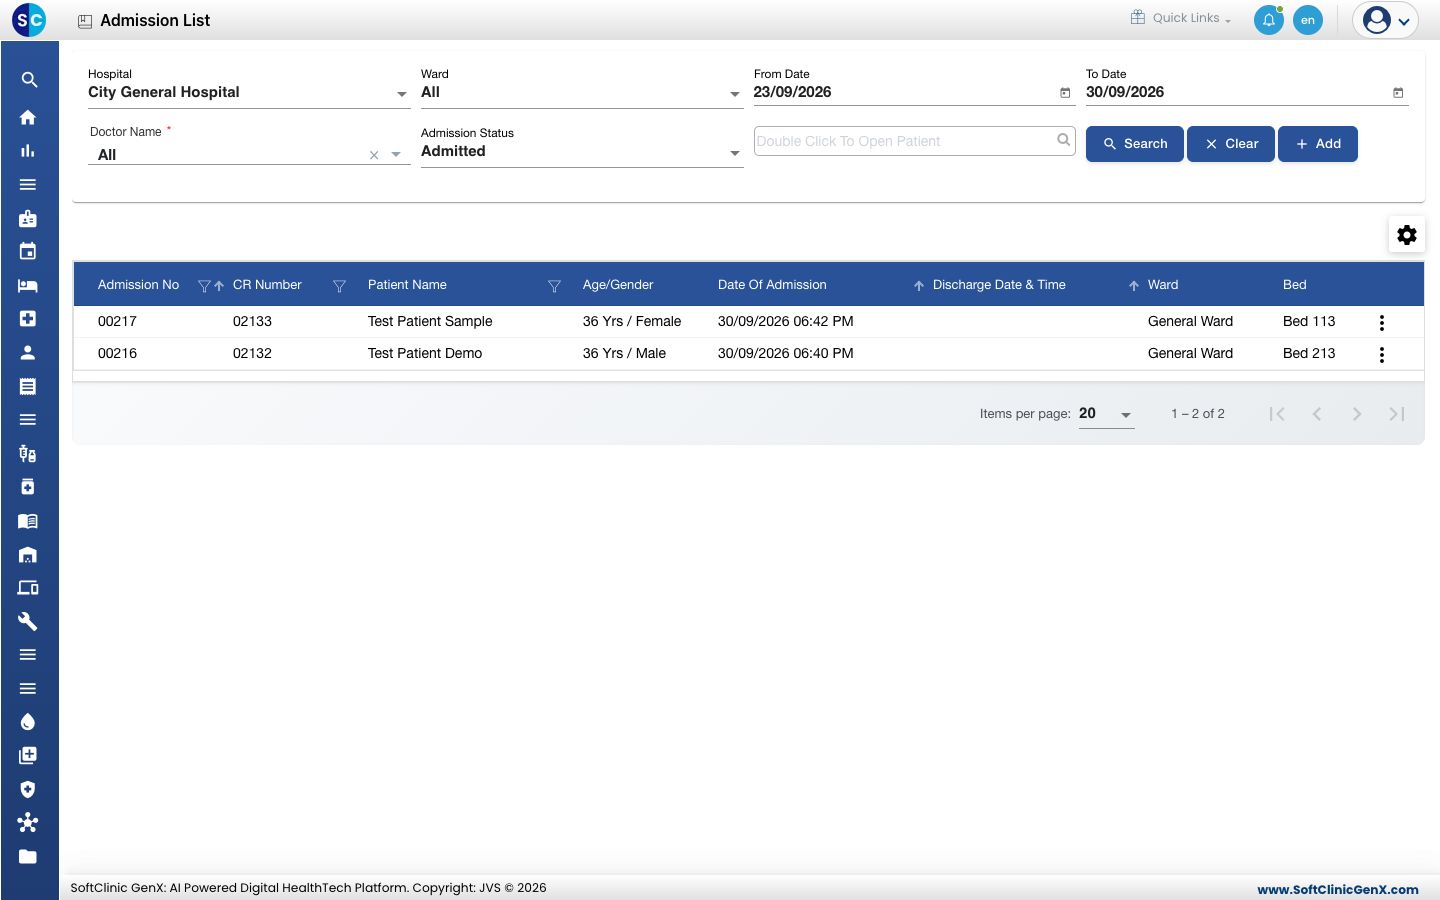
- Click Save. The admission gets its Admission Number and you return to the Admission List, where the patient shows with Admission Status Admitted.
Print the wristband
A Wristband printer window opens as soon as the admission is saved.
- Choose the band size that matches your printer, for example Adult 1" x 11" (25 x 279 mm), or A4 sheet (cut and insert) if the desk has no band printer.
- Click Print.
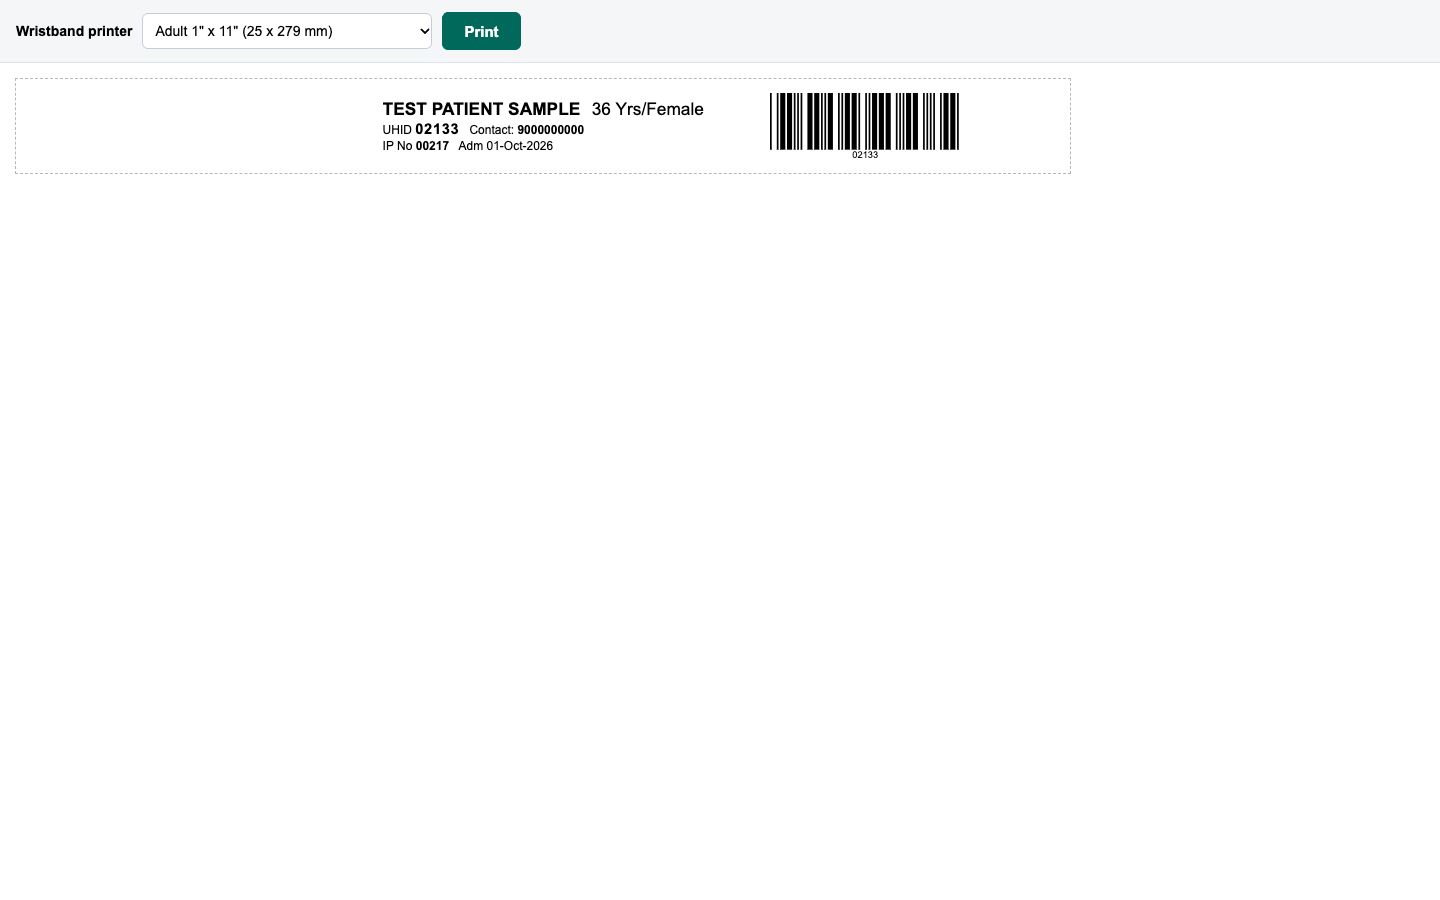
The band carries the patient name, age and gender, UHID, contact number, IP No, admission date and a barcode. The desk remembers the band size, so the next wristband prints without asking.
The wristband window opens only when a new admission is saved. Allow pop-ups for the site in your browser, otherwise the window is blocked.
Fields on the form
| Field | What to enter | Required |
|---|---|---|
| Admission Number | Filled for you on save. | — |
| Normal / Daycare | The kind of stay. | Yes |
| Admission Type | The type from your admission type list, for example General. | Yes |
| Doctor Name | The doctor who treats the patient during the stay. | Yes |
| Admitting Consultant | The consultant who admits the patient. | Yes |
| Admission Date, Admission Time | When the patient is admitted. Now by default. | Yes |
| Expected Length of Stay(In Days) | The number of days the doctor expects. | No |
| Hospital | The facility the patient is admitted to. | Yes |
| Bed | A vacant bed. Bed Class, Room and Ward follow the bed. | Yes |
| Patient Condition | Critical, Normal or Stable. | When marked with * |
| MLC Details | Yes for a medico-legal case. The MLC Details tab then has to be filled. | No |
The tabs on the left hold optional details: Package Details, Accompanied By Details, Other Consultant Details, Admission Eligibility Details (Self paying or Insured Patient), Referral Details, Documents, Admission Notes and Patients Visit History. You can fill them now or later from Change admission details.
Troubleshooting
| What you see | What it means | What to do |
|---|---|---|
| Please select patient! | No patient is picked from the list. | Type the name or CR number again and pick the patient from the list. |
| Please fill all required fields. | A field marked with * is empty. | Fill the fields shown in red. |
| Doctor Name is Required, Admitting Consultant is Required or Bed is Required | That field is empty. | Select a value. |
| Patient already Admitted | The patient has an admission that is still open. | Find it in the Admission List. |
| Bed is already occupied by an admitted patient | Someone else took the bed while you were filling the form. | Select another bed. |
| Please fill MLC details. | MLC Details is Yes but the MLC Details tab is empty. | Fill the tab, or set MLC Details to No. |
Related
- Choose a bed for an admission: pick the bed from the list or the chart.
- Take an admission deposit: collect the advance after admitting.
- Print the admission form and stickers: print the papers for the file.
- In-Door Management FAQs: common questions on the Admission List.