Set up System Settings
Choose which service details your hospital records, turn optional features on or off, limit sign-in to your own network and clear stored print copies.
Who does this: hospital administrator Where: Configurations › Application Settings › System Settings
System Settings holds switches that apply to the whole hospital: which details are kept for each service, whether doctors see only their own patients, whether optional modules are available, how access rights and tariffs work, and from which networks users may sign in.
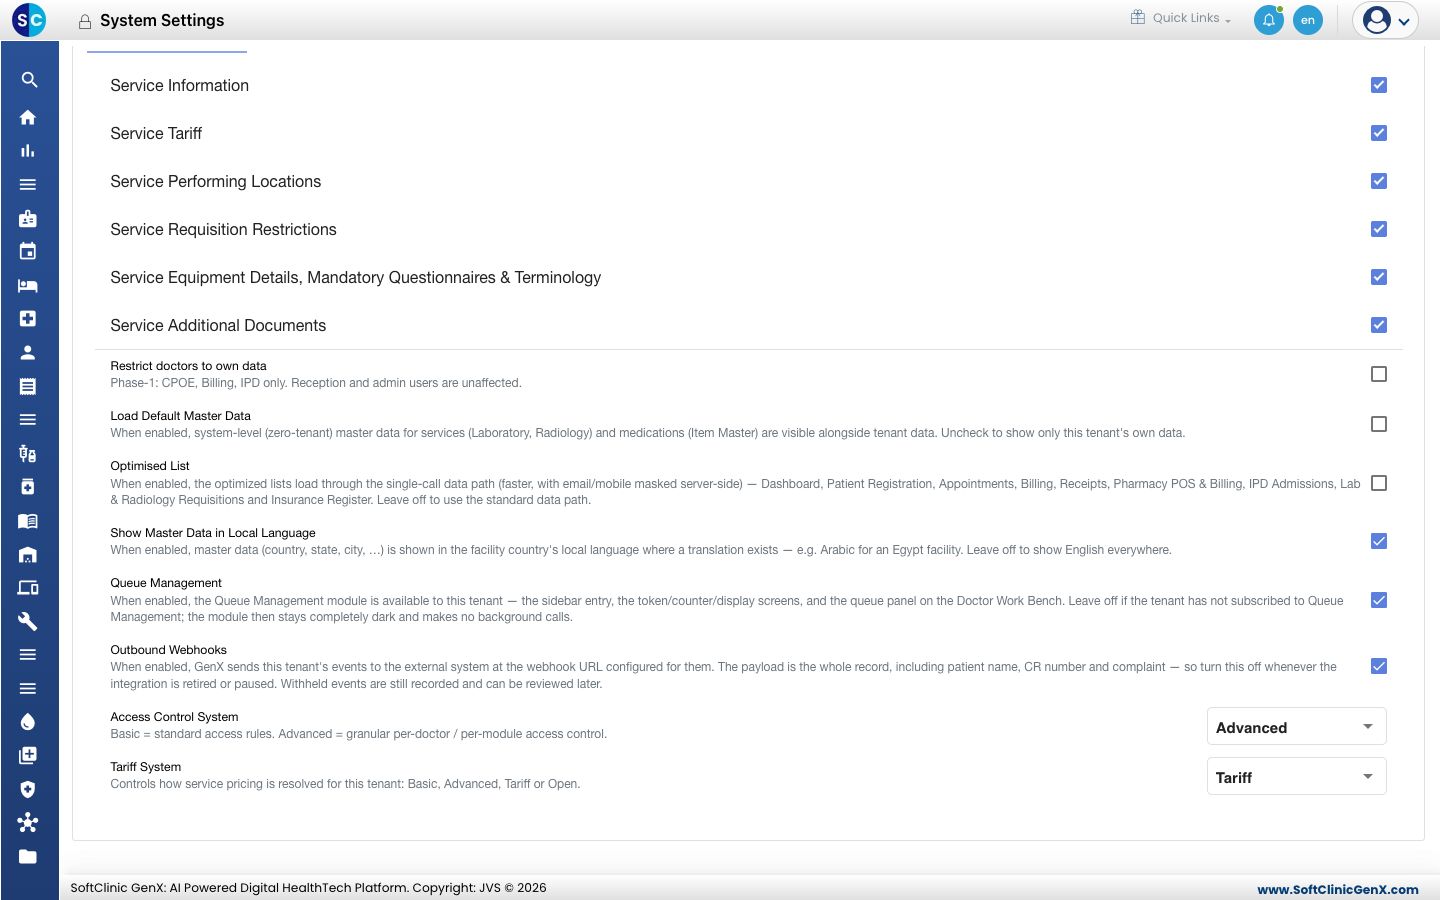
Change the system settings
-
Go to Configurations › Application Settings › System Settings.
-
On the System Settings tab, tick or clear the options you need:
Setting What it does Service Information … Service Additional Documents The sections shown on the service form. Clear a section your hospital does not use to keep the form short. Restrict doctors to own data Doctors see only their own patients in the doctor, billing and in-patient screens. Reception and admin users are not affected. Load Default Master Data Shows the ready-made laboratory, radiology and medicine lists alongside your own. Clear it to show only your hospital's own entries. Optimised List Loads the busiest lists faster, with patient email and mobile partly hidden. Show Master Data in Local Language Shows countries, states and cities in the facility country's local language where a translation exists. Queue Management Makes the Queue Management module available. Leave it off if your hospital has not subscribed to it. Outbound Webhooks Sends records to an outside system you have connected. Turn it off when that connection is no longer used. Access Control System Basic gives standard access rules. Advanced lets you set rights per screen and per doctor. Tariff System How service prices are worked out: Basic, Advanced, Tariff or Open. -
Click Save at the top of the screen. Cancel drops your changes.
Allow sign-in only from your network
- Open the IP Settings tab.
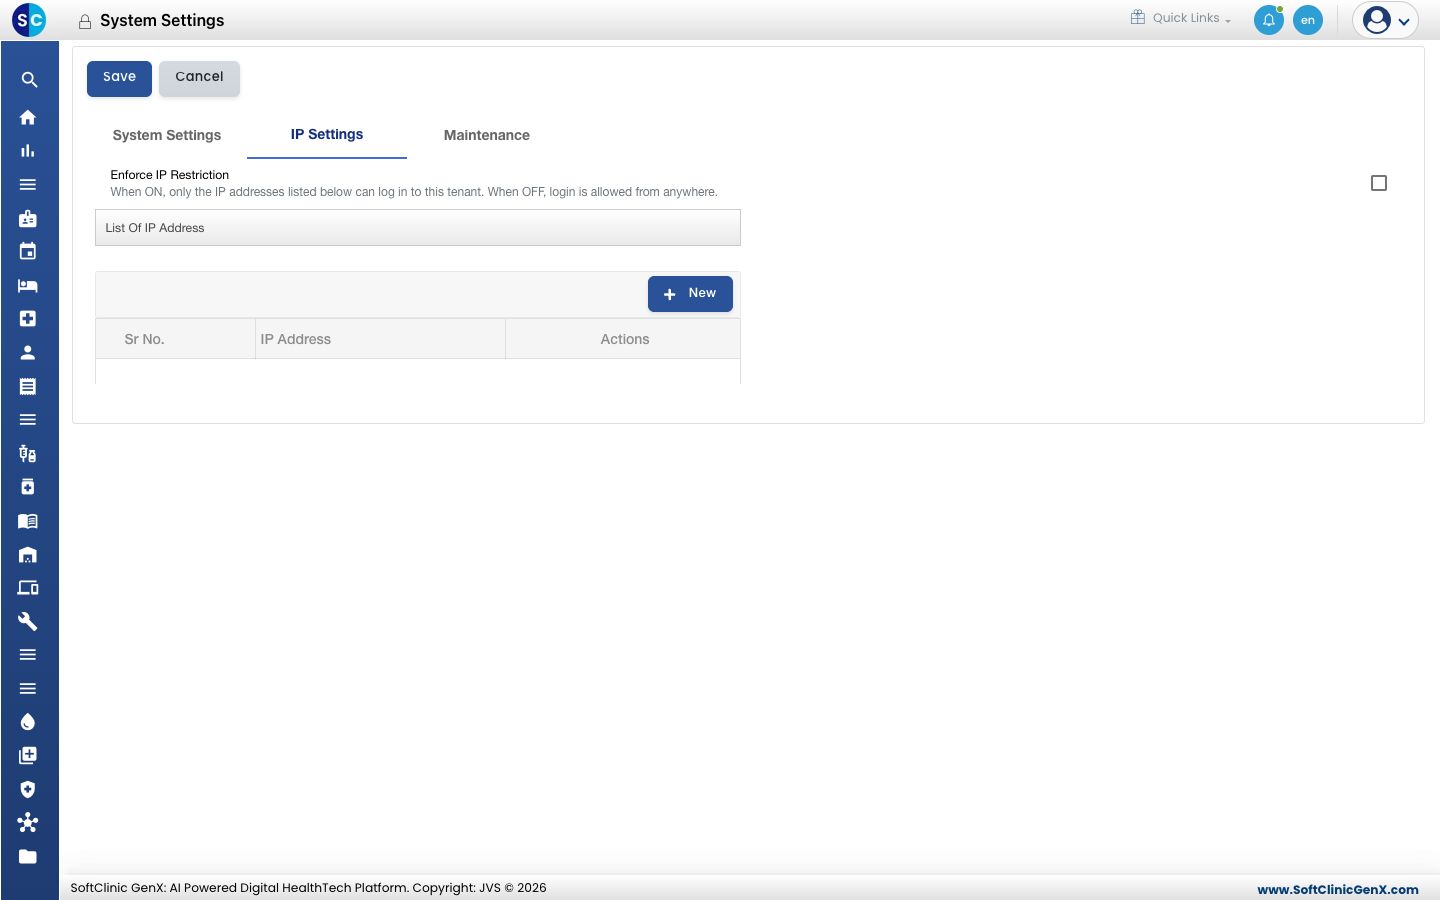
- Click New and enter an IP address your hospital uses. Repeat for each address.
- Tick Enforce IP Restriction.
- Click Save. From now on users can sign in only from the listed addresses.
Before you turn this on, make sure the address of the computer you are using is in the list, or you will not be able to sign in again from it.
Rebuild printed documents
When a bill, report or note was changed after it was printed, the next print may still show the stored copy.
- Open the Maintenance tab.
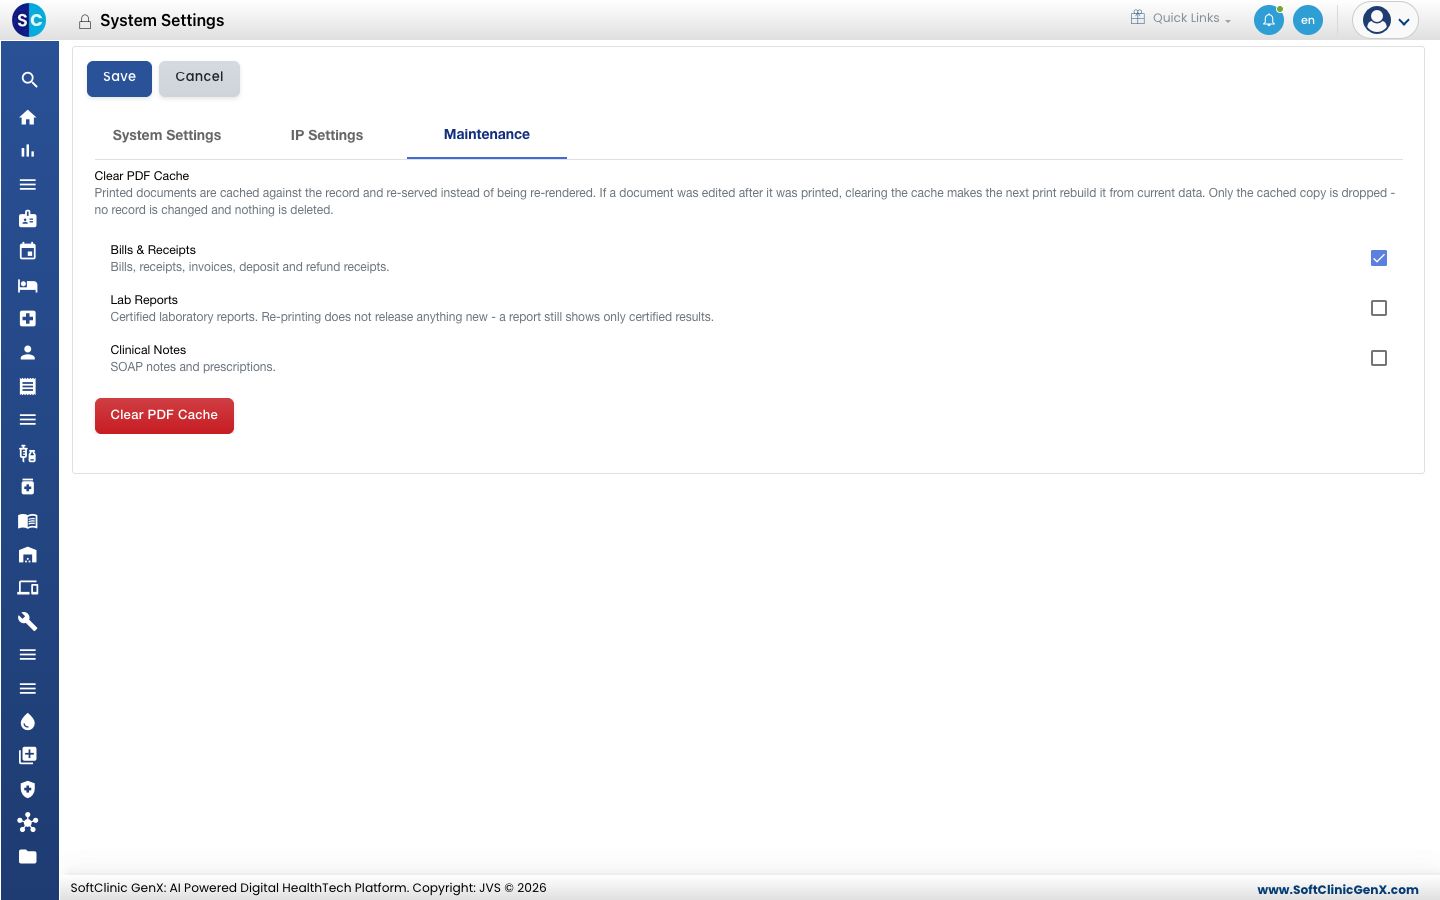
- Tick the kinds of documents to refresh: Bills & Receipts, Lab Reports or Clinical Notes.
- Click Clear PDF Cache and confirm. The next print of each document is built again from current data.
No record is changed or deleted. Lab reports still show only certified results.
Good to know
- Access Control System and Tariff System change how the whole hospital works. Agree the choice with JVS support before you change it.
- With Advanced access control, rights are set per screen in User Roles.
Related
- Previous: Set up Code Setup
- Next: Set up Password Settings
- Configurations (Admin) FAQs