Set up User Management
Create a sign-in for each staff member, give them facilities and roles, and reset passwords or unlock accounts.
Who does this: hospital administrator Where: Configurations › User Management Set up before: User Roles, Password Settings
Every person who signs in to SoftClinic GenX needs a user. A user has a login and password, belongs to one or more facilities, and gets a role in each facility that decides which screens they can use.
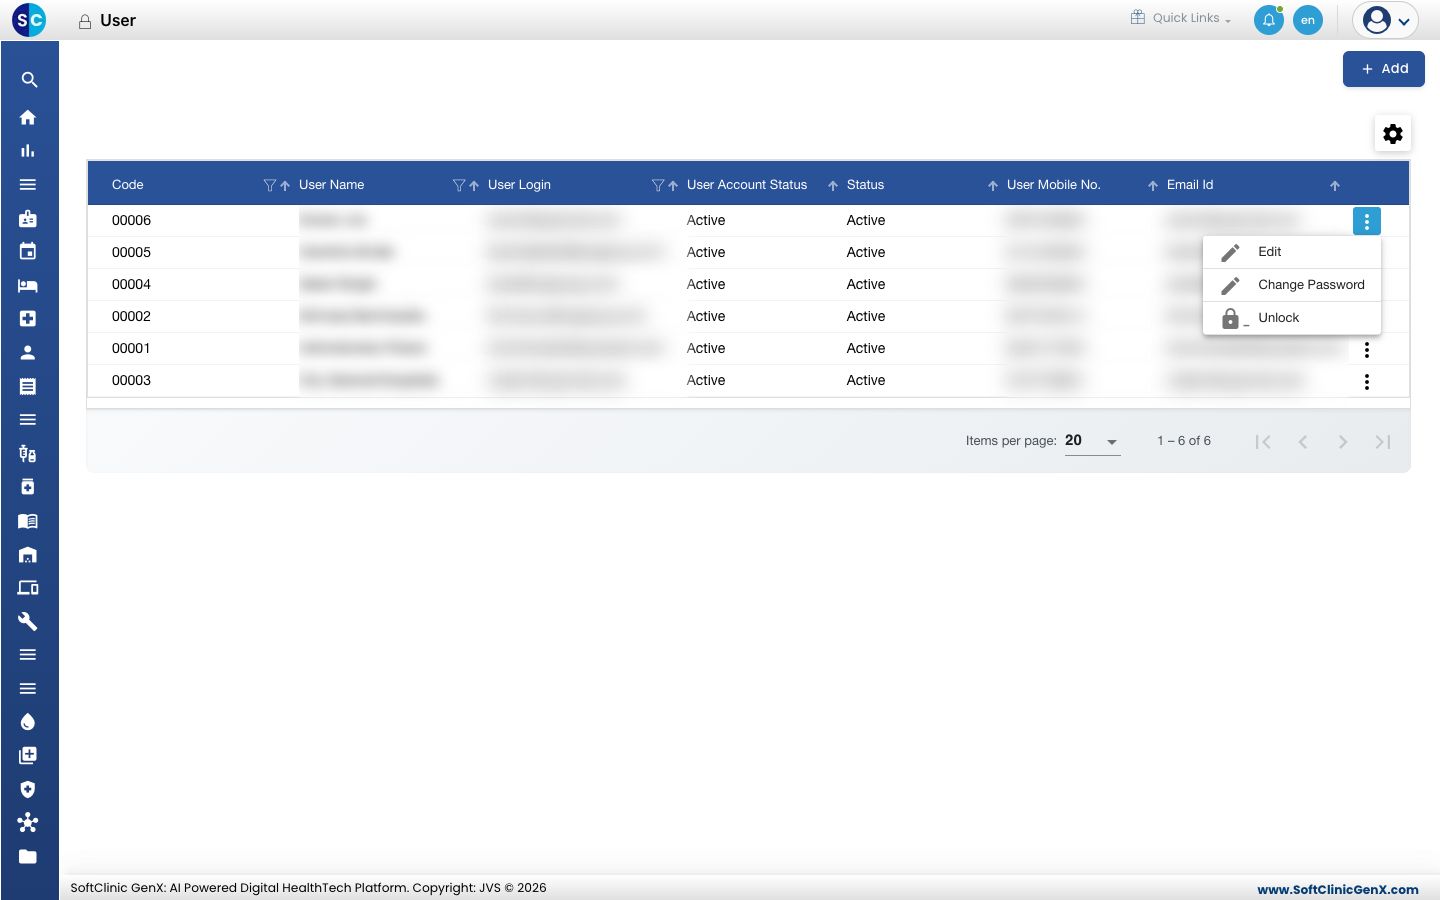
Add a user
-
Go to Configurations › User Management.
-
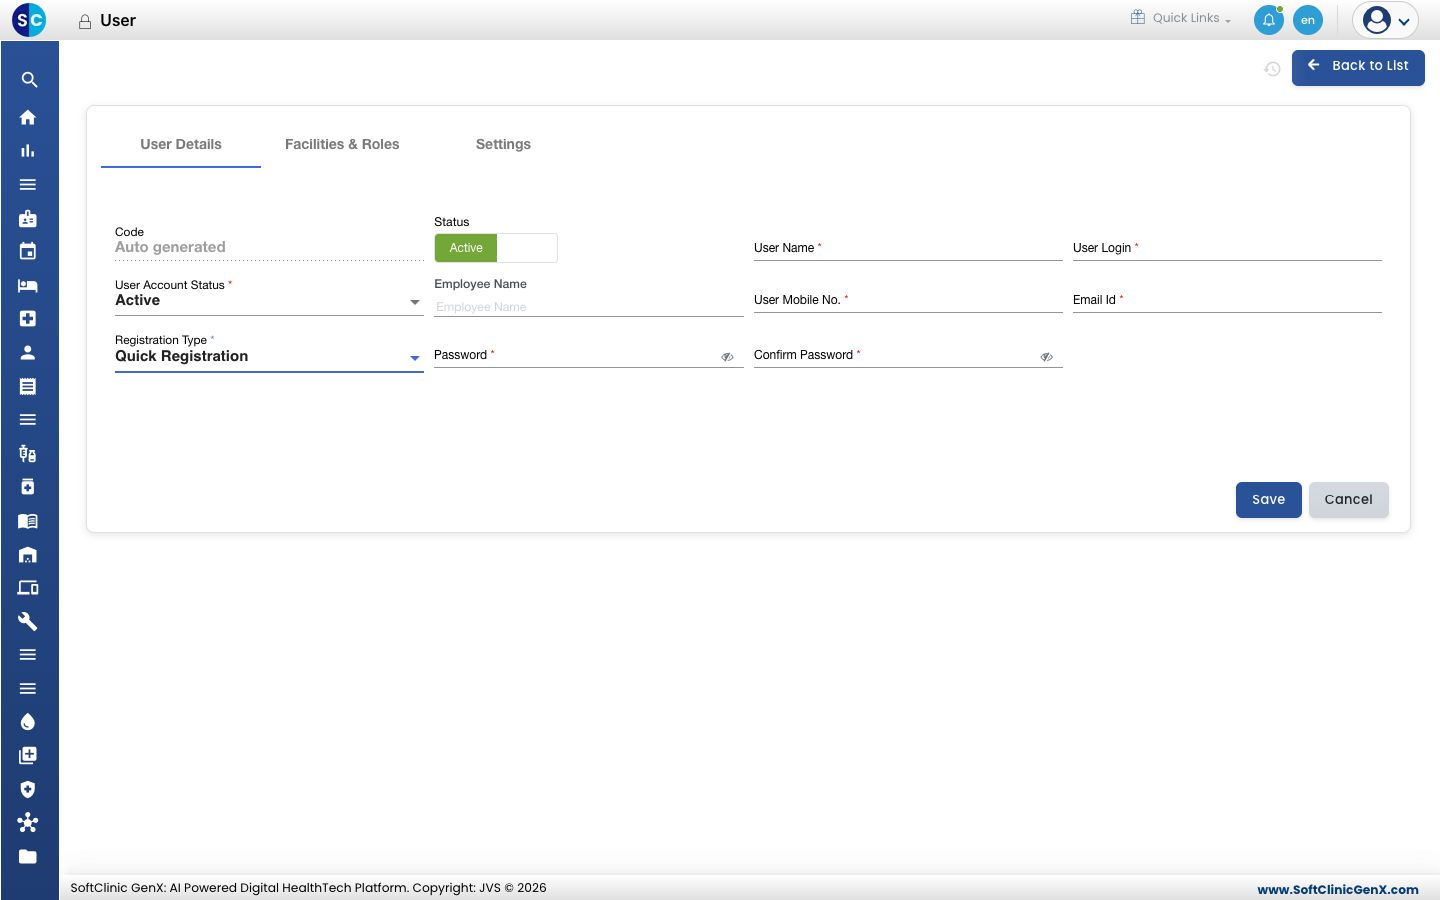
Click Add. The User Details tab opens.
-
Fill in the user's details:
Field What to enter Required Code Filled in automatically when you save. — Status Leave on Active. — User Name The person's full name, as it should appear on screens and prints. Yes User Login The name the person types to sign in. It cannot be changed later. Yes User Account Status Leave on Active. Yes Employee Name Optional. Pick the employee record; the name, login, mobile and email are filled in from it. No User Mobile No. The person's mobile number. Yes Email Id The person's email address. Yes Registration Type The patient registration form this user sees. Quick Registration is the default. Yes Password / Confirm Password The first password. Both must match and follow your password rules. Yes -
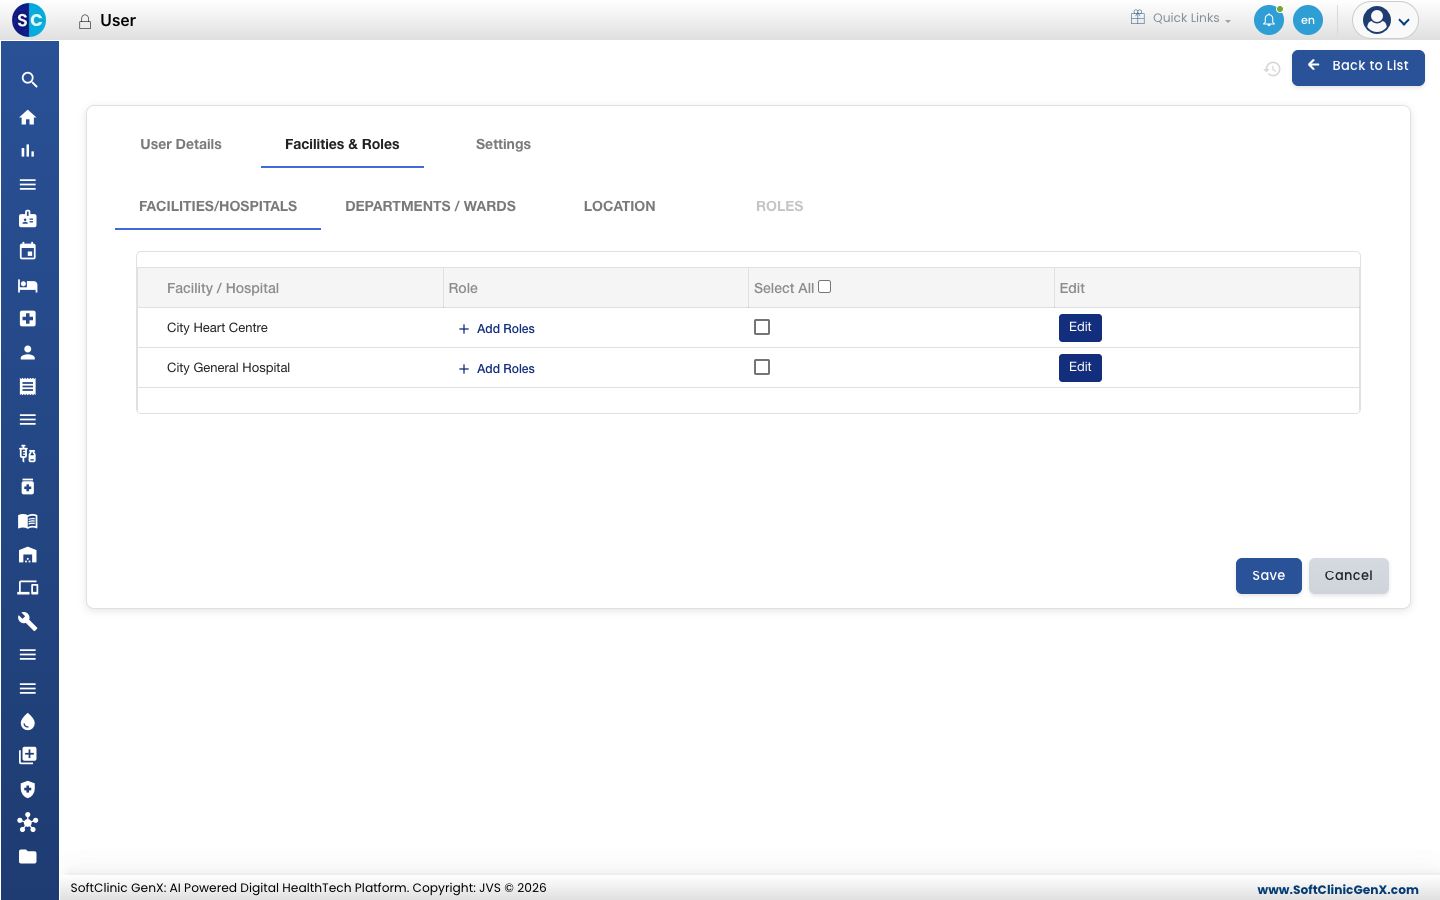
Open the Facilities & Roles tab. For each facility the person works in, tick Select All and click Add Roles to choose their role there. Use DEPARTMENTS / WARDS and LOCATION to limit them to certain departments or locations.
-
Open the Settings tab and check the user's preferences:
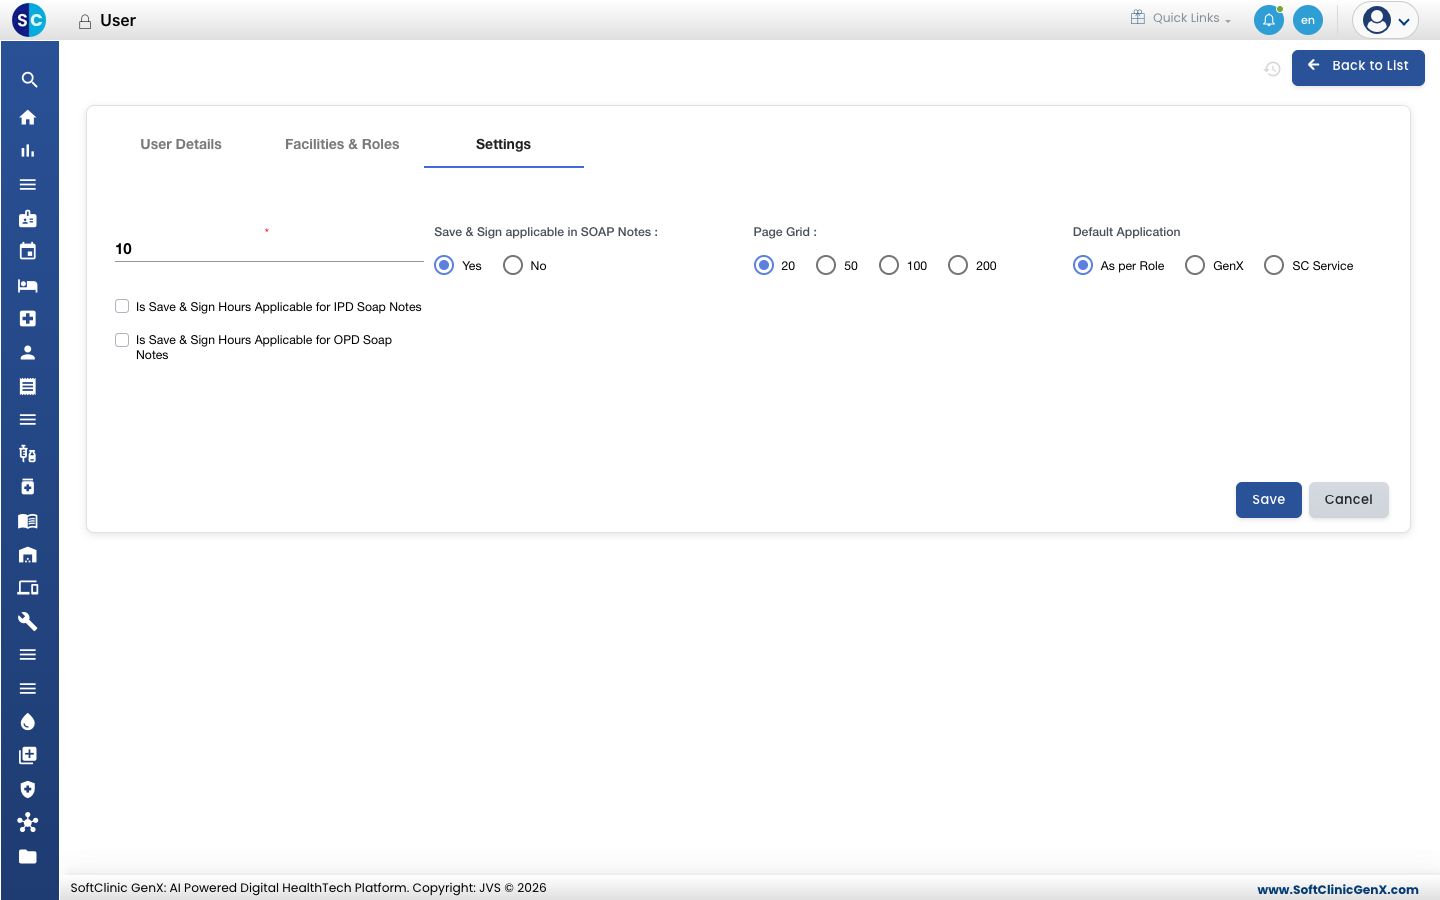
Setting What it does Idle session timeout (first field) Minutes without activity before the user is signed out. 10 to 180. Save & Sign applicable in SOAP Notes Whether the doctor signs clinical notes when saving them. Page Grid How many rows lists show per page. Default Application Which application opens after sign-in. As per Role follows the role. Is Save & Sign Hours Applicable for IPD / OPD Soap Notes Locks signed notes from editing after a set number of minutes. -
Click Save. The user appears in the list and can sign in.
Change a user, reset a password or unlock an account
Click the ⋮ button on the user's row and choose:
- Edit — change details, facilities, roles or settings, then click Save. To stop someone signing in, set Status to Inactive.
- Change Password — enter a New Password and Confirm Password and save. Give the new password to the user.
- Unlock — shown when an account is locked after too many wrong passwords. Confirm to unlock it straight away.
Good to know
- Each user must have at least one facility with a role, or the user cannot be saved.
- The number of active users is limited by your subscription. If you see "User limit reached", make an unused user Inactive or contact JVS support to add users.
- Users can change their own password later. See Change your password.
Related
- Previous: Set up User Roles
- Next: Set up Provider Setting
- Configurations (Admin) FAQs