Save, sign and print a SOAP note
Save a consultation as a draft, sign it to complete the visit, and print the prescription for the patient.
A SOAP note can be saved many times while you work on it. Signing is the last step: it completes the consultation and locks the note. After that you print the prescription for the patient.
Who can do this: doctors
Where: Doctor Work Bench › Doctor Dashboard › row menu › Start Consultation, then the buttons at the top of the SOAP note
Before you start
- Record the consultation. See Start a consultation from the Doctor Dashboard.
- Close any open section with Save & Next or Close. Save and Save & Sign are greyed out while a section is open.
Save the note as a draft
Each section is saved when you click Save & Next or Add inside it. Use the Save button to save the note as a whole.
- Save: saves the note and takes you back to the Doctor Dashboard. You see Record updated successfully.
- The arrow next to Save › Save Soap Notes: saves the note and keeps it open.
- The arrow next to Save › SAVE & FORWARD: saves the note and sends it to a colleague.
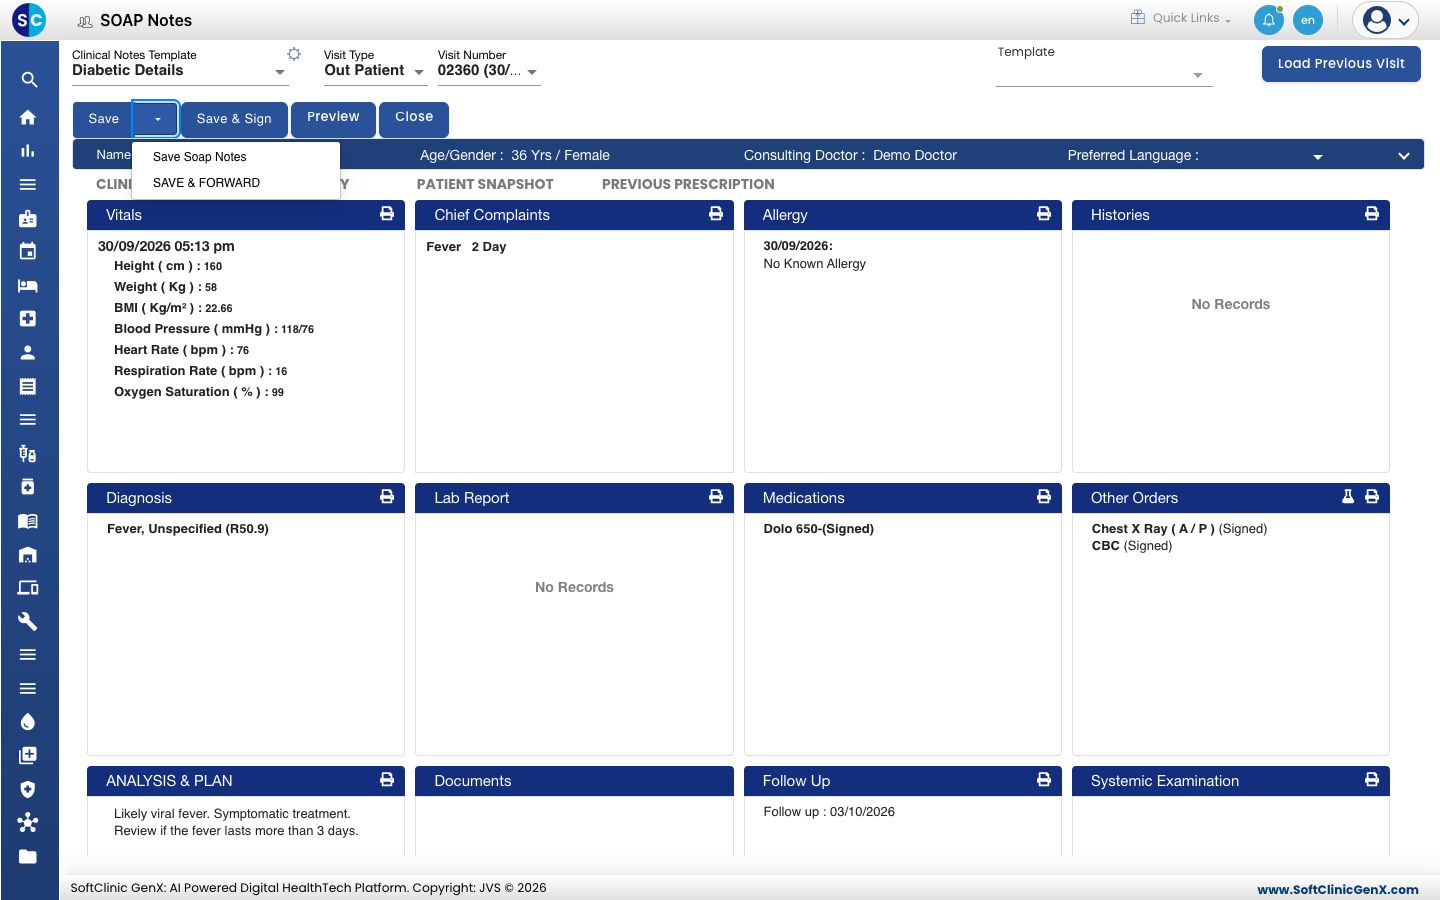
A saved note stays open for changes. Open it again from the Doctor Dashboard with SOAP Notes in the row menu.
Check the note before you sign
- Click the SUMMARY tab. The whole note shows on one page, in the order it prints.
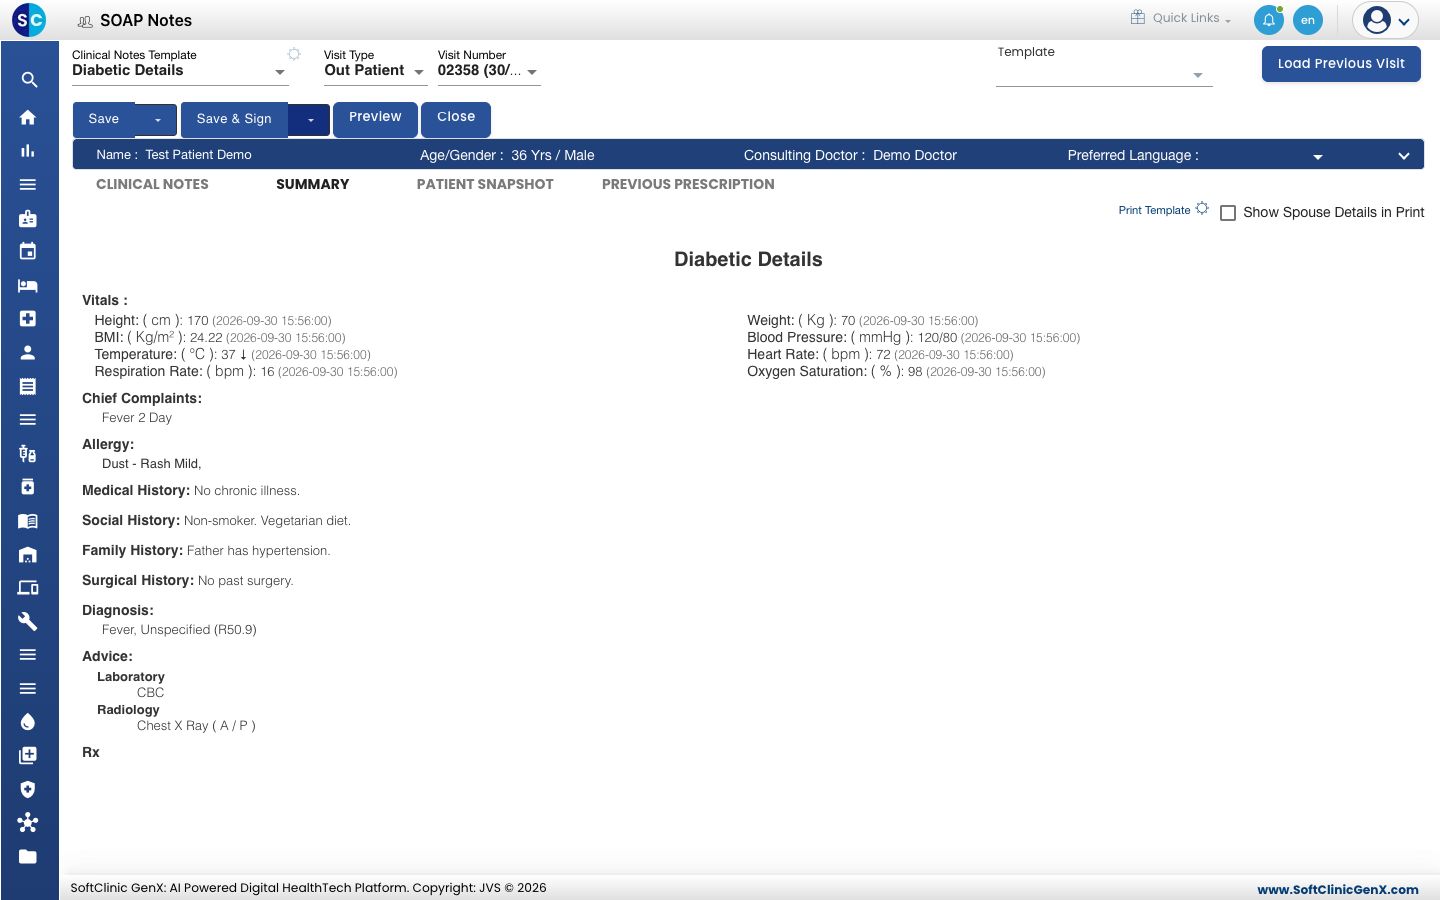
- Click Print Template to choose which sections print.
- Click CLINICAL NOTES to go back and correct a section.
Sign the note
- Click Save & Sign. You see Record updated successfully and return to the Doctor Dashboard.
- Check the patient's row. Status now reads Consultation Completed.
A signed note cannot be changed. Check the SUMMARY tab before you sign.
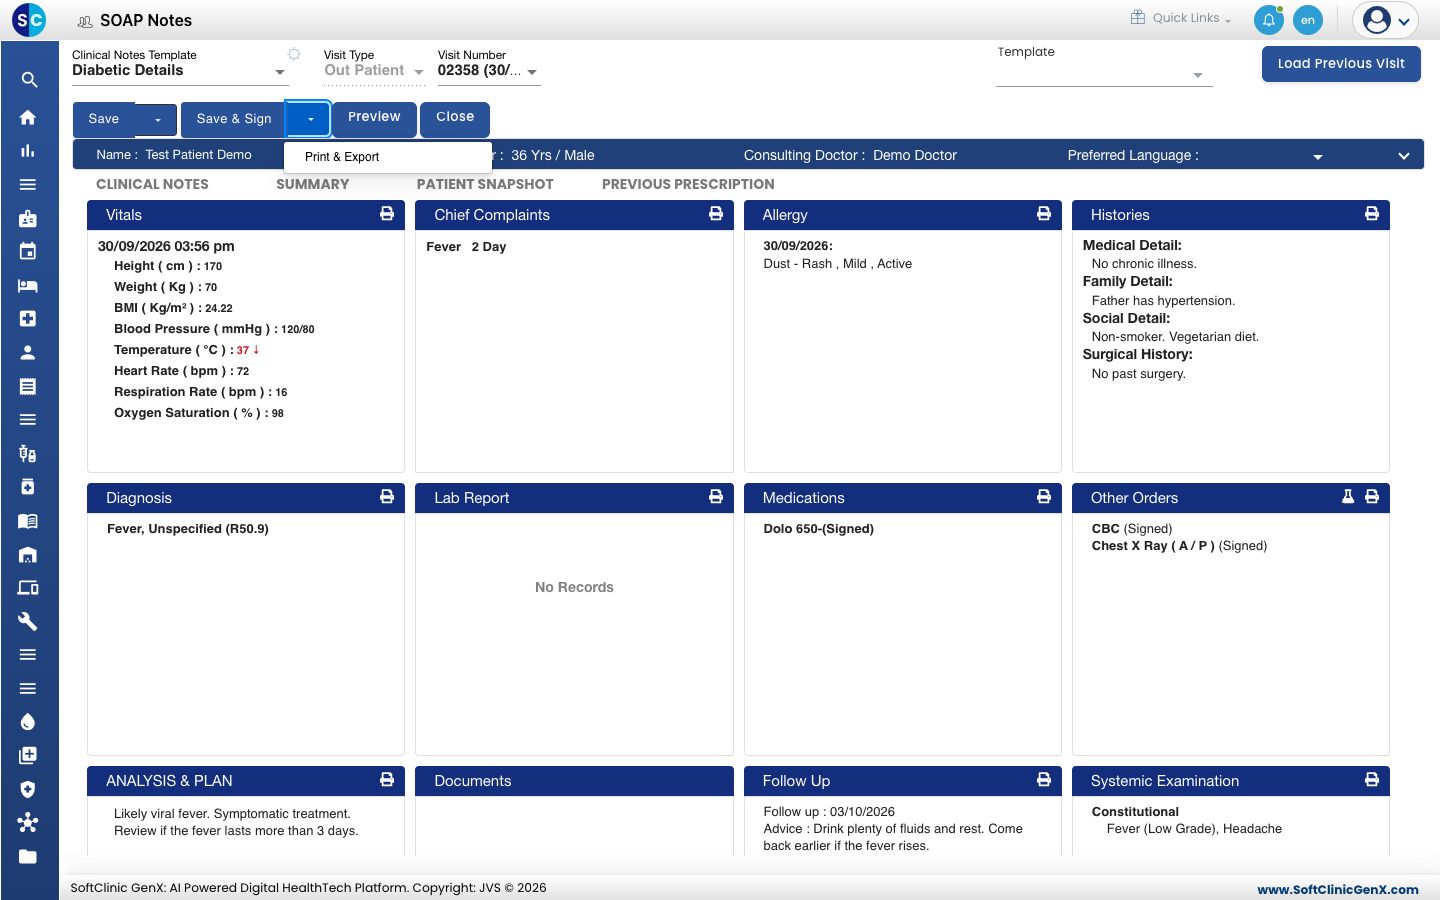
After signing, an arrow appears next to Save & Sign. It holds Print & Export, which opens the signed note as a PDF.
Print the prescription
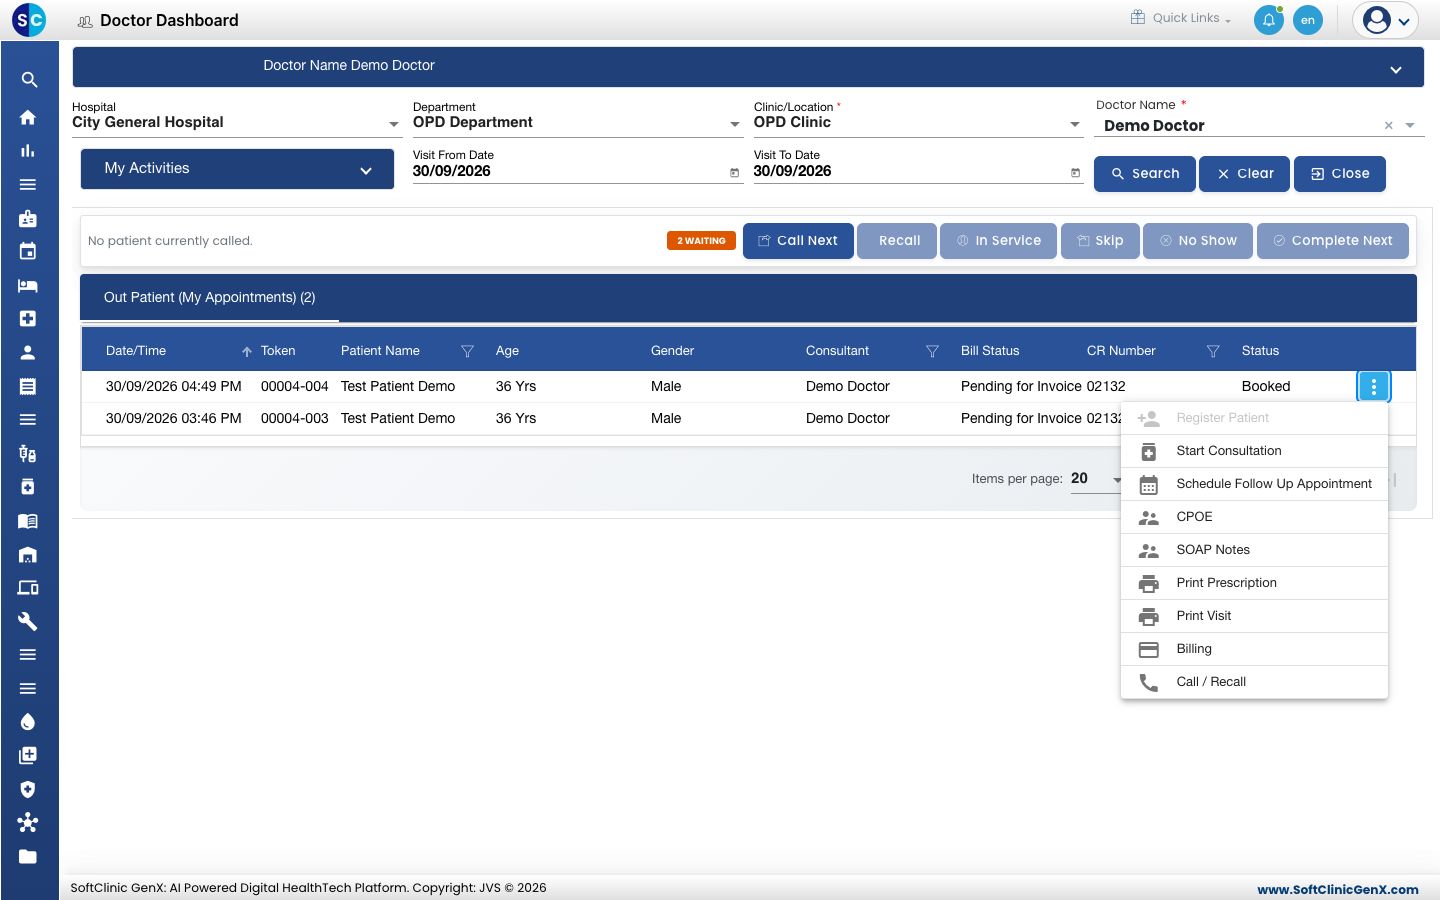
- Go to Doctor Work Bench › Doctor Dashboard and find the patient.
- Click the three dots at the end of the row and choose Print Prescription.
- Check the preview. It shows the patient, the visit and the medicines with dosage, duration and quantity.
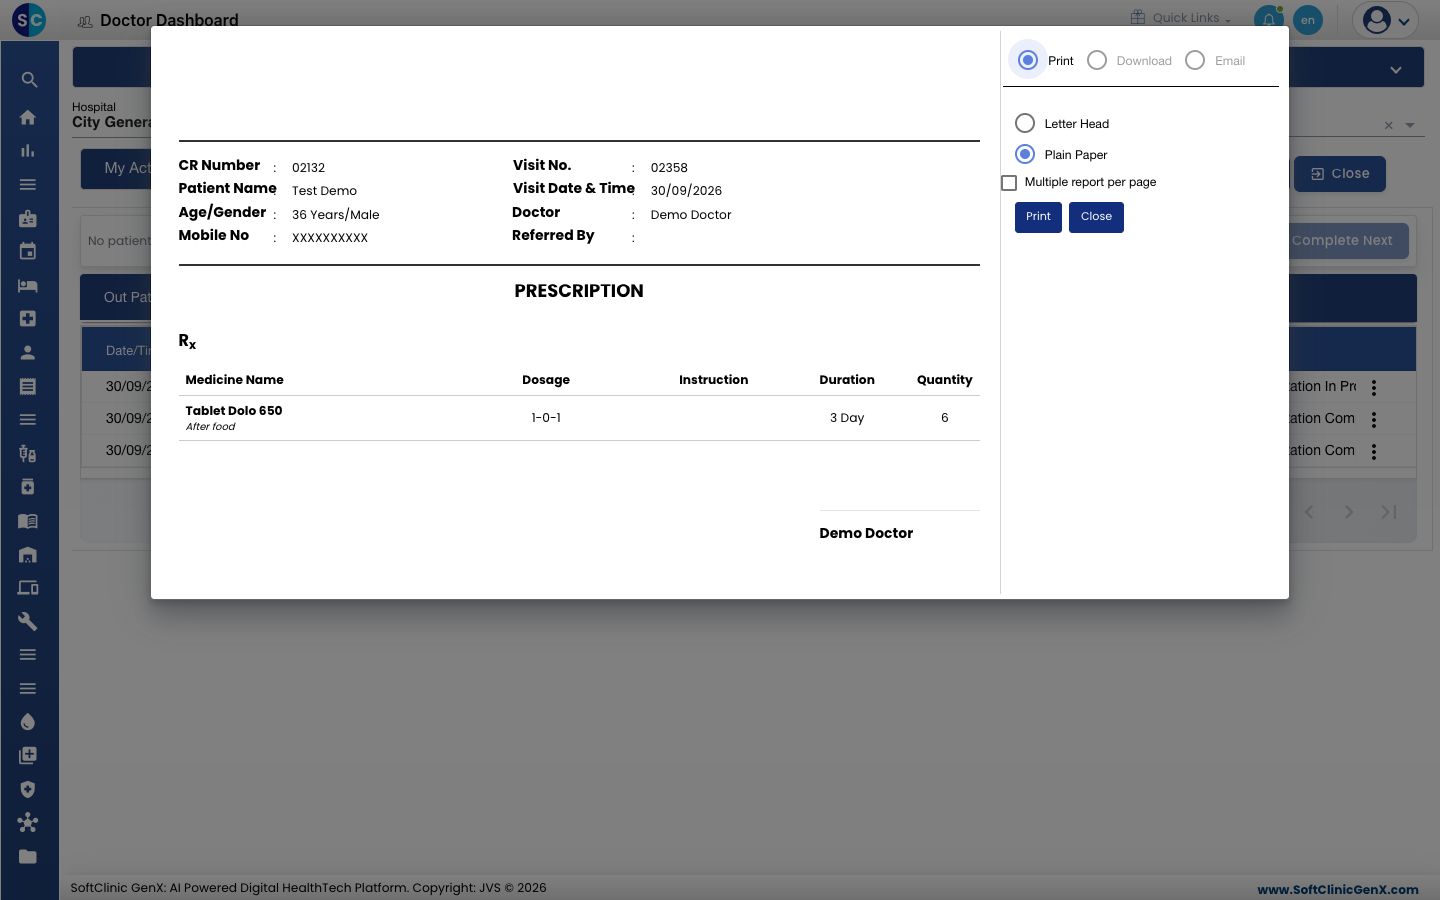
- Choose Letter Head or Plain Paper to match the paper in your printer. Plain Paper prints the hospital's heading on the page.
- Click Print.
The same preview has Download and Email next to Print.
Other ways to print:
- Print Visit in the same row menu opens the full visit note as a PDF in a new browser tab.
- Preview at the top of the SOAP note opens the note as a PDF without leaving the screen.
- The printer icon on a section card prints that one section.
Send the note to a colleague
- Click the arrow next to Save and choose SAVE & FORWARD.
- Choose Forward To and Forward For, enter the Email and a Message.
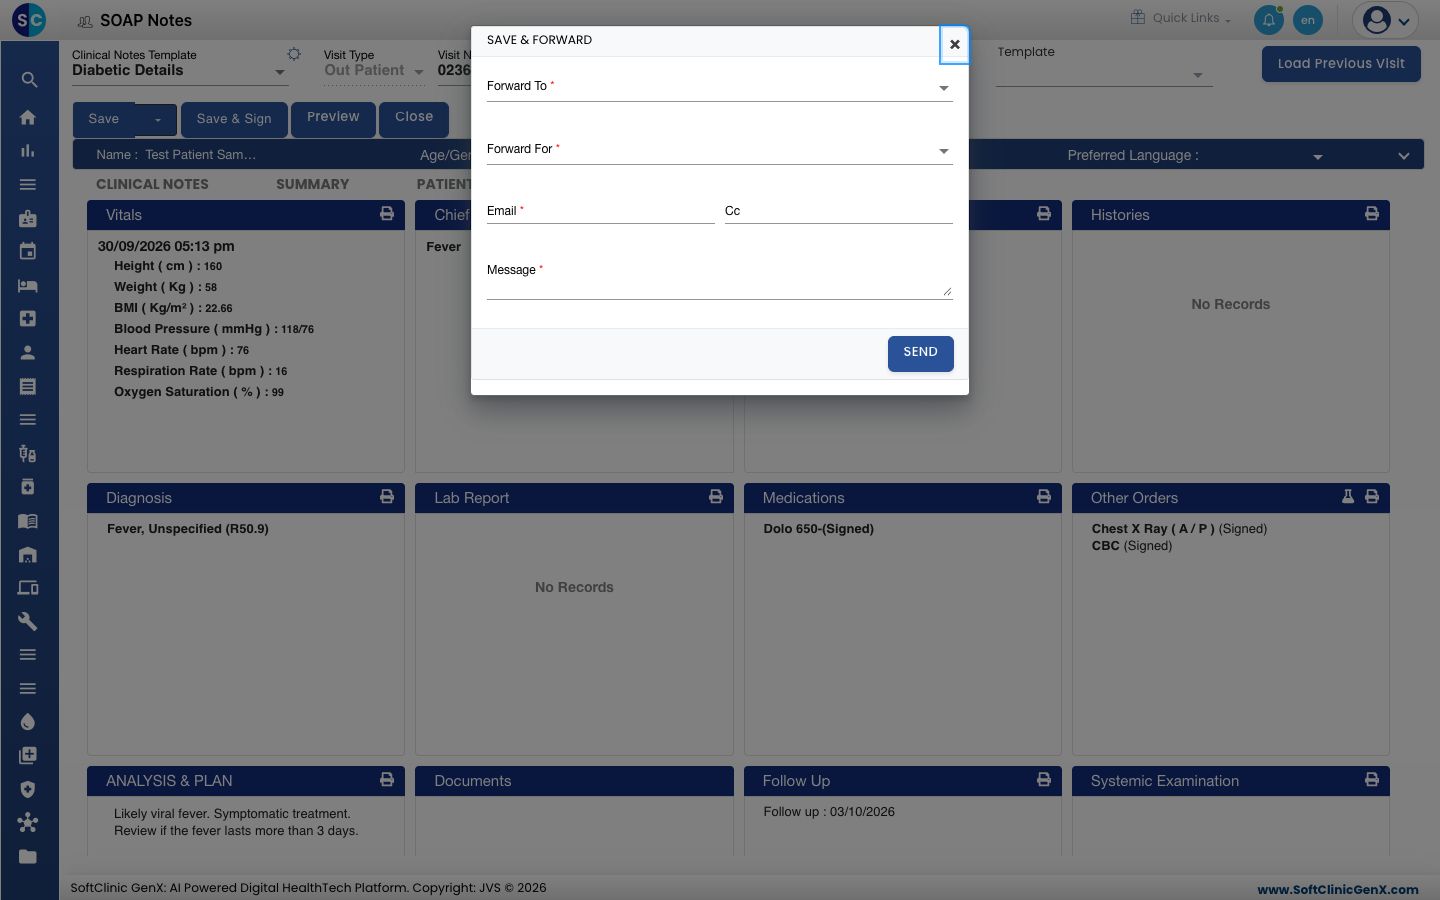
- Click SEND.
The person you forward to finds the note on the Doctor Dashboard under My Activities › Unsigned Notes.
Troubleshooting
| What you see | What it means | What to do |
|---|---|---|
| Save and Save & Sign are greyed out | A section is open on the right. | Click Save & Next or Close in that section. |
| Already sign & submit done can`t change data | The note is signed, so it is locked. | Record any new finding in the patient's next visit. |
| Please fill the portlet data first | You clicked the printer icon on an empty section. | Record the section first. |
| No clinical note has been recorded for this visit yet. | You chose Print Visit for a visit with no note. | Record and save the note first. |
Related
- Write a prescription: add and sign the medicines.
- View a patient's previous visits: find a signed note later.
- Set up Frequency: print the frequency in the patient's language.
- Doctor Work Bench (EMR) FAQs: common questions about consultations.