Finalise an in-patient bill
Close the running bill at discharge, adjust the patient's deposit, collect the balance and print the final IPD bill.
The final IPD bill turns an admitted patient's running bill into one invoice. You close the running bill first, then create the bill, use up the deposit the patient paid during the stay and collect what is left.
Who can do this: cashier and billing staff with billing rights
Where: In-Door Management › Admission List › row menu › Bill Adjustment, then IPD Billing
Before you start
- Every service the patient received is on the running bill. See View and print an in-patient's running bill.
- Any deposit is already taken. See Take an admission deposit.
Close the running bill
IPD Billing stays greyed out in the row menu until the running bill is closed.
- On the Admission List, open the patient's row menu and choose Bill Adjustment.
- Click Add Services and add anything still pending. See Add a missed charge.
- Tick Rendered on every service the patient received. The tick box in the Rendered heading ticks them all. Tick Cancel on any line that was not given and enter the Reason for cancellation.
- Set Adjustment Status to Adjustment - Completed.
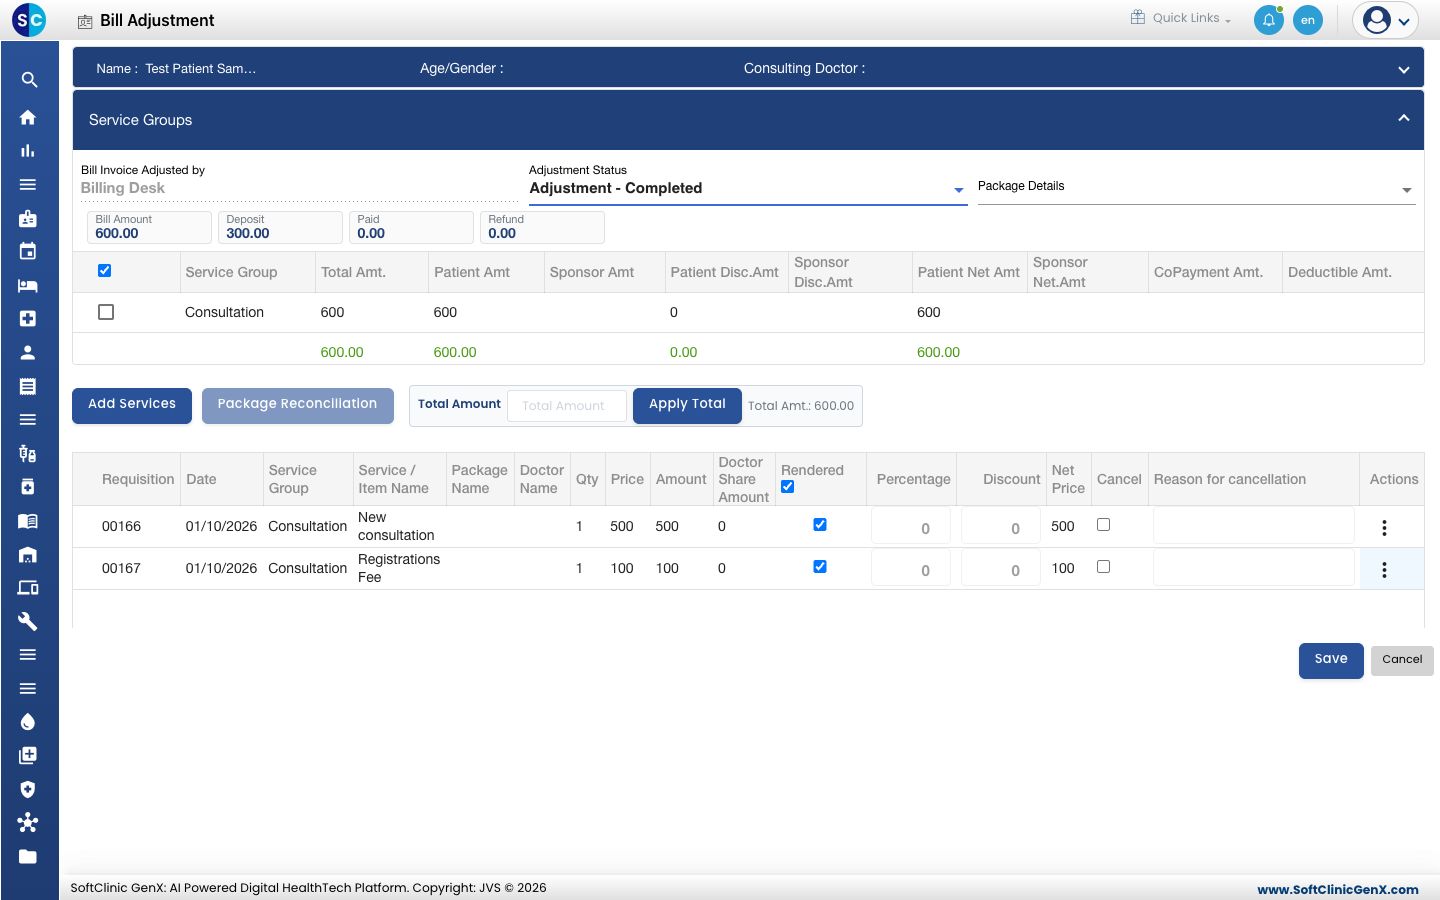
- Click Save. You return to the Admission List.
Create the bill and adjust the deposit
- Open the patient's row menu and choose IPD Billing. The IPD Billing screen lists the services, with Bill Amount and Deposit at the top.
- Choose the Invoice Type: Cash or Credit.
- Under Mode Of Payment, open the Settlement tab. Keep Full Settlement, or choose Partial Settlement if the patient pays part now.
- Tick Adjust Amount, then click Deposit Detail. The Patient Deposit window lists each deposit receipt.
- Tick Adjust on the deposits to use. Adj.Amount fills with the remaining amount; change it to use less. Click Add.
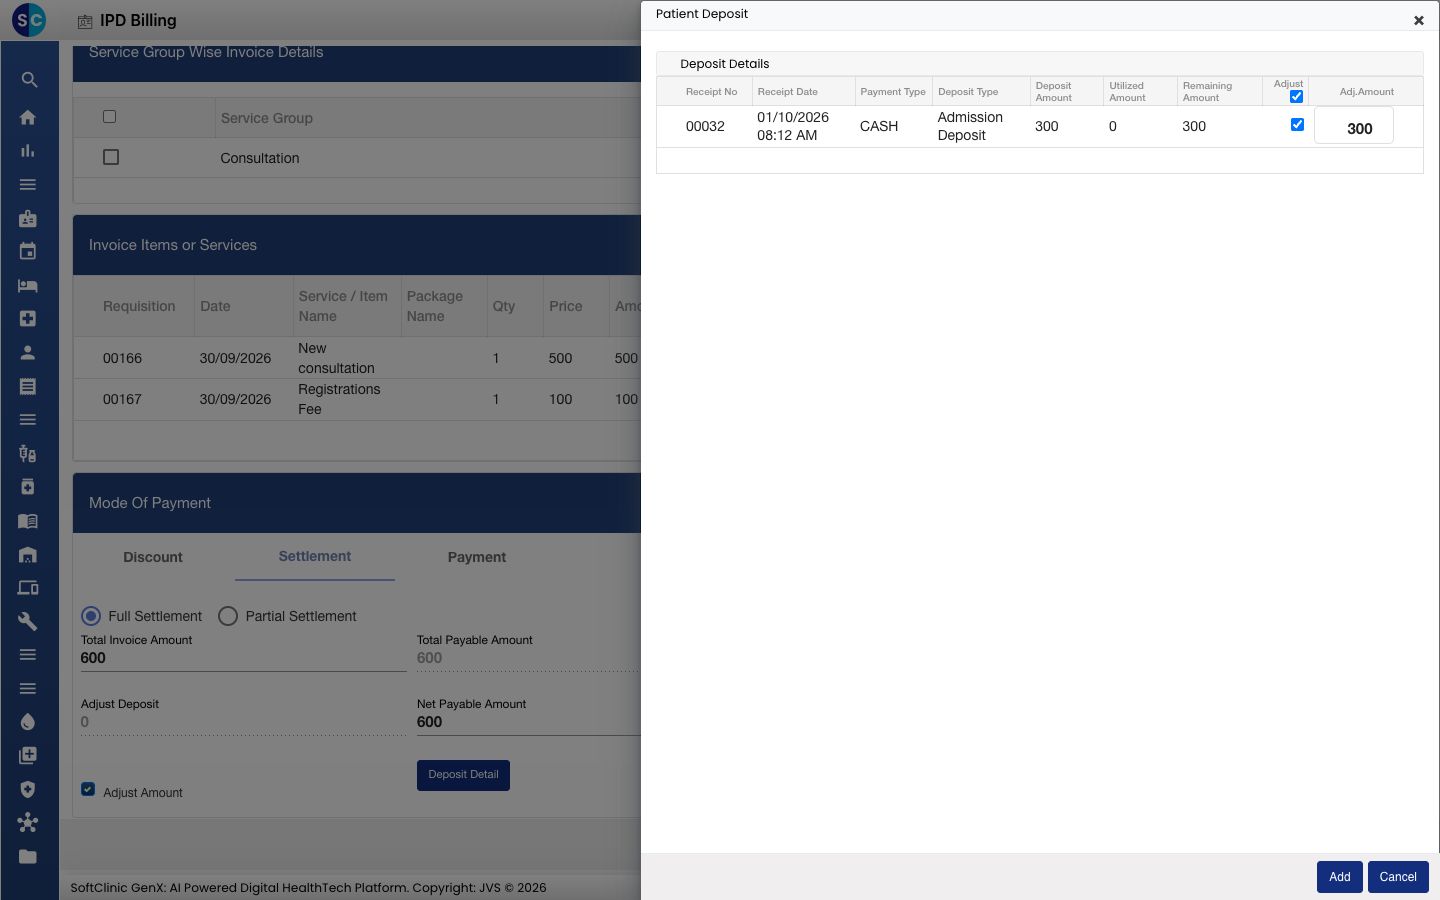
- Adjust Deposit now shows the amount used.
Collect the balance and save
- Open the Payment tab. Due in the SUMMARY shows the balance after the deposit.
- Choose the payment mode, check Collected and click Add. See Collect a payment for each mode.
- When Due is 0, click Save. You return to the Admission List.
Check the bill before you click Save. After saving, IPD Billing opens the saved bill to view only, and Bill Adjustment can no longer be opened for this admission.
Print the final bill
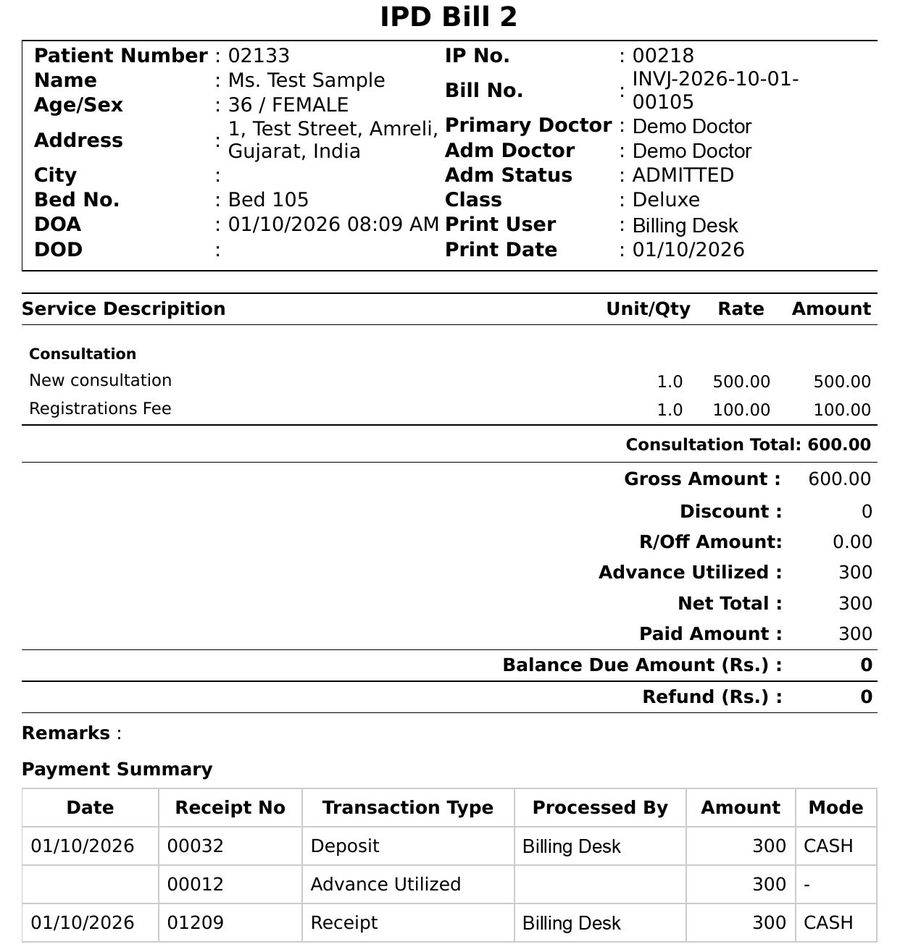
- Open the patient's row menu on the Admission List and choose Billing Print.
- Choose Letter Head or Plain Paper and click Print.
The bill shows each service, the Gross Amount, the Advance Utilized, the Paid Amount and the Balance Due Amount, with a Payment Summary of the deposit and the receipts.
Troubleshooting
| What you see | What it means | What to do |
|---|---|---|
| IPD Billing is greyed out | The running bill is not closed. | Set Adjustment Status to Adjustment - Completed on Bill Adjustment and save. |
| Please select either the rendered or the cancelled checkbox | A service is neither rendered nor cancelled. | Tick Rendered or Cancel on every line. |
| Please enter the Reason for cancellation | A line is ticked Cancel with no reason. | Type the reason on that line. |
| Bill Already Generated when you open Bill Adjustment | The final bill for this admission is saved. | Choose Billing Print to print it. |
| You are not allowed to perform this operation | Your role has no billing rights. | Ask your administrator for the right. |
Related
- Discharge a patient: the next step after the bill is settled.
- Refund a patient deposit: return a deposit that is more than the bill.
- Billing FAQs: common billing questions.