Set up Store Master
Who does this: hospital administrator or store manager Where: Inventory Management › Masters › Store Master Set up before: Facility, and a location of type Store with Inventory Storage Unit Attached ticked in Location
A store is a place that holds stock, such as the main store, the pharmacy or the operation theatre store. Every store you set up here appears when you receive goods, transfer stock and record consumption. A store starts life as a location in the hospital layout; this screen adds the stock settings for it.
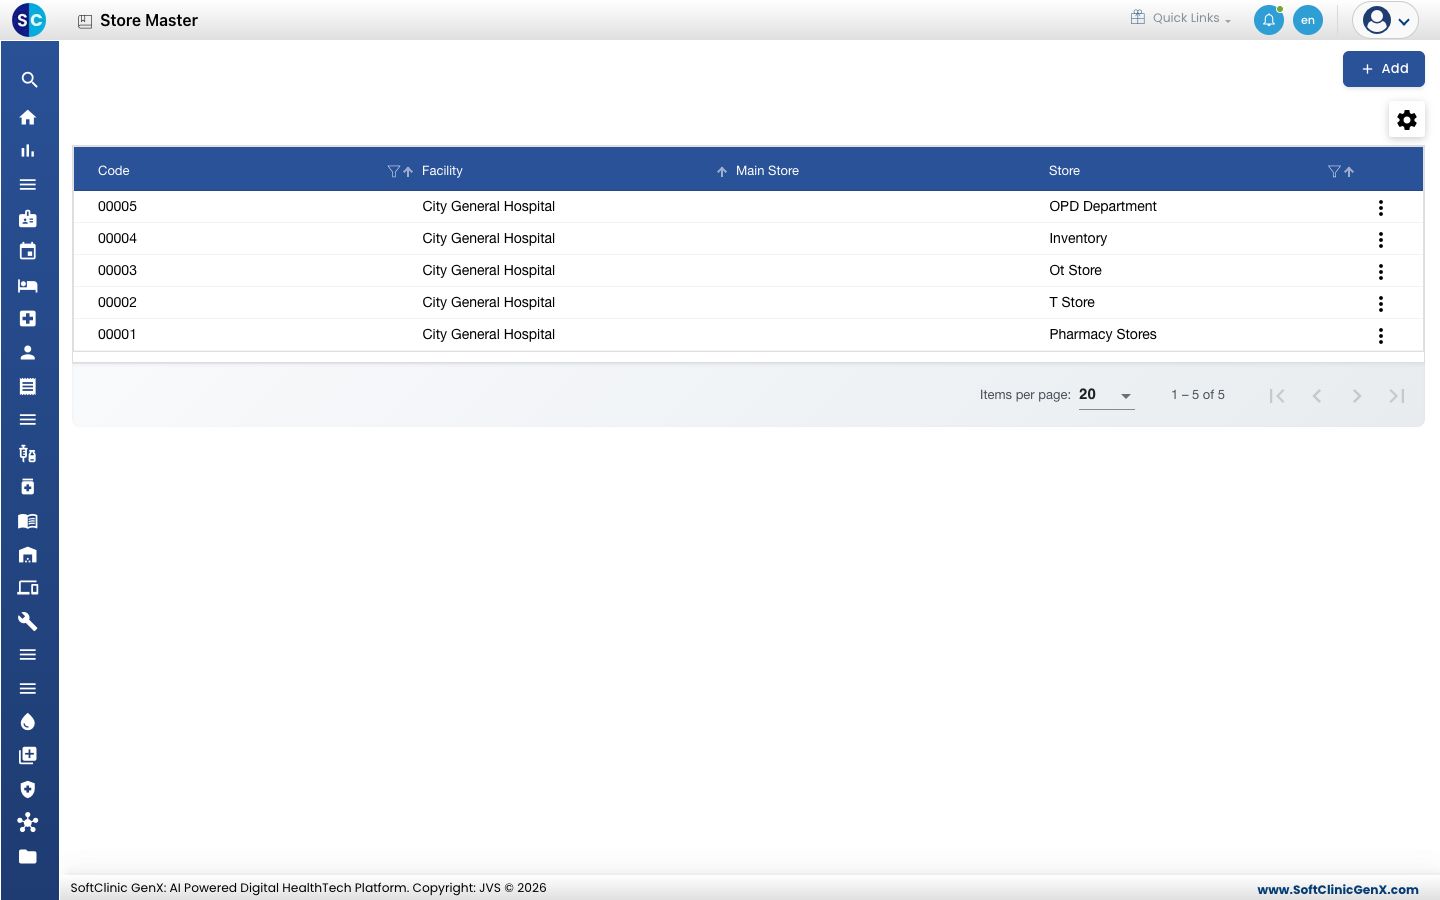
Add a store
-
Go to Inventory Management › Masters › Store Master.
-
Click Add. The Store Master panel opens on the right.
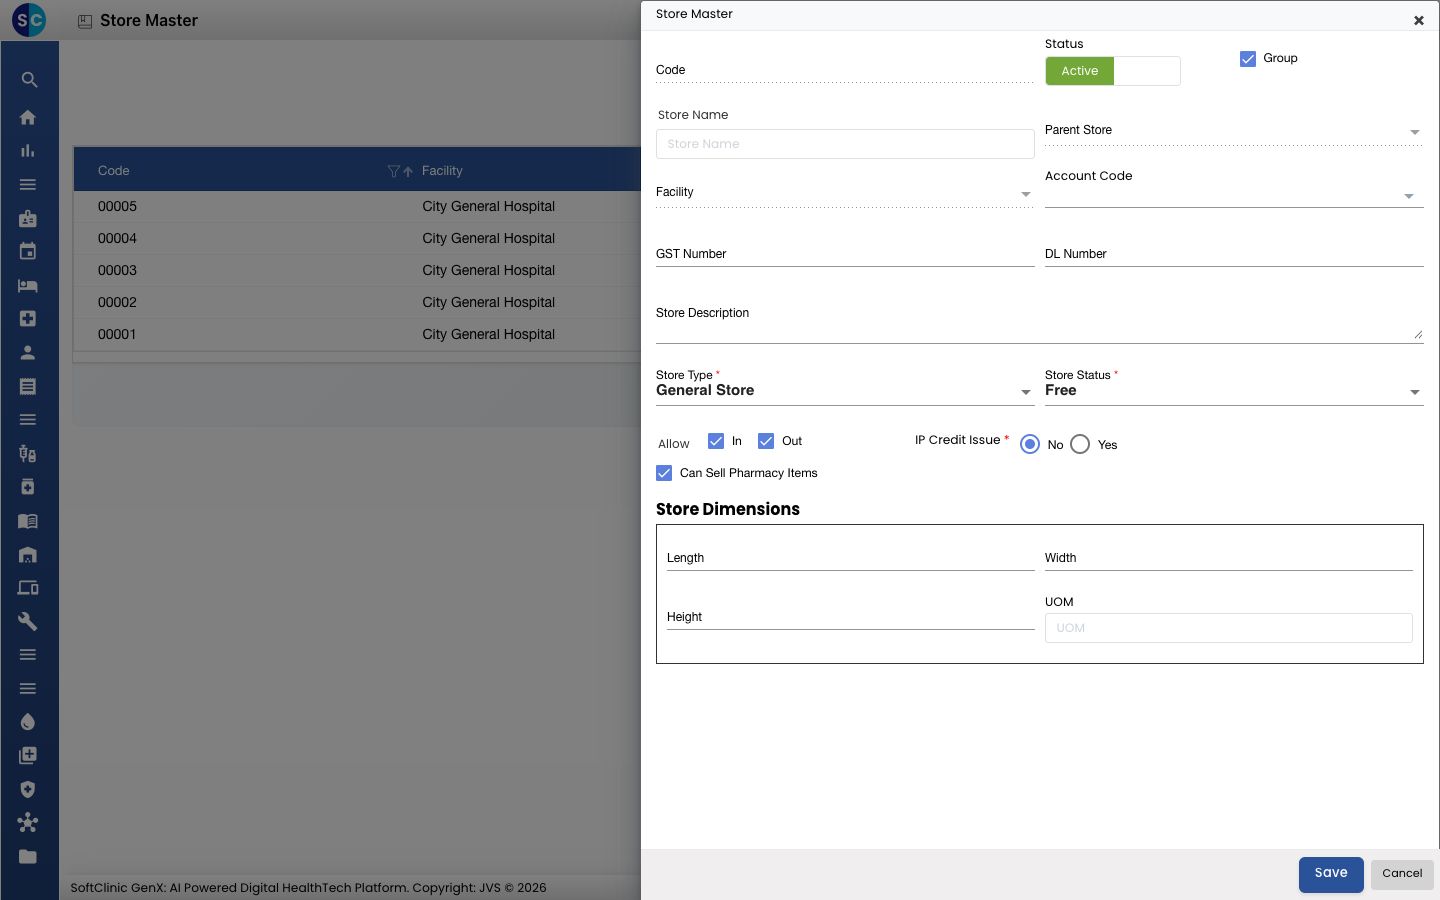
-
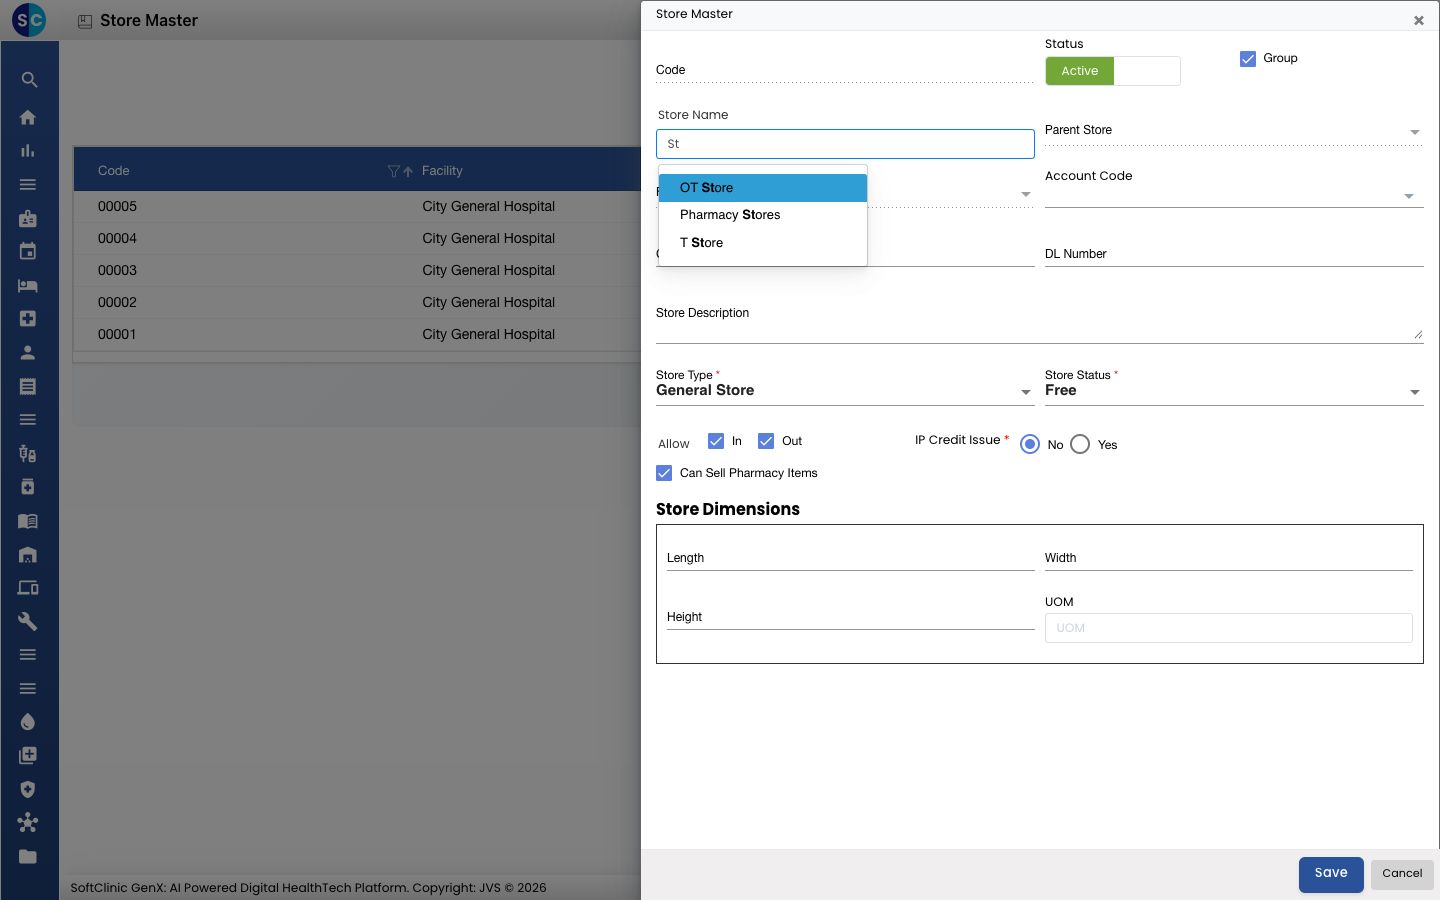
In Store Name, type part of the store's name and pick it from the list. Code, Facility and Parent Store are then filled in from the hospital layout.
-
Fill in the rest of the fields:
Field What to enter Required Status Leave on Active. — Group Ticked by default. No Account Code The accounts ledger for this store, if your accounts team uses one. No GST Number The store's own GST number, if it has one. No DL Number The drug licence number, for a store that holds medicines. No Store Description A short note about the store. No Store Type The kind of store: Central Store, Peripheral Store, General Store (the default), Consignment Store, In-Transit Store, Destruction Store, Maintenance Store, Other, or the department store type. Yes Department Appears only for the department store type. Choose the department this store belongs to. Yes, when shown Store Status Free (the default), Occupied or Blocked. Yes Allow In / Out Leave both ticked so the store can receive and issue stock. Untick one to stop stock coming in or going out. No Can Sell Pharmacy Items Leave ticked if pharmacy sales may be made from this store. No IP Credit Issue Choose Yes if this store issues items to admitted patients on credit. Yes Service Appears when IP Credit Issue is Yes. The billing service used for those issues. Service Group fills in by itself. Yes, when shown Length, Width, Height, UOM The store's size, if you want to record it. No 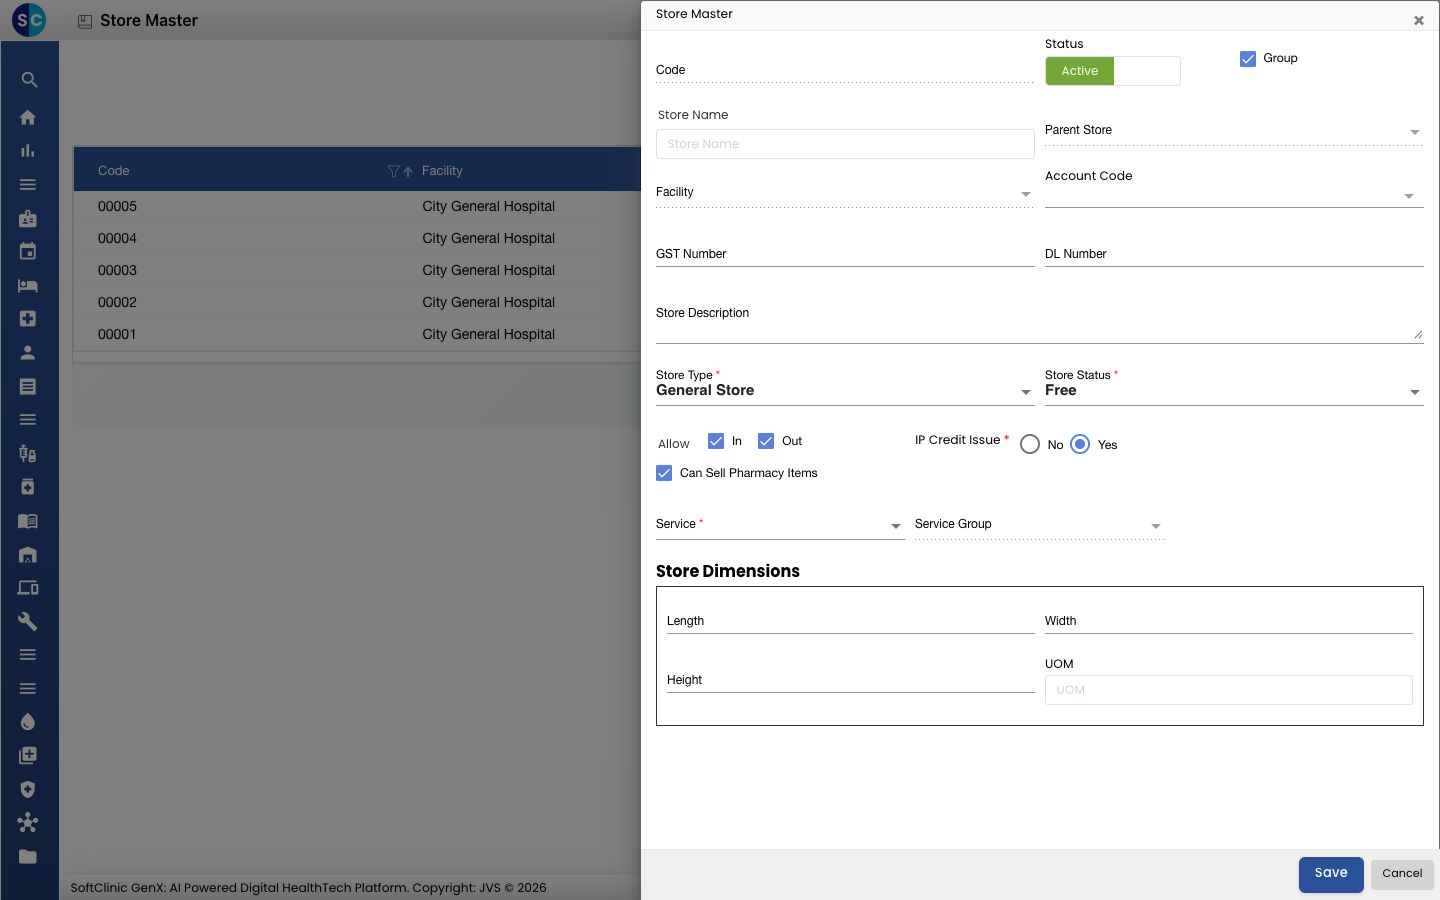
-
Click Save. The panel closes and the new store appears in the list.
Change a store
- In the list, click ⋮ at the end of the row and choose Edit.
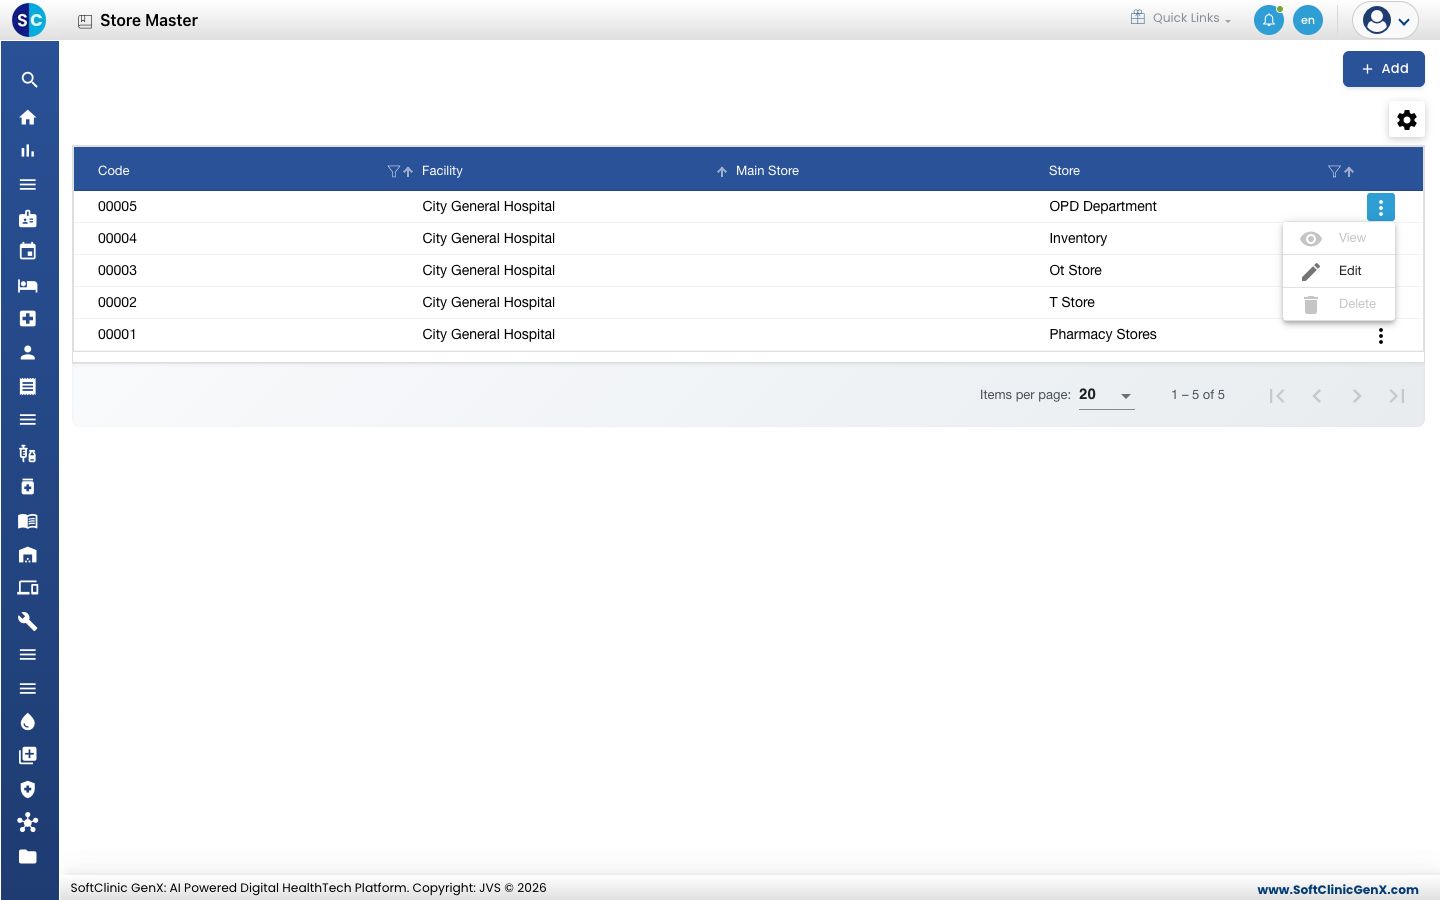
- Change the fields you need and click Save.
To stop a store from being used, set its Status to Inactive or its Store Status to Blocked.
Good to know
- Store Name accepts only a name picked from the list. If your store is missing, add it first as a location of type Store with Inventory Storage Unit Attached ticked.
- When Store Status is Blocked, you must give a reason. Click Block In/Active Reason and enter it in Block Reason.
- To give many departments their own store in one go, use Department Store Setup instead of adding each one here.
- Click Cancel or × to close the panel without saving.